Exterior Cladding Installation: Rainscreen System Guide
Master exterior cladding installation with this step-by-step rainscreen system guide. Learn substrate prep, furring, and fastening tolerances.
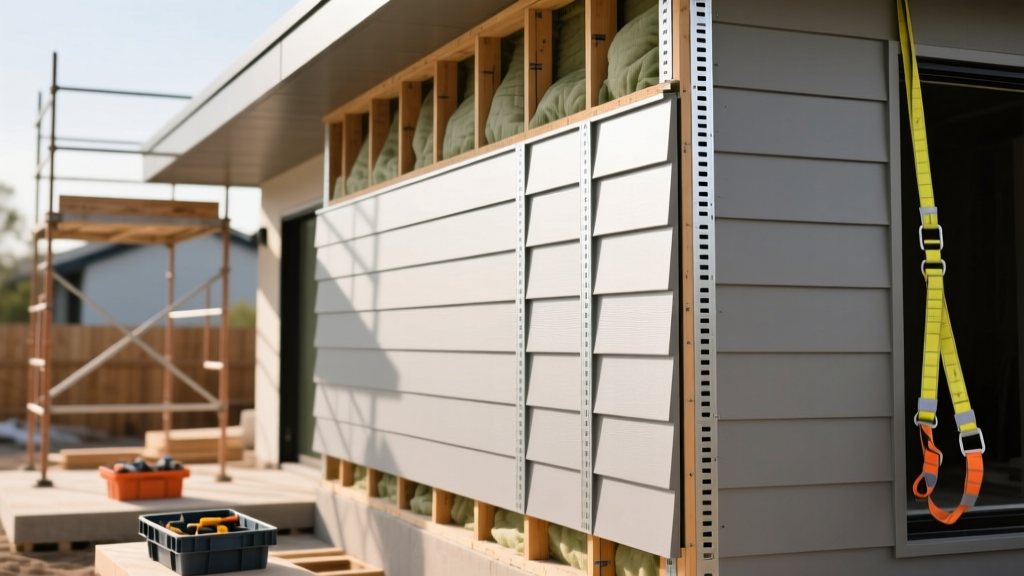
The Physics of the Rainscreen: Pressure Equalization
A ventilated rainscreen is not merely a decorative facade; it is a dynamic pressure-equalization system. When wind drives rain against exterior cladding, the air cavity behind the panels equalizes the pressure differential between the exterior and the weather-resistive barrier (WRB). By eliminating the pressure delta, water infiltration is physically prevented. According to the Whole Building Design Guide (WBDG), a properly detailed rainscreen must manage bulk water, control air leakage, and facilitate continuous drainage and drying. In modern construction, adhering to ASTM E331 (water penetration) and ASTM E283 (air leakage) standards is non-negotiable for commercial and high-performance residential cladding systems.
Substrate Preparation and Weather-Resistive Barriers (WRB)
The longevity of any cladding system is dictated by the substrate preparation. Before furring is attached, the structural sheathing or masonry backup must be continuous, flat, and properly sealed.
Fluid-Applied vs. Sheet Membranes
While traditional housewraps (like Tyvek) are common in residential framing, commercial and high-performance rainscreens demand more robust barriers. Fluid-applied membranes, such as Prosoco R-Guard FastFlash or Henry Blueskin VP100, provide a monolithic, fully adhered seal that bridges gaps and fastener penetrations. When applying fluid-applied WRBs, contractors must strictly monitor the wet mil thickness. A standard application requires 40 wet mils, which dries to approximately 24 dry mils. Using a wet mil gauge during application ensures the membrane will not tear when the furring fasteners penetrate it.
For concrete masonry unit (CMU) backups, parge coats must be fully cured and free of efflorescence before applying a vapor-permeable air barrier. Trapped moisture behind an impermeable WRB will lead to catastrophic spalling during freeze-thaw cycles.
Furring Strategies and Ventilation Gap Framing
The furring system creates the critical drainage and ventilation cavity. The 2026 International Energy Conservation Code (IECC) mandates continuous insulation in most climate zones, which heavily influences furring design.
- Wood Furring: Pressure-treated 1x3 or 2x4 strapping is cost-effective but prone to warping and shrinkage. If using wood, ensure it is kiln-dried after treatment (KDAT) with a moisture content below 19%.
- Aluminum Hat Channels: Systems like Knight Wall or thermally broken aluminum clips provide superior straightness and load-bearing capacity. They are mandatory for heavy cladding like terra cotta or thick stone veneers.
- Plastic Matrix: Products like Cor-A-Vent offer a compressible, non-combustible mat that provides a 3/8-inch cavity without traditional strapping, ideal for thin-set masonry or lightweight metal panels.
When fastening furring through exterior continuous insulation (ci), the fasteners act as thermal bridges, reducing the effective R-value of the wall by up to 15%. To mitigate this, use thermally broken cladding clips or fiberglass spacer pads. Furthermore, ensure fasteners penetrate the structural studs by a minimum of 1.25 inches. Relying solely on the sheathing for pull-out strength will result in cladding detachment under wind uplift loads.
Panel Installation: Tolerances, Reveals, and Fastening
Exterior cladding panels—whether fiber cement, high-pressure laminate (HPL), or aluminum composite material (ACM)—expand and contract at different rates. The Building Science Corporation emphasizes that rigid fastening of dynamic materials guarantees system failure. Installers must adhere to strict expansion gap tolerances.
For fiber cement and HPL panels, maintain a minimum 1/8-inch (3mm) gap at all vertical and horizontal joints. Do not caulk these joints; the cavity must remain open to allow air intake and exhaust. Use color-matched EPDM tape behind the joints to protect the WRB from direct UV degradation and secondary water ingress.
| Panel Material | Fastener Type | Head Style | Setting / Torque | Min. Edge Distance |
|---|---|---|---|---|
| Fiber Cement (1/2") | 304 Stainless Steel | Wafer Head with Nibs | Flush (Do not overtighten) | 3/8 inch |
| HPL / Phenolic | 316 Stainless Steel | Painted Flat Head | Fixed point: Flush. Sliding: 1/16" gap under head | 1/2 inch |
| ACM (Routed Tray) | Aluminum / SS Rivets | Large Flange Blind Rivet | Snug fit with neoprene washer | 5/8 inch |
Flashing, Trim, and Edge Detailing
The majority of cladding failures occur at transitions, penetrations, and terminations. A rainscreen is only as effective as its flashing details.
- Bottom Termination (Kick-Out Flashing): The base of the wall must feature a kick-out flashing that directs water away from the foundation. This flashing must include a drip edge extending at least 1 inch past the cladding face. Install a stainless steel or PVC bug screen mesh over the bottom cavity opening to prevent insect and rodent ingress while maintaining airflow.
- Top Termination and Parapets: At the top of the wall, install a continuous head flashing that laps over the WRB by a minimum of 6 inches. Close the top of the cavity with a vented closure strip that allows air exhaust but blocks bulk water driven by downdrafts.
- Window and Door Buck Integration: When cladding returns into window jambs, use a compressible backer rod and a high-quality silicone sealant (such as Dow Corning 795) at the interface. Ensure the cladding does not bear weight on the window frame; maintain a 1/4-inch clearance to allow for independent structural deflection.
Troubleshooting Common Installation Failures
Even with premium materials, poor execution leads to visible and structural defects. Recognizing these failure modes during installation prevents costly remediation.
Oil-Canning in Metal Cladding
Oil-canning appears as wavy, distorted reflections on flat metal panels. This is rarely a material defect; it is an installation error caused by thermal expansion restriction or uneven furring. To prevent this, ensure the furring plane is perfectly plumb and flat (within 1/8 inch over 10 feet). Use sliding clips at one end of the panel to allow longitudinal thermal movement, and never force a panel into place if it binds against the clips.
Panel Buckling and Fastener Pop-Through
If fiber cement or HPL panels buckle or crack around the fastener heads, the installer has likely ignored the "sliding point" vs. "fixed point" fastening methodology. Every panel must have exactly one fixed point (usually the center) to anchor it, while all other fasteners must be installed in oversized slots or with the head backed off by 1/16 inch to allow the panel to expand and contract freely beneath the fastener head.
Efflorescence and Staining
White, powdery stains on masonry or cementitious cladding indicate water is dissolving soluble salts within the material and depositing them on the surface as it evaporates. This means the drainage cavity is compromised, or the WRB is leaking. Ensure weep holes at the base of the wall are completely clear of mortar droppings and debris.
Frequently Asked Questions
A: While some thin-set systems use a 3/8-inch mat, building science best practices and most municipal codes require a minimum 1/2-inch (12mm) clear air space for effective drainage and capillary break. For taller buildings (over 3 stories), a 3/4-inch to 1-inch cavity is recommended to ensure adequate stack-effect airflow and drying potential.
A: No. Standard zinc-galvanized fasteners will corrode rapidly in marine environments, leading to rust streaks and structural failure. For projects within 3,000 feet of a coastline, you must use 316 marine-grade stainless steel fasteners. For inland projects, 304 stainless steel is the minimum acceptable standard.
A: Yes. Open-joint (or open-rainscreen) cladding relies on a secondary water barrier behind the panels. The WRB must be UV-resistant, as it will be exposed to sunlight through the joints. If using a standard WRB that is not UV-rated, you must apply vertical strips of UV-resistant EPDM or specialized flashing tape behind every open joint to protect the primary air and water barrier from degradation.