Roofing and Siding Materials: Installation and Transition Guide
Master the installation of roofing and siding materials at critical transitions. Learn step flashing, kickout integration, and material compatibility.

The Physics of the Roof-to-Wall Intersection
The intersection where roofing and siding materials meet is the most vulnerable envelope detail on any residential or commercial structure. While field installations of siding and roofing are generally straightforward, the transition zones—eaves, rakes, sidewalls, and chimneys—are responsible for over 80% of moisture intrusion claims in building envelope forensics. Wind-driven rain hitting a sidewall does not simply bounce off; it creates positive pressure that forces water upward and laterally behind the cladding. If the integration between the roofing underlayment, step flashing, and siding weather-resistive barrier (WRB) is not sequenced perfectly, capillary action will draw moisture into the wall cavity, leading to structural rot and mold proliferation within a single wet season.
Material Compatibility Matrix: Roofing and Siding Pairings
When selecting roofing and siding materials, contractors must account for differential thermal expansion and galvanic corrosion. Pairing incompatible metals or failing to account for the acidic runoff of certain wood species will destroy flashings and fasteners prematurely.
| Roofing Material | Siding Material | Required Flashing | Compatibility Notes & Edge Cases |
|---|---|---|---|
| Galvalume Metal Roof | Fiber Cement (e.g., James Hardie) | Galvanized Steel or Zinc | Never use bare copper or lead; runoff will corrode the Galvalume coating. Maintain a 1.5-inch gap between siding and roof. |
| Asphalt Shingles | Vinyl Siding | Aluminum or PVC Coil | Vinyl expands significantly. J-channel must not be nailed tightly; allow 1/4-inch lateral movement to prevent buckling in high heat. |
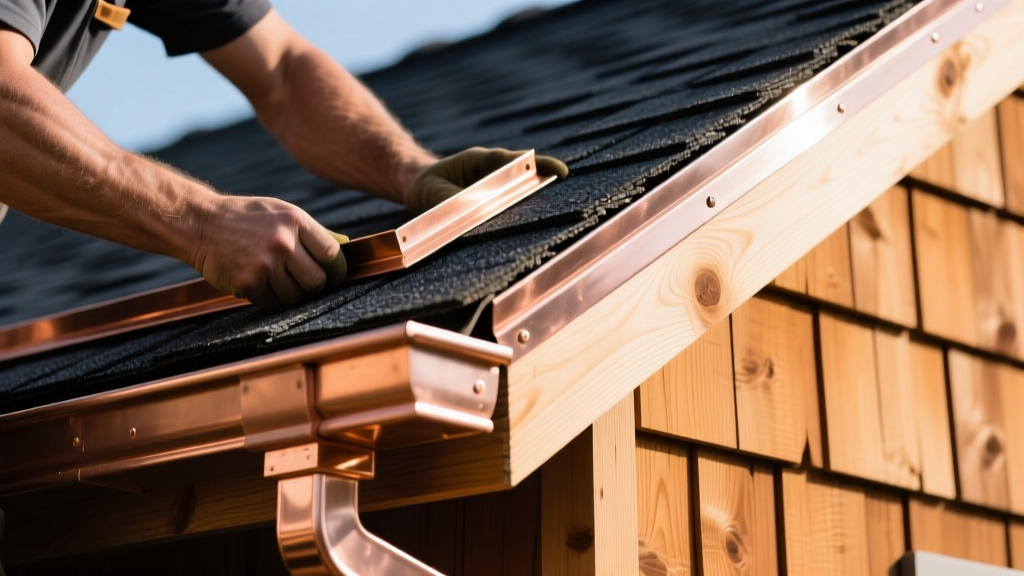
| Cedar Shake | Western Red Cedar Cladding | Copper or Stainless Steel | Cedar tannins are highly acidic and will eat through standard aluminum flashing within 5-7 years. Copper is mandatory for longevity. |
| Standing Seam Steel | Engineered Wood (e.g., LP SmartSide) | Color-matched Steel | Ensure the WRB (like ZIP System) is taped directly to the back of the steel flashing to create a continuous drainage plane. |
Execution: Step Flashing and Kickout Installation
The integration of roofing and siding materials at the sidewall requires a precise overlapping sequence. According to the PNNL Building America Solution Center, the drainage plane of the wall must overlap the roof flashing, while the siding must overlap the wall's WRB but remain clear of the roof surface.
Step 1: Drip Edge and Underlayment Sequencing
At the eave, install the drip edge under the ice and water shield. At the rake (gable) edge, install the drip edge over the underlayment. This specific sequencing prevents wind-driven rain from being pushed under the drip edge at the gable, while allowing any water that gets under the shingles at the eave to drain over the drip edge rather than onto the fascia.
Step 2: Step Flashing at the Sidewall
Use 4-inch by 4-inch minimum step flashing pieces (code requires a 2-inch headlap, making 4x4 the functional minimum for standard 5-inch shingle exposure).
- Nailing Protocol: Nail the step flashing exclusively to the wall, never to the roof deck. If you nail through the roof deck, the next course of shingles will be punctured, creating a direct conduit for water.
- WRB Integration: The house wrap or fluid-applied WRB must lap over the top of the step flashing. Use a 6-inch strip of self-adhering flashing tape (like Grace Vycor Plus) over the step flashing before applying the siding.
Step 3: The Kickout Flashing Mandate
Where the roof slope terminates at the bottom of a sidewall, water volume concentrates. Standard step flashing cannot handle this volume. You must install a kickout flashing (diverter) that features a minimum 4-inch throat and an angle of roughly 110 degrees to push water away from the siding and into the gutter. The IBHS FORTIFIED Home standards heavily emphasize kickouts as a primary defense against rot at the lower corners of wall intersections.
Do not mix copper kickout flashings with aluminum gutters or Galvalume roofing without a physical separation membrane. The electrolytic reaction caused by rainwater bridging these dissimilar metals will cause the aluminum or zinc coating to disintegrate in as little as 24 months. Use a 30-mil butyl rubber separator or stick to matching metals.
Siding Clearance Protocols Above the Roof Line
One of the most frequent installation errors when integrating roofing and siding materials is dropping the siding too close to the roof deck. This traps snow, ice, and debris, leading to wicking and premature siding failure.
- Wood and Fiber Cement: Maintain a strict 2-inch minimum clearance above the roof shingles. This prevents capillary wicking and allows space for roofers to apply sealant and replace shingles without damaging the siding.
- Vinyl Siding: Maintain a 1-inch clearance, but ensure the J-channel is sloped slightly to shed water. Vinyl will warp if it rests directly against hot asphalt shingles in the summer sun.
- Stucco and EIFS: Require a specialized weep screed installed a minimum of 2 inches above the roof line to allow trapped moisture in the stucco matrix to drain outward.
2026 Material Cost & Labor Estimates for Transitions
Budgeting for the integration details is often overlooked in initial estimates. Below are current 2026 market rates for high-quality transition materials and specialized labor.
| Component | Material Cost (Per Unit/LF) | Installed Labor Cost | Notes |
|---|---|---|---|
| Copper Step Flashing (50 pc bundle) | $110 - $145 | $3.50 - $5.00 / LF | Required for cedar/pressure-treated wood integration. |
| PVC Kickout Flashing (e.g., DryFlekt) | $18 - $28 each | $45 - $65 per corner | Color-matched to vinyl; prevents galvanic issues. |
| Self-Adhering Flashing Tape (6" x 50') | $35 - $55 per roll | $1.25 - $2.00 / LF | Must be primer-applied on OSB/plywood below 40°F. |
| Z-Flashing (Aluminum, 10ft stick) | $12 - $18 each | $4.00 - $6.00 / LF | Used for horizontal siding transitions and deck ledgers. |
Troubleshooting Common Transition Failures
When integrating roofing and siding materials, failures rarely occur in the middle of a wall or roof; they happen at the seams. Use this diagnostic framework to identify and repair transition leaks.
Symptom: Water staining on interior drywall at the ceiling-to-wall joint.
- Probable Cause: Missing or improperly angled kickout flashing at the bottom of the sidewall, allowing concentrated roof runoff to bypass the gutter and shoot directly behind the siding's bottom edge.
- The Fix: Remove the bottom 3 courses of siding and the adjacent shingles. Install a one-piece, seamless copper or PVC kickout diverter. Integrate it under the WRB and over the gutter apron.
Symptom: Siding rot or paint peeling restricted to the first 6 inches above the roof line.
- Probable Cause: Siding was installed too close to the shingles (less than 2 inches clearance), combined with capillary wicking of snowmelt and debris damming.
- The Fix: Cut the bottom of the siding using an oscillating multi-tool with a carbide grit blade to establish a clean 2-inch gap. Install a Z-flashing or step-flashing retrofit behind the WRB to shed water outward.
Symptom: Rust streaks bleeding down the siding from the roof intersection.
- Probable Cause: Galvanic corrosion between incompatible flashing and roofing/siding fasteners, or the use of uncoated steel step flashing with acidic wood cladding.
- The Fix: Extract the corroded flashing. Replace with marine-grade stainless steel (304 or 316 grade) or copper, ensuring no direct contact with dissimilar metals. Apply a heavy bead of polyurethane sealant (like OSI QUAD) at the top edge of the new flashing.
Written by
Marcus ChenMarcus Chen is a licensed structural engineer (PE) and building materials analyst with over 12 years of experience across residential, commercial, and industrial construction. He holds a Master of Science in Civil Engineering from UC Berkeley and spent six years at Thornton Tomasetti before transitioning to independent consulting and technical writing. Marcus specializes in material selection for seismic-prone regions, concrete reinforcement strategies, and lifecycle cost analysis. His work has been cited by the American Concrete Institute (ACI) and the Structural Engineers Association of California (SEAOC). When he is not on a job site or at his desk, you will find him hiking the Sierra Nevada or restoring a 1920s craftsman bungalow in Oakland, CA.
More from Marcus Chen
View all
Construction Cost
How Much Did the Eiffel Tower Cost to Build?
How much did the Eiffel Tower cost to build in 1889? We adjust for inflation and compare its budget to modern skyscraper construction.
Aug 4, 2026

Fire Resistance
What Is a Fire Resistant Material? Testing & Certification Guide
Discover what is a fire resistant material through ASTM and UL testing. Learn how fire ratings, certifications, and assemblies work in construction.
Aug 4, 2026

Construction Cost
How Much Did the Burj Khalifa Cost to Build?
How much did the Burj Khalifa cost to build? We break down the $1.5B project and extract 5 money-saving strategies for your next build.
Jul 30, 2026