Drywall Corner Bead Maintenance: Cleaning and Repair Playbook
Master drywall corner bead maintenance with our cleaning and repair playbook. Fix rust bleed-through, scuffs, and impact damage on metal and vinyl beads.
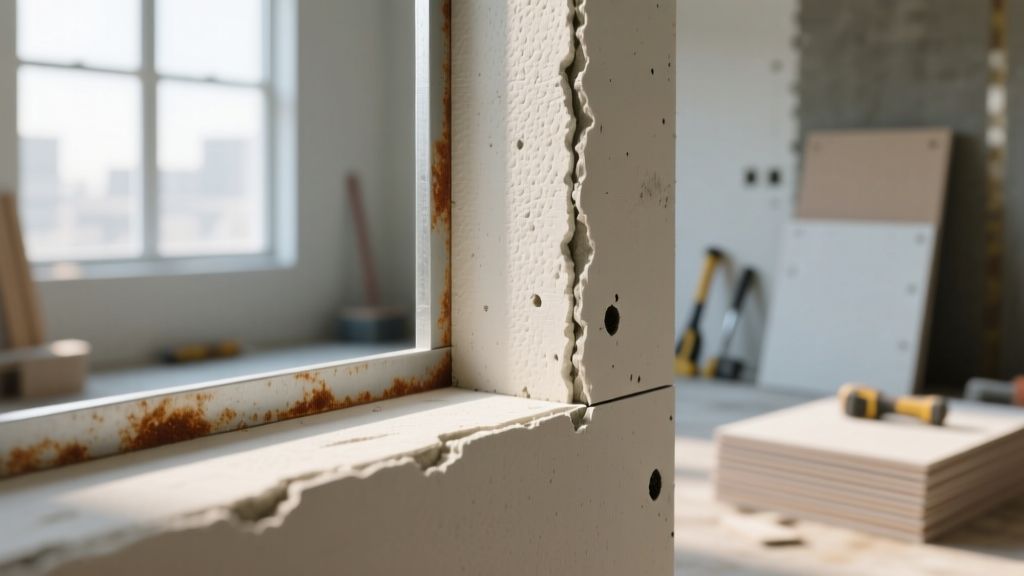
The Anatomy of Corner Bead Vulnerabilities
Outside drywall corners endure the highest physical stress in any interior environment. Furniture impacts, vacuum cleaner collisions, and pet traffic concentrate force directly onto the 1/8-inch nose of the drywall corner bead. While the gypsum board itself is protected by the bead's flanges, the bead and its overlying joint compound are highly susceptible to mechanical damage, moisture intrusion, and chemical staining.
Maintenance protocols must be tailored to the specific bead material. The three dominant profiles in modern construction are:
- Galvanized Steel: Prone to rust bleed-through if the zinc coating is compromised or if alkaline joint compounds react with exposed edges.
- Vinyl (PVC): Immune to rust and highly flexible, but susceptible to UV yellowing (in unprimed states) and brittle shattering under sharp, high-velocity impacts.
- Paper-Faced Composite: Features a metal or vinyl core wrapped in paper (e.g., Strait-Flex). Offers the strongest bond to the gypsum panel but is highly vulnerable to moisture delamination and edge fraying.
According to the Gypsum Association's application standards, the longevity of a corner system relies as much on environmental control and surface maintenance as it does on the initial installation. This playbook details the exact cleaning agents, repair compounds, and replacement matrices required to maintain corner integrity over a 20-year lifecycle.
Routine Cleaning Protocols by Material Type
Cleaning painted corner beads requires balancing soil removal with paint preservation. The nose of the bead often features a thicker mil-build of paint due to brush accumulation during the initial coating, making it slightly more resilient than the flange edges. However, aggressive scrubbing can burnish flat or matte finishes, creating a permanent sheen mismatch.
| Bead Material | Paint Compatibility | Recommended Cleaning Agent | Tool | Primary Risk Factor |
|---|---|---|---|---|
| Galvanized Steel | Acrylic Latex / Alkyd | Mild Dish Soap + Warm Water | Microfiber Cloth | Moisture seeping into micro-cracks, triggering sub-surface oxidation. |
| Vinyl (PVC) | Acrylic Latex | TSP-PF (Phosphate-Free) | Non-scratch Sponge | Solvent-based cleaners softening the PVC core beneath the paint. |
| Paper-Faced | Acrylic Latex / Eggshell | Dry Magic Eraser (Light Pressure) | Melamine Foam | Water saturation causing the paper face to delaminate from the gypsum. |
Troubleshooting Playbook: Stains, Rust, and Scuffs
1. Rust Bleed-Through on Galvanized Beads
Rust staining on outside corners is rarely caused by ambient humidity alone. It is almost always the result of an alkaline reaction between the wet joint compound (pH 10-12) and a compromised galvanized coating, or the use of a water-based primer that failed to seal the metal nose.
The Fix:
- Lightly scuff the stained area with 120-grit aluminum oxide sandpaper. Do not sand through the paint down to bare metal unless the rust is actively flaking; you only need to degloss the stain.
- Wipe away dust with a tack cloth.
- Apply a shellac-based primer (e.g., Zinsser B-I-N). Shellac is entirely non-water-based, meaning it will not reactivate the iron oxide or introduce moisture to the metal. It flashes off in 15 minutes.
- Spot-prime with a standard PVA or acrylic drywall primer to match the surrounding wall texture, then apply two coats of topcoat paint.
2. Hairline Flange Cracks
Cracks running parallel to the corner nose, exactly 1 to 1.5 inches away from the edge, indicate flange separation. This occurs when the HVAC system blasts dry air directly onto the corner, causing the gypsum board to shrink while the bead remains rigid.
The Fix: Do not simply caulk the crack. Caulk will collect dust and fail within six months. Instead, score the crack with a utility knife to create a slight V-groove. Inject a high-elastomeric sealant (like USG Sheetrock Brand First Coat or a specialized acrylic caulk rated for 50% movement). Smooth with a damp finger, let cure for 24 hours, and apply a skim coat of lightweight setting-type compound (e.g., Easy Sand 45) over the repair.
Impact Damage and Flange Crack Repair Matrix
When a corner bead suffers physical trauma, the repair strategy depends entirely on the material and the depth of the deformation. Use the following decision matrix to determine whether to patch, skim, or replace.
Impact Response Decision Tree
- Scenario A: Dented Metal Nose (No Paint Fracture)
Action: Apply a thin layer of setting-type joint compound directly over the dent. Sand flush with a 150-grit sanding sponge. Metal cannot be pounded back into shape once embedded in drywall. - Scenario B: Dented Metal Nose (Paint Fractured / Exposed Zinc)
Action: Prime exposed metal with rust-inhibitive spray. Fill dent with setting compound. Sand, prime, and paint. - Scenario C: Shattered or Creased Vinyl Bead
Action: Vinyl cannot be patched if the structural nose is creased. You must execute a partial bead replacement (see below). - Scenario D: Paper-Faced Bead Torn or Frayed
Action: If the tear is less than 2 inches, seal with shellac primer and skim coat. If larger, the paper face will continuously bubble under joint compound moisture; full replacement is required.
Executing a Partial Bead Replacement
Replacing an entire corner bead requires destroying the surrounding wall finish. For localized damage (e.g., a vacuum cleaner smashing the bottom 24 inches of a vinyl bead), perform a partial splice.
- Use an oscillating multi-tool with a flush-cut blade to slice the damaged bead horizontally at a clean, undamaged section above the impact zone.
- Pry the damaged flange away from the drywall using a stiff 6-inch taping knife. Cut the drywall paper along the flange edge to prevent tearing the wall face.
- Cut a new piece of Trim-Tex Super Bead (or matching profile) to length. The Super Bead features a rigid vinyl nose and flexible flanges that grip compound aggressively.
- Apply a continuous bead of construction adhesive (e.g., Liquid Nails Drywall Adhesive) to the back of the new flanges.
- Press the new section into place, overlapping the existing bead nose by exactly 1/16th of an inch. Wipe away squeeze-out immediately.
- Feather the transition joint with a topping compound, extending the feather edge at least 12 inches out from the corner to hide the splice line.
For comprehensive installation tolerances and splice techniques, refer to the Trim-Tex official installation guides, which provide exact overlap measurements for their proprietary vinyl profiles.
Environmental Control and Preventative Maintenance
Maintenance extends beyond physical repairs; it requires managing the micro-climate around exterior and interior corners. The National Wall and Ceiling Association (NWCCA) frequently cites environmental extremes as the root cause of premature corner bead failure.
Managing HVAC Airflow
Supply vents located within 3 feet of an outside corner create a localized low-humidity zone. In winter, this rapid drying causes the gypsum core to contract away from the metal flange, resulting in 'ghosting' (where the metal bead becomes visible through the paint due to thermal bridging and compound shrinkage).
Preventative Action: Install adjustable deflectors on nearby supply registers to redirect airflow toward the center of the room. Maintain indoor relative humidity between 35% and 45% during heating seasons to stabilize the gypsum core dimensions.
Upgrading High-Traffic Zones
If a specific corner requires bi-annual patching due to foot traffic, stretchers, or equipment movement, maintenance teams should upgrade the profile during the next scheduled renovation. Standard 0.017-inch galvanized steel beads will dent under 15 lbs of lateral force. Upgrading to a heavy-duty vinyl bullnose or a stainless steel clinical bead (often used in hospitals) increases impact resistance by up to 300%. While the material cost increases from roughly $0.40 to $1.85 per linear foot, the elimination of recurring maintenance labor yields a positive ROI within 18 months in commercial or high-traffic residential settings.
Expert Insight: Never use standard all-purpose joint compound for the final skim coat over a metal corner bead in high-humidity areas (like bathrooms or commercial kitchens). All-purpose compound contains organic binders that can trap moisture against the metal, accelerating oxidation. Always use a setting-type compound (chemical cure) for the final coat over metal in damp environments to create an impermeable, alkaline-stable barrier.