Drywall Mud Application: Taping, Coating, and Sanding Techniques
Master drywall mud application with this expert guide. Learn taping, three-coat techniques, mixing consistencies, and sanding for a flawless finish.
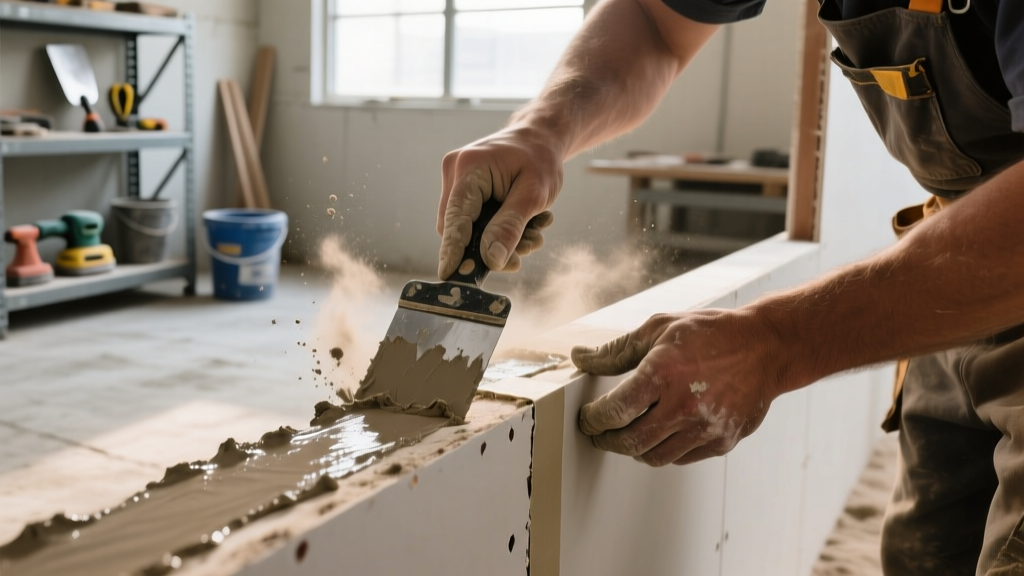
The Chemistry and Selection of Drywall Mud
Achieving a flawless Level 4 or Level 5 drywall finish relies entirely on the correct selection and application of joint compound, commonly known as drywall mud. The term 'mud' encompasses two distinct chemical categories: drying-type and setting-type. Understanding the mineral composition and shrinkage rates of each is the first step in preventing callbacks and structural failures.
Drying-type compounds (like USG Sheetrock All Purpose) rely on the evaporation of water to cure. They contain limestone, attapulgite clay, and mica. Because water leaves the matrix during drying, these compounds experience volumetric shrinkage, requiring multiple coats. Setting-type compounds (like USG Durabond or Easy Sand) are based on calcium sulfate hemihydrate. They cure via an exothermic chemical reaction when mixed with water, resulting in zero shrinkage and a significantly harder substrate.
| Mud Type | Primary Use Case | Shrinkage Rate | Hardness (Shore D) | 2026 Avg. Cost (5 Gal/Bucket) |
|---|---|---|---|---|
| Setting-Type (45/90) | Prefilling gaps, embedding tape, high-humidity areas | Negligible | High (60-70) | $16 - $22 (Box/Bucket) |
| All-Purpose Drying | Taping, second coat, general purpose | Moderate | Medium (40-50) | $18 - $24 |
| Topping/Lightweight | Final coat, skim coating, Level 5 finishes | Low | Low (20-30) | $20 - $28 |
Essential Tooling and Material Preparation
Professional application requires precision tooling. A standard DIY kit will leave ridges and chatter marks. Procure the following specific tools for a professional-grade application:
- 10-inch and 12-inch Stainless Steel Taping Knives: The 10-inch is for the filling coat; the 12-inch is for the finishing coat. Stainless steel prevents rust stains in the mud. Expect to pay $35-$45 per blade for professional-grade spring steel.
- Aluminum Hawk: Magnesium hawks react chemically with wet joint compound if left sitting, creating dark oxidation stains. Always use aluminum or stainless steel.
- Mud Mixer and Heavy-Duty Drill: A mud mixer paddle requires a low-RPM, high-torque drill (minimum 800 RPM, 10 Amps) to shear the compound without whipping air bubbles into the matrix.
Drywall mud must be thinned based on the application stage. Out of the bucket, all-purpose mud is too thick for smooth finishing.
- Taping Coat: Thin to a 'thick peanut butter' consistency. It must hold the tape without sagging.
- Filling Coat: Thin to a 'mayonnaise' consistency. Add roughly 1 cup of water per 5 gallons and mix for 3 minutes.
- Topping Coat: Thin to a 'yogurt' consistency. It should slide off the knife effortlessly when held at a 45-degree angle.
The Three-Coat Application System
The industry standard for flat seams and inside corners is a three-coat system. Attempting to hide seams in two coats forces the applicator to apply the mud too thickly, leading to edge-cracking and excessive sanding.
Coat 1: Embedding and Taping
The objective of the first coat is mechanical adhesion. Apply a 1/8-inch bed of all-purpose or setting-type mud over the tapered edge of the gypsum board. Center the paper tape over the seam and press it into the bed. Using a 6-inch taping knife, draw down the seam at a strict 15-degree angle, applying enough pressure to squeeze out excess mud from beneath the tape while leaving a paper-thin layer underneath. For inside corners, fold the tape precisely at the crease and apply mud to both walls before embedding.
Coat 2: Filling and Feathering
Wait until the first coat is completely bone-dry (typically 24 hours at 70°F and 50% relative humidity). Scrape off any high spots or dried ridges with a dry 10-inch knife before applying the second coat. Apply the mayonnaise-consistency mud over the tape, extending the feathered edge 2 inches beyond the first coat on both sides. Hold the 10-inch knife at a 30-degree angle. The center of the blade should ride on the drywall, while the edges feather the mud out to zero thickness.
Coat 3: Topping and Skimming
The final coat utilizes lightweight topping compound. Using a 12-inch or 14-inch knife, apply a thin, wide layer that extends the feathered edge another 2 to 3 inches. The goal is to create a gradual, imperceptible transition from the joint to the bare paper face of the drywall. This coat should be no thicker than 1/32 of an inch.
Troubleshooting Common Application Failures
Even experienced tapers encounter defects. Identifying the root cause prevents compounding errors during the sanding phase.
If air bubbles form under the paper tape during the first coat, the bed layer was too thin or the mud was too dry. Do not attempt to sand a blister. Slit the blister with a utility knife, peel back the loose paper, and inject setting-type mud underneath before patching with a new layer of tape.
- Edge Cracking (Checking): Caused by applying a second coat before the first coat has fully dried, trapping moisture. The trapped moisture forces the top layer to shrink unevenly. Always verify the mud is uniformly white with no dark, damp spots.
- Pitting: Small craters in the dried mud are caused by air bubbles introduced during aggressive mixing. Mix mud on a low RPM setting, and 'slap' the mud against the side of the mud pan with your knife to knock out suspended air before loading the hawk.
- Chatter Marks (Ridges): Ridges running parallel to the knife stroke indicate a nick in the blade edge or a piece of dried mud stuck to the knife. Wipe the blade with a damp sponge between every single stroke.
Sanding and the Raking Light Inspection
Sanding drywall mud is where the final aesthetic is determined. The Gypsum Association strictly outlines the tolerances for Levels 4 and 5 finishes. To achieve these, you must abandon overhead lighting and use a 'raking light' inspection method.
Place a high-lumen LED work light directly against the wall, shining parallel to the surface. This raking light will cast harsh shadows across any ridge, blister, or depression. Mark defects with a light pencil circle.
Abrasive Selection and Technique
Use a pole sander equipped with a 120-grit aluminum oxide screen for initial leveling of ridges. Follow with a 150-grit or 180-grit screen for final smoothing. Never use sandpaper coarser than 100-grit, as it will score the paper face of the gypsum board, creating fuzz that will show through flat paint.
Sanding joint compound generates respirable crystalline silica. According to OSHA regulations, dry sanding drywall mud requires strict adherence to Permissible Exposure Limits (PEL). Always use a pole sander with an integrated HEPA vacuum shroud, or wet-sand using a damp sponge for the final pass to eliminate airborne particulate entirely.
Final Prep for Primer
After sanding, the wall will be covered in a fine layer of dust. Do not apply primer directly over dust; the primer will peel and the paint will fail. Wipe the walls down with a slightly damp microfiber mop or use a shop-vac with a soft brush attachment. Once the dust is removed, inspect the joints one last time under ambient daylight. If the joints disappear into the field of the board without casting a shadow, the drywall mud application is complete and ready for a high-build PVA drywall primer.
For further technical specifications on joint treatment materials and fastener spacing, refer to the USG Joint Compound Technical Data Sheets to ensure your specific product matches the environmental conditions of your job site.