Troubleshooting Drywall Steel Studs & Framing Failures
Expert guide to troubleshooting drywall steel studs & framing failures. Fix popped screws, deflection cracks, and stud bowing with precise repair methods.

Diagnostic Matrix: Identifying Steel Framing Drywall Failures
Drywall installed over cold-formed steel (CFS) framing behaves fundamentally differently than wood-framed assemblies. Steel does not shrink or warp from moisture, but it is highly susceptible to thermal expansion, torsional buckling, and structural deflection. Before cutting into a wall, map the visible symptom to its underlying framing defect using the diagnostic matrix below.
| Visible Symptom | Framing Root Cause | Required Repair Strategy |
|---|---|---|
| Screw pops aligned vertically along stud bays | Thermal expansion/contraction of steel studs pushing through rigidly bound drywall. | Remove popped screws, install #8 fine-thread screws 2 inches away, patch with setting compound. |
| Horizontal cracking 2-4 feet below ceiling | Missing deflection track; concrete slab deflection crushing the rigid drywall edge. | Score and remove top drywall section, retrofit slip track or deflection bead, apply elastomeric sealant. |
| Wavy wall surface (undulation) or shadowing | Stud torsional buckling due to missing bridging or improper gauge for wall height. | Install retrofit flat-strap bridging, sister bowed studs with 43-mil steel, re-hang affected panels. |
| Rust stains bleeding through joint compound | Use of interior EQ (Equivalent) galvanized studs in high-moisture zones instead of G90. | Cut out corroded stud sections, splice in G90 galvanized steel, prime drywall with oil-based sealer. |
Resolving Fastener Pops and Screw Back-Out
Unlike wood, steel framing has a high coefficient of thermal expansion. A 10-foot steel stud can expand or contract up to 1/8 inch with a 50°F temperature swing. If the drywall is tightly bound at the floor and ceiling tracks, this thermal movement forces the stud to push against the fasteners, resulting in popped bugle heads or torn paper faces.
The most common cause of immediate back-out is using the wrong screw gauge. For 20-gauge to 25-gauge (33-mil to 43-mil) non-structural studs, use #6 fine-thread drywall screws. For 16-gauge to 12-gauge (54-mil to 97-mil) structural studs, you must step up to #8 fine-thread screws with a drill point to penetrate the thicker flange without stripping the threads.
Step-by-Step Pop Repair
- Identify the Stud: Use a magnetic stud finder to confirm the pop is directly over the steel flange.
- Remove the Culprit: Back out the popped screw entirely. Do not just drive it deeper, as the gypsum core is already crushed.
- Install Relief Fasteners: Drive two new #6 or #8 fine-thread screws 2 inches above and below the original hole. Set the bugle head just below the paper face without breaking the paper.
- Patch and Finish: Fill the void with a high-strength setting-type compound (e.g., Durabond 45), followed by a lightweight topping coat and standard tape embedding.
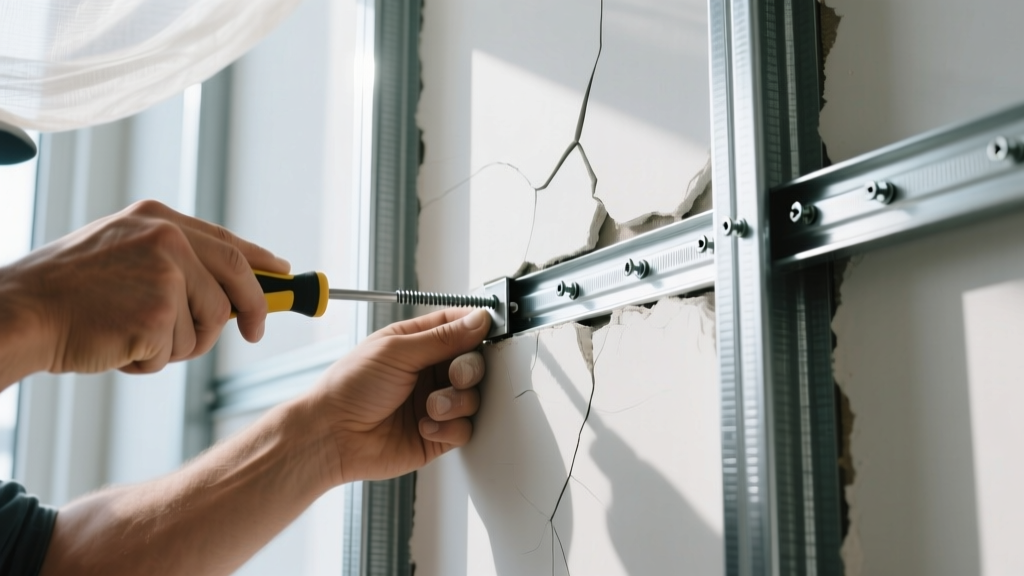
Fixing Corner and Butt Joint Cracking on Metal Studs
Horizontal cracks near the ceiling or at partition intersections are rarely drywall tape failures; they are framing deflection failures. Modern commercial construction relies on concrete slabs that deflect under live loads (people, furniture, snow on the roof). If the top track of your steel framing is pinned rigidly to the slab above, that downward deflection will crush the drywall or tear the corner tape.
According to guidelines from the Association of the Wall and Ceiling Industry (AWCI), interior partitions must accommodate slab deflection through slip tracks or deflection clips. If a builder hard-attached the top track, you must retrofit a slip joint.
Retrofitting a Deflection Joint
- Score and Snap: Score the drywall horizontally 2 inches below the ceiling angle. Snap off and remove this top strip.
- Install a Deflection Bead: Attach a flexible vinyl deflection bead (such as Trim-Tex Magic Corner) to the ceiling, leaving the vertical leg floating over the wall board.
- Seal the Gap: Fill the 1/2-inch to 3/4-inch gap between the new wall edge and the ceiling with a high-movement elastomeric sealant (e.g., Tremco Dynaflex Ultra). Do not use standard acrylic caulk, which will tear when the slab moves.
Never embed standard paper or fiberglass mesh tape into the ceiling-to-wall angle of a steel-framed commercial partition. The joint must remain a floating, caulked slip plane to absorb structural movement.
Correcting Stud Bowing and Board Undulation
If a finished wall looks wavy or casts shadows under grazing light, the steel studs have likely suffered torsional buckling. This occurs when 33-mil (25-gauge) studs are framed at 24 inches on-center (o.c.) in walls exceeding 10 feet in height without adequate lateral bracing. The Cold-Formed Steel Engineers Institute (CFSEI) mandates bridging to prevent this exact failure mode.
Retrofitting Steel Bridging
To stabilize a buckling wall without tearing off all the drywall, you can access the stud cavity from an adjacent room, an unfinished utility chase, or by cutting strategic access panels.
| Wall Height | Stud Gauge (Thickness) | Required Bridging Interval | Retrofit Material |
|---|---|---|---|
| Under 10 ft | 33-mil (25 ga) | Mid-height only | 1.5' galvanized flat strap |
| 10 ft - 14 ft | 33-mil (25 ga) | Every 4 feet max | Proprietary X-bridging or flat strap |
| Over 14 ft | 43-mil (20 ga) min | Every 4 feet max | 1.5' flat strap with blocking |
Wrap 1.5-inch wide, 33-mil galvanized steel flat strapping tightly around the stud flanges and secure with #8 self-drilling tek screws. This locks the studs in place and prevents further twisting. If a stud is already severely bowed (deflection greater than 1/8 inch over 4 feet), sister it with a new 43-mil (20-gauge) stud cut to the cavity height, screwing them together every 12 inches.
Moisture Intrusion and Galvanic Corrosion Repair
Steel studs are galvanized to prevent rust, but not all galvanization is equal. Standard interior framing uses an EQ (Equivalent) coating, which is extremely thin and designed only for dry environments. If an EQ stud is exposed to chronic moisture (e.g., behind a leaking shower pan or in an unconditioned humid zone), it will oxidize rapidly, and the rust will bleed through the gypsum board and joint compound.
Splicing Out Corroded Steel
When rust compromises the structural integrity of the stud flange, the damaged section must be excised and replaced with G90 galvanized steel (which has a much thicker zinc coating).
- Cut the Defect: Use a reciprocating saw with a metal-cutting blade to remove the rusted section. Cut at least 6 inches past the visible corrosion in both directions.
- Fabricate a Splice Plate: Cut a piece of G90 galvanized steel track or flat strap that is 12 inches longer than the gap you created.
- Install and Secure: Slide the splice plate into the stud cavity, overlapping the existing good steel by 6 inches on each side. Secure with four #8 self-drilling screws per overlap.
- Seal the Cavity: Apply a zinc-rich cold galvanizing compound to the cut edges and screw heads to prevent flash rusting before closing the wall.
Frequently Asked Questions
Can I use wood drywall screws on steel studs?
No. Wood screws have coarse threads and sharp points designed to bite into wood fibers. On steel, they will strip the thin metal flange, fail to pull the board tight, and eventually back out. Always use fine-threaded, self-tapping drywall screws specifically rated for cold-formed steel.
How do I hang heavy cabinets on steel stud framing?
Standard 33-mil steel studs cannot support heavy point loads like kitchen cabinets directly through drywall. You must either install structural wood blocking (like plywood or 2x4s) inside the stud bays before drywalling, or use specialized heavy-duty toggle bolts (like Snaptoggles) rated for 300+ lbs in 5/8-inch drywall, ensuring the bolts engage the steel flange if possible.
What is the maximum spacing for steel studs in commercial drywall?
According to Gypsum Association guidelines, 1/2-inch drywall requires studs spaced at a maximum of 16 inches o.c., while 5/8-inch Type X drywall can be installed on studs spaced up to 24 inches o.c. Always verify local building codes and the specific board manufacturer's span tables for fire-rated assemblies.
Written by
Priya KapoorPriya Kapoor is a real estate market analyst and construction economics researcher with expertise in housing affordability, development feasibility, and infrastructure investment. She holds a Master of Regional Planning from Cornell University and previously worked as a senior analyst at CBRE's Investment Properties group, where she modeled returns for $4B in mixed-use development pipelines. Priya now runs an independent research practice advising developers, municipalities, and REITs on construction cost forecasting and market timing. She publishes the quarterly "BuildMat Market Pulse" report tracking material price indices across 12 commodity categories. Based in Austin, TX, Priya serves on the board of Habitat for Humanity Austin and is a marathon runner.
More from Priya Kapoor
View all
Construction Cost
Cost to Build a 1600 Sq Ft Home in 2026: Full Breakdown
Accurate 2026 cost to build a 1600 sq ft home—material, labor, and regional pricing breakdowns included. Plan your budget with real-time estimates.
Aug 11, 2026

Wood & Lumber
Name the Types of Wood for Pressure Treatment and Preservation
Learn how to name the types of wood best suited for pressure treatment. Compare species treatability, chemical retention levels, and 2026 preservation costs.
Aug 4, 2026

Stone & Masonry
Stone Veneer Suppliers Lindenhurst: 2026 Cost Analysis
Analyze 2026 stone veneer costs in Lindenhurst, NY. Compare local supplier pricing, delivery fees, and Suffolk County installation labor rates.
Aug 4, 2026