Drywall Screw Gun Setup and Technique for Flawless Gypsum Hanging
Master drywall screw gun setup, depth adjustment, and fastening technique. Learn pro tips for hanging gypsum board without tearing the paper face.
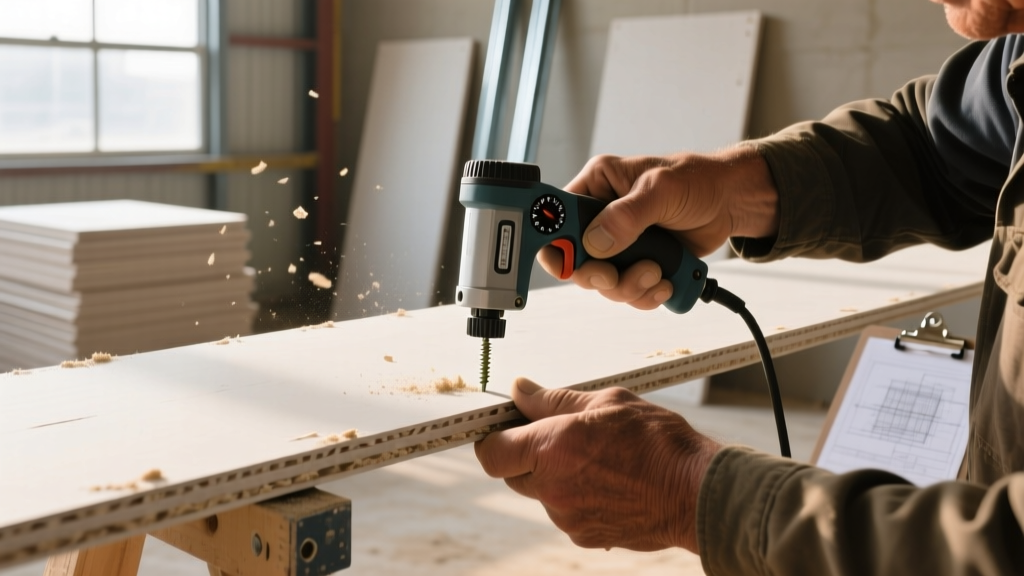
The Mechanics: Why a Dedicated Drywall Screw Gun Matters
Hanging gypsum board requires a specific fastening profile that standard power drills simply cannot replicate. A dedicated drywall screw gun—often referred to as an auto-feed or collated screwdriver—operates at significantly higher rotational speeds, typically between 3,500 and 4,500 RPM, compared to the 1,500 to 2,000 RPM of a standard drill. This high velocity allows the bugle head of the drywall screw to slice through the gypsum core and seat flush against the backing stud in a fraction of a second.
The critical differentiator is the depth-sensitive clutch mechanism. When the screw head reaches the preset depth, the clutch disengages the drive bit from the motor. This prevents over-driving, which is the primary cause of paper face tear-out. According to the Gypsum Association, if the top paper layer of the gypsum board is broken by the screw head, the fastener loses virtually all of its structural holding power, leading to sagging ceilings and popped screws during the finishing phase.
Selecting the Right Tool: Cordless Auto-Feed Models
For professional installation in 2026, cordless auto-feed screw guns dominate the market due to their mobility on large commercial and residential sites. Below is a comparison of the top-tier models utilized by high-production hanging crews.
| Brand & Model | Max RPM | Feed System | Avg. Bare Tool Cost | Best Application |
|---|---|---|---|---|
| Milwaukee M18 FUEL (2866-20) | 4,500 | Auto-Feed Collated | $229 | High-volume production, ceilings |
| Makita XSF03Z | 4,200 | Auto-Feed Collated | $189 | All-day ergonomics, metal studs |
| Senco Duraspin (Corded/Pneumatic) | 5,000 | Auto-Feed Collated | $145 | Continuous commercial framing |
| DeWalt ATOMIC 20V (DCF622) | 4,400 | Auto-Feed Collated | $199 | Tight corners, retrofit work |
Fastener Specifications: Matching Screws to Gypsum Board
Using the correct collated screw strip is non-negotiable. The thread pitch and length must match both the framing material and the board thickness. Manufacturer guidelines from USG Corporation dictate strict adherence to fastener sizing to maintain fire ratings and structural integrity.
Standard Fastener Matrix
- 1/2-inch Standard Board (Wood Studs): 1-1/4-inch coarse-thread drywall screws.
- 1/2-inch Standard Board (Metal Studs): 1-inch or 1-1/4-inch fine-thread drywall screws.
- 5/8-inch Type X Fire-Rated Board (Wood Studs): 1-5/8-inch coarse-thread drywall screws.
- 5/8-inch Type X Fire-Rated Board (Metal Studs): 1-5/8-inch fine-thread drywall screws (20-gauge steel or lighter).
Note: Fine-thread screws feature a sharper point and tighter pitch designed to self-drill through 20-gauge to 25-gauge light gauge steel without stripping the hole. Coarse threads will strip out instantly in metal studs.
Calibrating the Depth Sensitivity Dial
Before hanging the first sheet, you must calibrate the depth dial. Environmental factors like humidity and variations in gypsum core density between manufacturing batches can alter how the board compresses. Follow this exact calibration sequence:
- Prepare a Test Substrate: Secure a scrap piece of the exact gypsum board you are hanging over a scrap piece of the exact framing material (wood or metal).
- Set to Shallow: Turn the depth adjustment dial on the nose of the screw gun to the shallowest setting (usually marked with a '+' or a shallow icon).
- Drive a Test Screw: Engage the auto-feed mechanism and drive a single screw into the test piece.
- Inspect the Dimple: Run your fingernail over the screw head. The ideal depth is a dimple ranging from 1/32-inch to 1/16-inch deep.
- Adjust Incrementally: If the screw is proud (sticking out), adjust the dial one click deeper. If the paper is torn or the gypsum core is crushed, adjust one click shallower.
- Verify the Paper Face: The paper must remain perfectly intact around the bugle head. The head should sit just below the surface, creating a shallow crater for joint compound without piercing the paper layer.
Application Technique: The Glide and Drive Method
Proper physical technique reduces wrist fatigue and ensures consistent dimpling across a 4x12 foot sheet. Unlike driving lag bolts, hanging drywall relies on momentum and surface contact.
Pro Tip: Never push the screw gun with your arm strength. The feed mechanism and the clutch do the work. Apply only enough forward pressure to keep the nose cone flush against the board until the clutch disengages with an audible 'click' or 'clack'.
The Sequence:
1. Align the nose cone perpendicular (90 degrees) to the board surface. Angled drives will tear the paper and result in rejected fasteners during the mudding phase.
2. Pull the trigger before the nose cone touches the board. This spins the bit up to 4,000+ RPM, ensuring the screw bites immediately upon contact.
3. Glide the tool smoothly along the stud line. Do not lift the tool between screws; simply release the trigger pressure slightly to disengage the clutch, slide the nose cone 12 to 16 inches down the stud, and re-engage.
4. Maintain a spacing of 8 inches on center (O.C.) at the perimeter edges and 12 to 16 inches O.C. on intermediate field studs, per standard building codes.
Troubleshooting Common Fastening Failures
Symptom: Paper Face Tear-Out (Bullseyes)
Cause: Depth dial set too deep, or driving at an angle.
Fix: Adjust the dial shallower. Ensure you are keeping the tool perfectly flat against the wall. If the board is heavily bowed, do not force the screw through the gap; pre-shim the stud instead.
Symptom: Screw Stripping in Metal Studs
Cause: Using coarse-thread screws on metal, or the RPM is too low, causing the screw to heat up and melt the galvanized coating before biting.
Fix: Verify you are using fine-thread collated strips. Ensure your battery is fully charged to maintain peak 4,500 RPM output.
Symptom: Screws Proud (Not Seating Flush)
Cause: Depth dial too shallow, or hitting a knot in a wood stud.
Fix: Adjust the dial deeper. If you hit a dense wood knot, do not repeatedly fire into the same hole. Move the screw 2 inches up or down the stud to find clean wood.
Maintenance and Clearing Collated Strip Jams
Auto-feed mechanisms rely on a plastic collated strip that feeds through the nose cone. Dust from the gypsum core inevitably builds up inside the feed track, causing misfires or jammed strips. At the end of every workday, or immediately if the feed stalls, you must clear the track.
Drop the battery, open the nose cone latch (usually a quick-release lever on the side of the Milwaukee and Makita models), and use a stiff bristle brush or compressed air to clear the gypsum dust from the drive channel and the feed pawl. Lubricate the moving feed pawl with a single drop of dry PTFE spray lubricant—never use wet oil, which will attract gypsum dust and create a cement-like sludge that seizes the mechanism. Proper daily maintenance ensures the tool survives the harsh environment of a multi-month drywall installation.