Drywall Sheet Installation: Pro Fastening and Framing Guide
Master drywall sheet installation with pro framing tips, exact screw patterns, and fastening techniques to prevent popped nails and seam cracks.
Pre-Installation: Framing Tolerances and Moisture Control
Before unloading a single drywall sheet, the framing substrate must be verified against Gypsum Association GA-216 standards. Wood framing moisture content must not exceed 19%. Exceeding this threshold guarantees future screw pops and joint ridging as the lumber acclimates and shrinks. For metal framing, verify the gauge: 25-gauge is the absolute minimum for interior non-loadbearing partitions, while 20-gauge or heavier is required for structural or high-abuse shaft wall assemblies.
Framing tolerance is the most frequently ignored metric in residential and commercial drywalling. The maximum allowable deviation is 1/8 inch over a 4-foot straightedge. Bowed studs or misaligned tracks will telegraph through the finished surface, making a Level 5 finish physically impossible to achieve without excessive, crack-prone skim coating. Use shims or sistering to correct out-of-plane studs before the first panel is lifted.
Environmental Conditioning and Acclimatization
Maintain a minimum ambient temperature of 40°F (4°C) for at least 48 hours prior to, during, and following the hanging and taping process. Cold temperatures alter the setting time of joint compounds and reduce the flexibility of the drywall sheet face paper, increasing the risk of micro-fractures during handling. Furthermore, ensure the building is fully enclosed and the HVAC system is operational to stabilize humidity levels between 20% and 60%. Deliver panels to the job site as close to installation time as possible to prevent edge damage and moisture absorption from unconditioned environments.
Fastener Matrix: Screws, Spacing, and Penetration
Selecting the correct fastener is non-negotiable. Using a coarse-thread wood screw on light-gauge metal studs will strip the metal, resulting in zero holding power. Conversely, fine-thread metal screws will snap under the torque required to penetrate dense wood framing. Refer to the matrix below for exact specifications based on USG installation guidelines.
| Panel Thickness | Wood Stud Fastener | Metal Stud Fastener (up to 25-ga) | Edge Spacing | Field Spacing |
|---|---|---|---|---|
| 1/2-inch Standard | 1-1/4' W-Type (Coarse) | 1' S-Type (Fine) | 8 inches | 16 inches |
| 5/8-inch Type X | 1-5/8' W-Type (Coarse) | 1-1/4' S-Type (Fine) | 8 inches | 12 inches |
| 1/2-inch Moisture-Resist | 1-1/4' W-Type (Coarse) | 1' S-Type (Fine) | 8 inches | 12 inches |
All fasteners must be positioned a minimum of 3/8 inch from edges and ends to prevent core blowout. For heavy-gauge metal studs (20-ga to 16-ga), upgrade to G-Type screws with a self-drilling wing tip to pierce the steel without pre-drilling.
The Hanging Sequence: Ceilings, Walls, and Joint Staggering
Always hang ceiling panels before wall panels. This sequence allows the top edge of the wall drywall sheet to press tightly against the ceiling panel, creating a continuous, supported corner joint that resists gravity-induced cracking. If walls are hung first, the ceiling panel rests on the wall edge, leaving a vulnerable horizontal seam prone to sagging and tape failure.
Strategic Joint Staggering
- End Joints: Stagger vertical end joints by a minimum of 4 feet between adjacent rows. This distributes structural stress and prevents continuous weak lines across the wall plane.
- Star Joints: Never allow four panel corners to meet at a single point. These 'star joints' create massive compound buildups and are the primary failure points for ceiling cracks.
- Openings: Avoid aligning panel joints with the corners of doors or windows. Run the panel past the opening and cut it out; otherwise, structural settling will immediately crack the seam radiating from the corner.
Advanced Structural Detailing: Back-Blocking
Butt joints (short edges) are inherently weak because they lack the tapered recess of factory edges. To prevent ridging and cracking, implement back-blocking. This involves securing a scrap strip of drywall or a specialized PVC back-blocker across the studs behind the joint, then screwing the abutting panels into this hidden substrate. This pulls the joint tight, creates a makeshift taper, and transfers structural stress away from the paper tape.
'Floating inside corners is a hallmark of professional work. By leaving the corner edge of the drywall sheet unscrewed for the first 8 inches, you allow the framing to shift slightly without tearing the corner tape.' — Senior Foreman, Commercial Drywall Division
Precision Fastening Technique and Dimpling
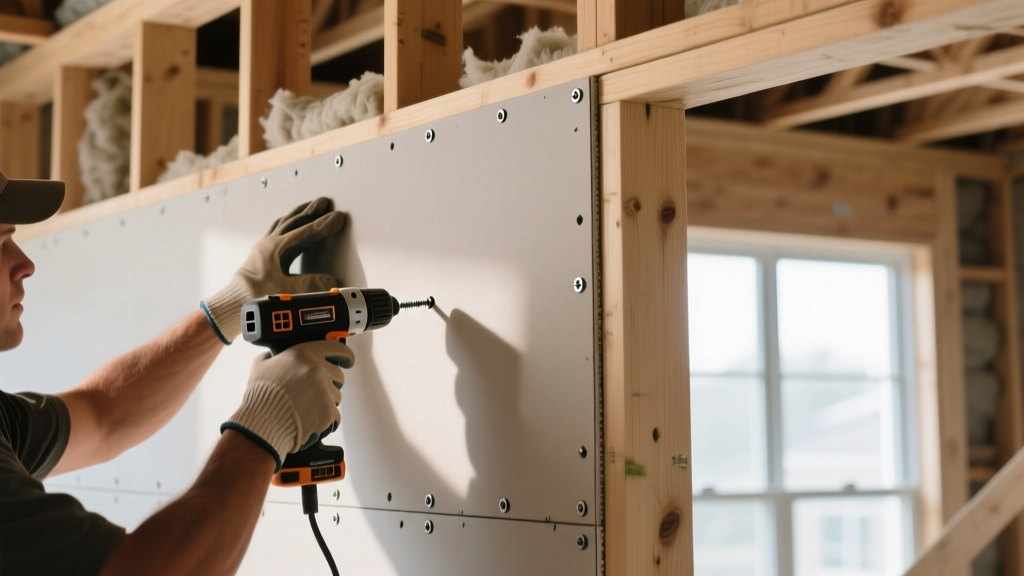
The objective of fastening is to dimple the gypsum core without breaking the face paper. The screw head must penetrate the paper and recess into the core by exactly 1/32 inch to 1/16 inch. If the paper tears, that fastener loses up to 80% of its holding power and must be abandoned, with a new screw driven 2 inches away.
Cutting, Scribing, and Edge Preparation
For straight cuts, use the score-and-snap method with a sharp utility knife. Always cut the back paper cleanly after snapping the core. Crucially, use a drywall rasp or a utility knife held at a 45-degree angle to bevel the cut edges. This creates a shallow V-groove that allows joint compound to penetrate deeply into the seam, locking the tape in place and preventing edge blisters.
For electrical boxes and complex cutouts, use a spiral saw (drywall router) equipped with a pilot-point bit. The pilot point rides along the inside edge of the electrical box, ensuring a precise cutout with a maximum 1/8-inch gap around the perimeter. Gaps larger than 1/4 inch violate fire-rating assemblies and require non-combustible mineral wool packing.
Troubleshooting Installation Failures
Screw and Nail Pops
Pops occur when the framing moves independently of the drywall sheet. In wood framing, this is almost always caused by installing panels over green lumber (moisture >19%) that subsequently shrinks, pulling the stud away from the panel. In metal framing, pops indicate that the drywall was forced against a bowed stud, and the stored tension is slowly pushing the fastener back out. The fix requires removing the popped fastener, driving a new screw 2 inches away into solid core, and repairing the crater.
Blown-Out Paper Face
If the perimeter of the screw head shows torn, fuzzy paper, the dimpler bit is either dull or set too deep. A blown-out screw provides zero clamping force. Do not attempt to fill a blown-out screw head with joint compound and move on; the tape over that seam will eventually bubble. Drive a replacement fastener nearby and mark the failed screw with a pencil so the taper knows to treat it as a void.
Fractured Gypsum Cores
Handling damage or improper scoring leads to micro-fractures in the gypsum core. If a panel cracks during lifting, do not install it. A fractured core compromises the fire-resistance rating of Type X assemblies and will manifest as a visible, un-tapeable ridge on the finished wall. Always carry panels vertically on their long edge to minimize flex and core snapping.