How to Patch a Hole in Drywall to Maintain Performance Ratings
Learn how to patch a hole in drywall while preserving fire, moisture, and acoustic ratings. Expert specs for Type X, green board, and sound drywall.
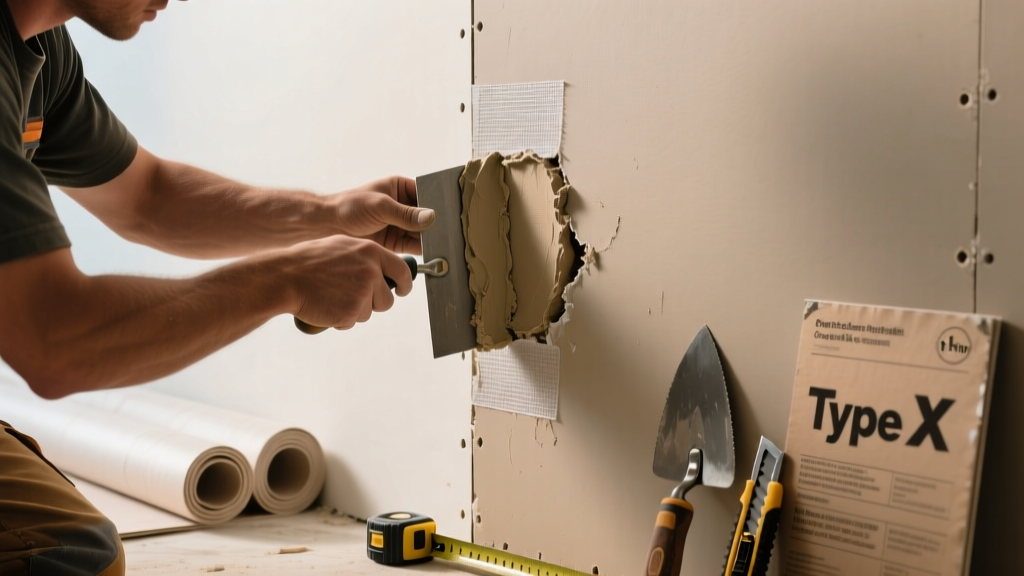
The Hidden Cost of Standard Drywall Patches
Most guides on how to patch a hole in drywall focus exclusively on cosmetic outcomes—achieving a smooth, invisible finish. However, from a building science and code compliance perspective, cutting into a gypsum board assembly compromises its continuous membrane. If the original wall was constructed with performance-rated materials, a standard patch using pre-mixed joint compound and fiberglass mesh tape effectively downgrades the assembly. Under the 2026 International Building Code (IBC) and current UL fire-resistance directories, an unverified patch in a rated wall can void the entire assembly's certification. Restoring a wall requires matching the exact performance specifications of the original gypsum board, including fire-resistance (ASTM E119), moisture resistance (ASTM D3273), and sound transmission class (STC) ratings.
Performance Specification Matrix: Matching Patch to Board
Before cutting your patch piece, identify the existing board type. The repair materials must mirror the core and face paper specifications of the surrounding wall.
| Original Board Type | Required Patch Board | Mandatory Tape | Required Joint Compound | Performance Standard |
|---|---|---|---|---|
| Standard (White) | Standard 1/2" or 5/8" | Paper or Fiberglass Mesh | All-Purpose or Setting | ASTM C1396 |
| Type X (Fire-Rated) | Type X (e.g., USG Firecode Core) | Paper Tape Only | Setting-Type (45/90 min) | UL Design / ASTM E119 |
| Moisture/Mold (Green/Purple) | Moisture-Resistant (MR) | Fiberglass Mesh or Paper | Setting-Type or Mold-Resistant | ASTM D3273 / D6329 |
| Sound-Dampening | Acoustic Board (e.g., SilentFX) | Paper Tape | Setting-Type + Acoustic Sealant | ASTM E90 (STC Rating) |
Restoring Type X Fire-Rated Assemblies (UL Compliance)
Type X gypsum board contains glass fibers and other non-combustible materials in its core to delay structural failure during a fire. When patching a hole in a 1-hour or 2-hour rated partition, the repair must utilize materials that char and calcine at the same rate as the surrounding board.
The Setting-Type Compound Mandate
Pre-mixed all-purpose joint compounds (drying-type) rely on water evaporation and vinyl binders to cure. These compounds shrink significantly and lack the calcined gypsum density required for fire resistance. For Type X patches, you must use a setting-type joint compound (chemical-curing), such as USG Sheetrock Brand Setting-Type (Durabond) 45 or 90. Setting compounds undergo an exothermic chemical reaction, creating a dense, hard matrix of interlocking gypsum crystals that closely mimics the core of the fire-rated board itself. According to Gypsum Association technical resources, drying-type compounds are generally restricted to the finishing coats in rated assemblies, never the taping or fill coats over joints or patches.
Fastener and Framing Specifications
A fire-rated patch cannot simply be glued or floated. The patch piece must be mechanically fastened to structural backing. For holes larger than 4x4 inches, install 1x3 wood furring strips or 3/4-inch plywood backing behind the existing drywall. Secure the backing to the existing board using 1-1/4 inch coarse-thread drywall screws spaced no more than 6 inches apart. The patch piece itself must be screwed to the backing at a maximum spacing of 12 inches on center for walls, and 8 inches on center for ceilings, matching standard UL framing requirements.
Do not use self-adhesive fiberglass mesh tape on Type X fire-rated patches. Under direct flame impingement, the fiberglass mesh can melt or lose tensile strength before the surrounding gypsum calcines, leading to premature joint failure and crack propagation. Always use perforated paper tape embedded in setting-type compound for the primary taping coat in fire-rated assemblies.
Patching Moisture-Resistant and Acoustic Gypsum
Green and Purple Board (Moisture and Mold Resistance)
Moisture-resistant (green) and mold-resistant (purple) boards feature treated face and back papers, and in the case of purple board, a mold-inhibiting core. When patching these boards in high-humidity areas like bathrooms, the vulnerability lies in the joint compound and the primer. Standard pre-mixed joint compound is highly susceptible to mold growth if exposed to prolonged moisture. Use a setting-type compound for the fill and taping coats, as the high pH during the chemical curing process naturally inhibits mold spores. For the final skim coat, use a specialized mold-resistant topping compound. Before painting, the patched area must be sealed with a moisture-blocking primer (such as Zinsser Perma-White or Kilz Mold & Mildew) to prevent water vapor from migrating into the porous gypsum core through the repair site.
Sound-Dampening Board (STC Restoration)
Acoustic gypsum boards, such as National Gypsum's specialized acoustic lines or CertainTeed SilentFX, utilize a viscoelastic polymer sandwiched between two thin gypsum layers to dampen sound vibrations. Cutting a hole severs this damping layer. To restore the Sound Transmission Class (STC) rating:
- Perimeter Sealing: Before installing the patch, run a continuous 3/8-inch bead of acoustical sealant (e.g., Tremco Acoustical Sealant or USG Sheetrock Brand Acoustical Sealant) along the back edge of the cutout.
- Decoupling the Patch: Do not over-tighten the screws when securing the patch to the backing. The patch should sit flush but not compress the acoustic sealant entirely, allowing the viscoelastic layer to maintain its damping properties.
- Joint Treatment: Use paper tape and setting compound. The mass of the setting compound helps block airborne sound flanking through the joint seams.
Step-by-Step Execution for High-Performance Patches
Follow this precise sequence to ensure structural integrity and performance compliance for holes measuring 6x6 inches up to 12x12 inches.
- Square the Cutout: Use a drywall saw to cut the damaged area into a perfect rectangle or square. Cut at a slight 5-degree inward bevel to prevent the patch from falling through the cavity.
- Install Structural Backing: Insert 1x3 furring strips that extend at least 3 inches beyond the cutout on all sides. Secure them to the back of the existing drywall with 1-1/4" screws, countersinking the heads slightly without breaking the face paper.
- Cut and Fit the Patch: Cut a new piece of performance-matched gypsum board (e.g., 5/8" Type X) exactly 1/8-inch smaller than the cutout on all sides. This gap is critical for the joint compound to fill and lock the patch in place.
- Apply Acoustical/Fire Sealant (If Required): For STC or strict fire-rated assemblies, apply a bead of appropriate sealant to the backing strips before placing the patch.
- Mechanical Fastening: Drive 1-1/4" drywall screws through the patch into the backing strips every 6 to 8 inches. Ensure the screw heads dimple the paper without tearing it.
- Taping and First Coat: Apply a bed of setting-type compound (45-minute set time) to all four seams. Embed paper tape, pressing firmly to squeeze out excess compound. Feather the edges 4 inches out. Allow to cure completely (approx. 45-60 minutes).
- Fill and Skim Coats: Apply a second coat of setting compound, feathering out to 8 inches. Once cured, apply a final thin skim coat using a lightweight topping compound to achieve a Level 4 or Level 5 finish, feathering out to 12 inches.
- Sand and Prime: Sand with 150-grit or 180-grit sanding sponges. Apply a performance-matching primer (fire-retardant, mold-resistant, or standard PVA) before painting.
Common Failure Modes in Spec-Grade Patching
Even with the correct materials, execution errors can compromise the assembly. Watch for these specific failure modes:
- Photographing (Joint Shadowing): Using a setting-type compound that is too dense or applying it too thickly without adequate feathering causes the patch to show through flat paint under glancing light. Always transition to a lightweight topping compound for the final coat to match the porosity of the surrounding face paper.
- Edge Crumbling: If the cut edges of the patch are not sealed, the exposed gypsum core will rapidly absorb moisture from the joint compound, causing the edges to swell and crumble. Always brush a thin layer of diluted PVA glue or a dedicated drywall edge sealer onto the cut gypsum edges before taping.
- Over-Sanding the Face Paper: Sanding through the face paper of the surrounding board exposes the gypsum core, which will instantly absorb paint and create a permanent dull spot. Use a sanding pole with light pressure and stop immediately when the compound is flush with the paper.
- Ignoring Electrical Clearances: When patching near electrical boxes, ensure the patch does not encroach on the required 1/4-inch maximum gap between the box and the drywall, as specified by NEC 314.21. Fire-rated assemblies require this gap to be filled with specific firestop putty pads or intumescent sealant, not standard joint compound.