Expert Plaster Repair: Gypsum Board Patching & Veneer Finish
Learn expert plaster repair techniques using gypsum board patches and veneer plaster to seamlessly fix large holes in historic lath walls.
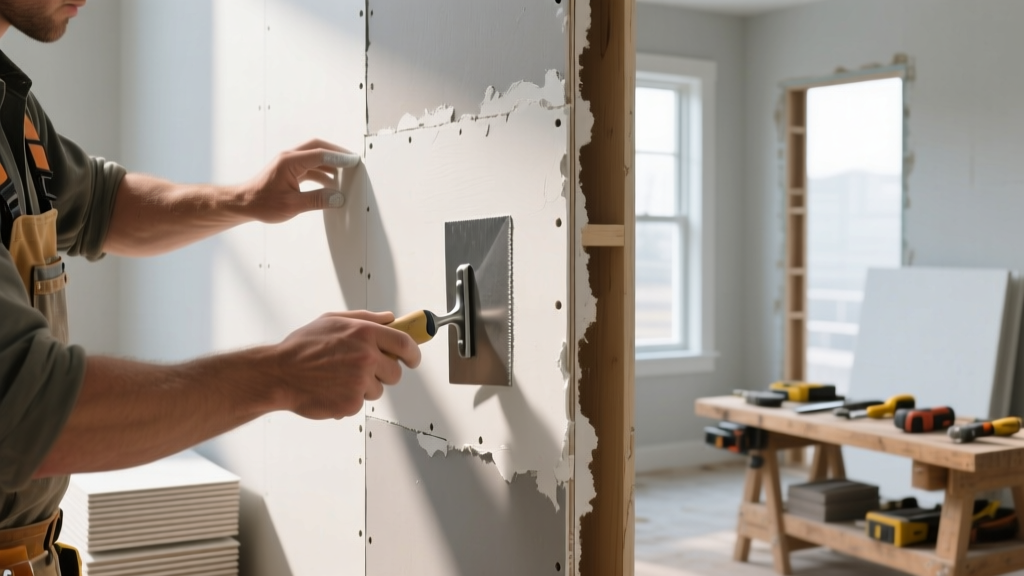
Why Standard Drywall Mud Fails on Historic Plaster
When repairing large holes in historic lath-and-plaster walls, many contractors default to standard gypsum board patches finished with lightweight joint compound. This approach almost always results in 'flashing'—a visible difference in porosity and texture between the patch and the original hard plaster, which becomes glaringly obvious under natural light or semi-gloss paint. True plaster repair requires matching the density, acoustic mass, and surface tension of the original wall. By utilizing specialized gypsum board substrates combined with a veneer plaster finish, you can achieve a monolithic, structurally sound repair that is virtually undetectable.
Material Selection Matrix for Plaster Patches
Not all gypsum board is suitable for receiving veneer plaster. Standard drywall paper faces will blister and delaminate when exposed to the high moisture content of wet plaster. You must select a substrate engineered for direct plaster application.
| Gypsum Board Type | Face Paper Treatment | Suitability for Veneer Plaster | Recommended Application |
|---|---|---|---|
| Standard Drywall (White Board) | Untreated, highly absorbent | Poor (Requires heavy PVA sizing) | Standard joint compound finishing only |
| Plaster Base (Blue Board) | Specially treated, uniform absorption | Excellent | Direct veneer plaster application |
| Moisture-Resistant (Green Board) | Wax/silicone treated, water-repellent | Fail (Plaster will not bond) | Tile backer in damp areas only |
| Fiberglass-Faced (e.g., DensArmor) | Inorganic glass mat | Good (Requires specific bonding agents) | High-moisture veneer environments |
Precision Substrate Installation: Matching Historic Thickness
The most common failure in plaster repair is a patch that sits recessed from the original wall surface. Historic three-coat plaster systems (scratch, brown, and finish) typically measure between 3/4-inch and 1-inch thick. Standard 1/2-inch gypsum board will leave a 1/4-inch void that cannot be filled with veneer plaster without severe shrinkage cracking.
The Shim and Screw Protocol
- Measure the Existing Profile: Use a digital caliper or a simple depth gauge to measure the exact thickness of the original plaster from the face of the wood lath to the finished paint surface.
- Select the Gypsum Board: Use 5/8-inch plaster base (blue board) for maximum rigidity and fire resistance, matching the mass of the original wall.
- Furr the Studs: Attach 1/4-inch or 3/8-inch pine furring strips or composite shims directly to the wall studs or joists inside the open cavity. This brings the mounting plane forward.
- Secure the Board: Fasten the 5/8-inch plaster base to the furred studs using 1-5/8-inch coarse-thread drywall screws. Space screws 8 inches apart on edges and 12 inches in the field. Do not break the paper face with the screw head; stop driving exactly flush.
Bridging the Seam: Mesh and Bonding Agents
To prevent ridging at the transition between the historic plaster and the new gypsum board patch, you must mechanically bridge the joint. According to preservation guidelines outlined by the National Park Service Technical Preservation Services, rigid patches must be decoupled slightly from structural movement while maintaining surface continuity.
- Clean the Perimeter: Scrape all loose paint, calcimine, and dust from the existing plaster edge within 3 inches of the joint.
- Apply Bonding Agent: Brush a liberal coat of a polyvinyl acetate (PVA) bonding agent (such as Larsen's Plaster Weld or USG Plaster Weld) over the existing plaster edges and the new blue board. Allow it to dry until tacky (usually 30-45 minutes).
- Embed Fiberglass Mesh: Press self-adhesive 2-inch alkaline-resistant fiberglass mesh tape over the 1/8-inch gap. The PVA bonding agent will lock the mesh in place and prevent the alkalinity of the new plaster from degrading the fiberglass.
Veneer Plaster Application: The Two-Coat System
Standard joint compound shrinks as it dries because it relies on water evaporation. Veneer plaster cures via a chemical crystallization process, resulting in zero shrinkage and a rock-hard surface that matches historic lime/gypsum plasters. For repairs, a two-coat system using products like USG Diamond or Imperial Veneer Finish is the industry standard.
Step 1: The Basecoat (Scratch Coat)
Mix the veneer plaster basecoat to a thick, peanut-butter-like consistency. Using a 14-inch stainless steel trowel, apply a 1/16-inch thick layer over the gypsum board and feather it out over the fiberglass mesh onto the existing plaster. Before the plaster fully sets, use a plasterer's rake or a stiff brush to 'scratch' horizontal grooves into the surface. This provides a mechanical key for the finish coat. Allow the basecoat to cure until it is firm but still slightly damp (typically 45 to 90 minutes, depending on ambient humidity).
Step 2: The Finish Coat
Mix the finish veneer plaster slightly looser than the basecoat. Apply it over the scratched basecoat, working from the center of the patch outward toward the existing wall. As the plaster begins to lose its surface sheen (the 'thumbprint' stage), lightly mist the surface with water using a spray bottle and use a damp sponge float to bring the 'cream' (lime-rich paste) to the surface. This cream is then tightly troweled with a clean, flexible stainless steel trowel to burnish the surface perfectly flush with the surrounding historic wall.
2026 Material Cost and Labor Breakdown
Understanding the economics of proper plaster repair helps in bidding and project planning. While material costs are higher than standard drywall mud, the labor savings from eliminating sanding and multiple skim coats offset the initial expense.
| Material / Labor Component | Unit | Estimated 2026 Cost | Notes |
|---|---|---|---|
| 5/8" Plaster Base (Blue Board) | 4x8 Sheet | $22.00 - $26.00 | Specialty order at most big-box stores |
| USG Diamond Veneer Finish (50 lb) | Bag | $28.00 - $34.00 | Covers approx. 100 sq ft per coat |
| PVA Bonding Agent (Plaster Weld) | 1 Gallon | $35.00 - $42.00 | Diluted 1:1 with water for sealing |
| Specialty Plastering Labor | Sq. Ft. (Patch area) | $18.00 - $28.00 | Highly dependent on regional union rates |
Troubleshooting Common Veneer Plaster Defects
Even with proper gypsum board preparation, environmental factors can compromise the plaster cure. Use this diagnostic framework to address field issues.
- Defect: Flashing (Patch visible through paint)
Cause: The veneer plaster was over-troweled, creating a dense, non-porous burnish that differs from the original wall, or the surrounding wall was not sealed.
Fix: Prime the entire wall with a high-solids PVA drywall sealer (not a standard acrylic primer) to equalize the porosity of the old plaster and the new veneer before applying the topcoat paint. - Defect: Map Cracking (Spiderweb fissures)
Cause: Applying the finish coat before the basecoat has sufficiently cured, trapping moisture that shrinks unevenly, or applying the plaster too thickly (exceeding 1/16-inch per coat).
Fix: Scrape out loose cracks, re-apply PVA bonding agent, and fill with a high-setting joint compound (e.g., USG Durabond 45), followed by a tight skim coat of veneer. - Defect: Premature Set (Plaster hardening in the hawk)
Cause: Using warm water for mixing, or failing to clean dried plaster residue from mixing buckets and tools, which introduces crystallization catalysts into the new batch.
Fix: Always use cold, clean water (between 50°F and 70°F) and dedicate specific buckets exclusively for veneer plaster. Never mix standard joint compound and veneer plaster in the same bucket.
For further technical specifications on achieving the correct surface profiles when integrating gypsum board patches with plaster systems, consult the Gypsum Association's finishing guidelines, which detail the strict tolerances required for Level 5 and veneer finishes over gypsum substrates. By respecting the material science of both the gypsum board core and the plaster finish, contractors can deliver repairs that preserve the architectural integrity of historic spaces while utilizing modern, reliable building materials.