How to Patch a Large Hole in Drywall: Structural Specs and Ratings
Learn how to patch a large hole in drywall while restoring structural integrity, fire ratings (ASTM E119), and acoustic performance with exact specs.
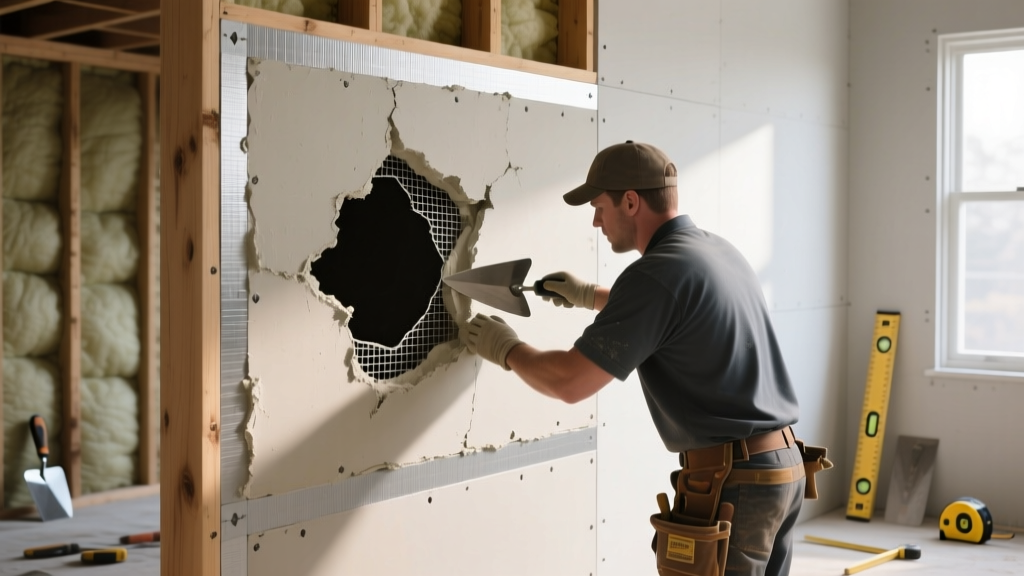
Defining 'Large' in Gypsum Board Repair
In gypsum board repair, a 'large hole' is technically defined as any penetration exceeding 6 inches in diameter or width. While smaller punctures can be resolved with spackle and fiberglass mesh, holes larger than 6 inches compromise the continuous membrane of the wall assembly. This compromises not just the visual plane, but the structural shear strength, the acoustic Sound Transmission Class (STC) rating, and the fire-resistance rating of the partition.
Understanding how to patch a large hole in drywall requires moving beyond basic DIY aesthetics and focusing on material specifications governed by ASTM C1396 Standard Specification for Gypsum Board. A successful patch must replicate the thickness, core density, and edge profile of the surrounding substrate to prevent telegraphing and maintain the assembly's performance ratings.
If the damaged wall is part of a fire-rated partition (e.g., separating a garage from living space, or in multi-family residential corridors), you cannot use standard gypsum board for the patch. You must identify the existing board type and match its fire-rating specifications exactly to maintain the building's code compliance.
Material Specifications: Matching the Existing Assembly
Before cutting your patch, you must identify the existing board's specifications. Use a borescope or carefully feel the edge of the hole to determine thickness (typically 1/2-inch or 5/8-inch) and core type.
| Board Type | Standard Thickness | Core Additives | Fire Rating (per ASTM E119) | Best Application |
|---|---|---|---|---|
| Standard (Regular) | 1/2", 5/8" | None (pure gypsum) | None (combustible facing) | Interior non-rated walls/ceilings |
| Type X (Fire-Rated) | 5/8" (most common) | Glass fibers, vermiculite | 1-Hour (single layer on wood/metal) | Garages, furnace rooms, stairwells |
| Type C (Enhanced Fire) | 1/2", 5/8" | Higher density glass fibers, expandable clay | Up to 4-Hours (multi-layer assemblies) | Commercial shaft walls, high-rise corridors |
| Moisture/Mold Resistant | 1/2", 5/8" | Silicone core additives, treated facers | Varies (usually standard or Type X) | Bathrooms, basements, behind tile |
Cost Expectations (2026 Market): A 4x8 sheet of 5/8-inch Type X (such as USG Sheetrock Firecode X or CertainTeed Fire-Shield) typically retails between $18.00 and $24.00. Standard 1/2-inch boards range from $12.00 to $15.00. Never substitute 1/2-inch standard board to patch a 5/8-inch Type X assembly; the 1/8-inch depth variance will cause severe joint compound shrinkage and cracking, while violating fire codes.
Patching Methods Graded by Structural Performance
The method you choose must scale with the size of the hole and the required structural performance of the wall.
1. The California Patch (Butterfly Method)
- Max Hole Size: 6 to 10 inches.
- Structural Rating: Low. Relies entirely on the paper facing of the patch for adhesion.
- Procedure: Cut a piece of drywall 2 inches larger than the hole on all sides. Score and snap the back gypsum core, leaving the front paper intact. Peel the core away, leaving a 2-inch paper border. Apply joint compound to the hole perimeter, press the paper border into the mud, and coat.
- Failure Mode: The paper border is highly susceptible to blistering if the underlying wall has residual moisture or if too much water is used in the joint compound.
2. Backer Board / Furring Strip Method
- Max Hole Size: 10 to 24 inches.
- Structural Rating: Medium. Provides rigid backing but does not tie into the structural framing.
- Procedure: Insert 1x3 wood furring strips or 20-gauge metal backing tracks into the hole, extending at least 4 inches past the opening on both sides. Secure them to the back of the existing drywall using 1-5/8-inch drywall screws. Screw your new patch directly into these backer boards.
- Pro Tip: Apply a bead of construction adhesive (like Liquid Nails LN-900) to the backer boards before pressing them against the back of the existing drywall to eliminate screw-popping and vibration rattle.
3. Stud-to-Stud Structural Replacement
- Max Hole Size: Over 24 inches, or any hole in a load-bearing shear wall or fire-rated assembly.
- Structural Rating: High. Fully restores the original structural and fire-rating integrity.
- Procedure: Cut the damaged drywall back to the center of the nearest framing studs on the left and right. If the hole falls between studs, install new horizontal wood blocking or metal track between the vertical studs. Cut the new gypsum board to fit exactly (leaving a 1/8-inch gap for expansion), and fasten it directly to the framing.
Use 1-1/4-inch Type S (fine-thread) screws for metal studs (20 to 25 gauge) and 1-5/8-inch Type W (coarse-thread) screws for wood framing. Space screws a maximum of 12 inches apart on ceilings and 16 inches apart on walls. Drive the screw head just below the paper surface without breaking the paper facing.
Restoring Fire and Acoustic Ratings
When patching a large hole in a rated assembly, the patch is only as strong as its perimeter seal. According to the Gypsum Association Fire Resistance Design Manual, any penetration or repair in a fire-rated wall must maintain the continuous firestop barrier.
'A fire-rated gypsum board assembly is compromised if the perimeter of a patch is left unsealed or sealed with standard, combustible joint compound. The gap must be treated with an approved firestop material.' — Gypsum Association Technical Guidelines
Acoustic and Firestop Sealing Protocol
- Gap Sizing: Leave a strict 1/8-inch gap between the patch and the existing drywall. Do not force the patch tight; gypsum expands slightly under extreme heat, and a tight fit can cause the board to buckle during a fire event.
- Firestop Application: For fire-rated walls, fill the 1/8-inch gap with an ASTM E814 compliant intumescent firestop sealant (e.g., USG Firestop Compound or SpecSeal). Standard joint compound will crack and fall out during a fire, allowing smoke and flames to pass through.
- Acoustic Sealing: For non-rated but sound-rated walls (like bedroom partitions), fill the gap with an acoustic sealant to maintain the assembly's STC rating. Air leaks as small as 1% of the wall area can reduce the STC rating by up to 5 points.
Joint Compound Chemistry and Compressive Strength
The final performance of the patch relies on the joint compound used to blend the seams. Using the wrong compound is the leading cause of patch failure, resulting in 'flashing' (visible seams under paint) and edge-cracking.
| Compound Type | Chemical Basis | Shrinkage Rate | Compressive Strength | Best Use in Patching |
|---|---|---|---|---|
| Setting-Type (e.g., DuraBond 90) | Calcium sulfate hemihydrate (chemical set) | Negligible (< 1%) | Very High (> 1,000 psi) | First coat, filling deep gaps, embedding tape |
| All-Purpose (Drying-Type) | Limestone, attapulgite clay (evaporation set) | High (up to 15% volume loss) | Low to Medium | Second coat, minor feathering |
| Topping / Lightweight | Perlite, vinyl polymers (evaporation set) | Medium (up to 8%) | Low | Final skim coat, sanding to a glass finish |
For large patches, the first coat must be a setting-type compound like USG DuraBond 90. Because setting compounds undergo a chemical crystallization process rather than drying via evaporation, they do not shrink into the deep bevels of the patch seams. Applying a drying-type compound over a deep gap will result in severe shrinkage, requiring 3 to 4 additional coats to achieve a flat plane.
Common Failure Modes and Troubleshooting
Symptom: The Patch Edge is Telegraphing Through Paint
- Cause: The joint compound was not feathered wide enough, creating a convex bow. Alternatively, the patch paper was not sealed with a PVA primer, causing the drywall paper to absorb moisture from the paint and swell (blistering).
- Fix: A 12-inch hole requires a minimum 24-inch wide feathered edge (12 inches past the seam on both sides). Always prime the raw gypsum paper with a dedicated PVA drywall sealer before applying standard latex paint.
Symptom: Ridging or Peaking at the Seams
- Cause: Truss uplift or framing movement compressing the patch. This happens frequently on ceilings where the patch was tied only to backer boards and not to the actual structural trusses.
- Fix: For ceiling patches larger than 16 inches, always use the stud-to-stud (or joist-to-joist) method. Relying on floating backer boards on ceilings will almost guarantee ridging as the building settles and trusses flex under thermal loads.
Symptom: Joint Tape Blisters
- Cause: Insufficient joint compound under the paper tape, or using mesh tape with standard all-purpose mud (mesh requires setting-type mud due to its lack of tensile strength compared to paper).
- Fix: Use perforated paper tape embedded in a rich bed of setting-type compound. Squeeze out all air bubbles with a 6-inch taping knife held at a 45-degree angle, applying 15-20 lbs of pressure.
By treating a large drywall patch as a structural and code-compliant restoration project rather than a simple cosmetic fix, you ensure the wall maintains its original fire, acoustic, and load-bearing specifications for the lifespan of the building.