1/4 Inch Gypsum Board: The Ultimate Guide to Curved Walls & Overlays
Master 1/4 inch gypsum board installation for curved walls and overlays. Explore framing specs, bending techniques, and top product picks.

Technical Profile: 1/4 Inch Gypsum Board
Standard 1/2-inch drywall dominates residential construction, but 1/4 inch gypsum board fills a highly specialized niche. Engineered with a thinner, high-density gypsum core and specialized face papers, this panel weighs approximately 1.2 pounds per square foot—less than half the weight of standard 1/2-inch boards. Its primary utility lies in two distinct applications: creating architectural curves and overlaying damaged existing surfaces without the labor cost of demolition. According to the Gypsum Association GA-216 guidelines, 1/4-inch panels require strict adherence to framing tolerances and fastening schedules to prevent structural failure and surface telegraphing.
- Thickness: 1/4 inch (6.35 mm)
- Weight: ~38 lbs per sheet (1.2 lbs/sq ft)
- Core: Noncombustible aerated gypsum
- Edge Profile: Tapered for concealed joint finishing
- Fire Rating: Not rated for single-layer fire assemblies (Type X is unavailable in 1/4")
Primary Applications and Use Cases
1. Architectural Curves and Arches
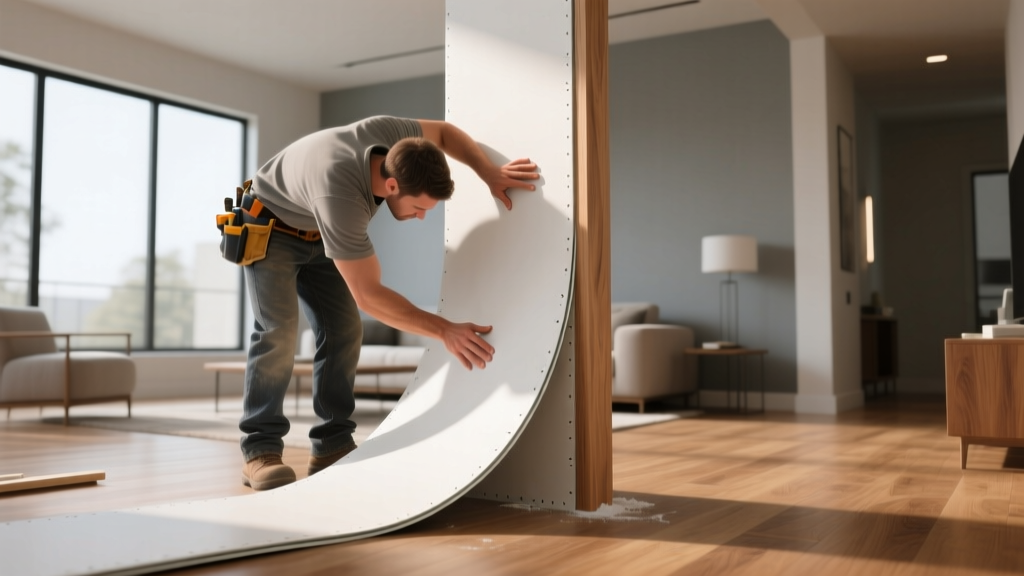
The reduced core thickness allows 1/4 inch gypsum board to flex around curved framing. While standard 1/2-inch drywall fractures when bent to a radius tighter than 10 feet, specialized 1/4-inch flexible panels can accommodate dry-bent radii down to 36 inches, and wet-bent or scored radii as tight as 12 inches. This makes it the mandatory choice for barrel vault ceilings, curved stairway bulkheads, and rounded wall transitions.
2. Skimming and Overlaying Existing Surfaces
When renovating older homes with cracked plaster-and-lath walls, removing the original substrate is expensive and creates hazardous dust. Installing 1/4 inch gypsum board directly over the existing plaster restores a flat, modern surface. Because it adds only 1/4 inch of depth, contractors avoid having to extend window jambs, door casings, and electrical boxes, which would be required if using 1/2-inch overlay board.
3. RV, Marine, and Mobile Home Retrofits
Weight restrictions in recreational vehicles and manufactured housing make standard drywall impractical. The 38-pound weight of a 4x8 1/4-inch sheet reduces the overall payload of an RV renovation significantly compared to 70-pound 1/2-inch sheets, while still providing a paintable, fire-resistant interior skin.
Top 1/4 Inch Gypsum Board Products Compared
Not all 1/4-inch panels are manufactured equally. Flexible variants feature a specialized fiberglass-reinforced face paper that resists tearing under tension during bending. Standard 1/4-inch boards are strictly for flat overlays.
| Product Model | Best Application | Min. Dry Bend Radius | Est. Cost (4x8 Sheet) |
|---|---|---|---|
| USG Sheetrock Flexible | Tight curves, arches, vaulted ceilings | 36 inches | $16.00 - $19.00 |
| GP ToughRock 1/4" Regular | Plaster overlays, flat wall skimming | Not recommended | $13.00 - $15.00 |
| CertainTeed 1/4" Regular | Budget-friendly overlay, RV cabinetry | Not recommended | $12.50 - $14.50 |
Framing Tolerances and Fastening Schedules
Because 1/4 inch gypsum board lacks the rigid core mass of thicker panels, any framing deviation greater than 1/8 inch will telegraph through the finished surface. Framing must be perfectly plumb and planar.
Maximum Framing Spacing
- Walls (Single Layer): 16 inches on-center (o.c.) maximum.
- Ceilings (Single Layer): 12 inches o.c. maximum. Note: Single-layer 1/4-inch ceiling applications are highly susceptible to sagging in humid environments. A double-layer application (1/4" over 1/2" base) is strongly recommended for ceilings.
- Curved Framing: Studs or furring strips must be spaced at a maximum of 6 inches o.c. to provide adequate backing for the bent panel edges and prevent rebound.
Fastener Specifications
Using standard 1-5/8-inch drywall screws will blow out the face paper and shatter the thin core. You must use shorter fasteners driven with a precisely adjusted dimpler.
- Wood Studs: 1-inch Type W (coarse-thread) drywall screws. Space 7 inches o.c. on edges and 8 inches o.c. in the field.
- Steel Studs (20-25 ga): 3/8-inch or 1/2-inch Type S-12 (fine-thread) drywall screws. Space 8 inches o.c. on edges and 12 inches o.c. in the field.
- Adhesive: For overlay applications, apply a continuous 3/8-inch bead of acoustical sealant or drywall adhesive to the existing substrate to eliminate hollow spots and reduce fastener popping.
Step-by-Step: Bending Techniques for Curved Walls
Executing a flawless curve requires selecting the correct bending method based on the required radius. Always install the panels with the long dimension perpendicular to the curved framing members.
- Dry Bending (Radii 36" and larger): Slowly push the USG Sheetrock Flexible panel against the curved studs. Have a second installer follow immediately behind, driving screws into every stud to lock the tension in place before the core snaps.
- Wet Bending (Radii down to 24"): Use a paint roller or sponge to lightly dampen both the face and back paper of the board. Do not soak the board; excess water will degrade the gypsum core. Allow the moisture to absorb for 45 to 60 minutes until the board becomes pliable, then bend and fasten.
- Scoring and Snapping (Radii down to 12"): Score the back paper and partway into the gypsum core every 2 inches along the length of the board using a utility knife. Snap the core at each score line, leaving the face paper intact to act as a hinge. Fasten the board to the curve, then apply a heavy layer of setting-type joint compound (like USG Durabond 90) over the entire scored back to restore structural rigidity.
- Rebound Cracking: Failing to fasten the panel within 3 minutes of bending allows the gypsum core to relax, causing joint compound to fracture along the stud lines.
- Moisture Degradation: Never use 1/4 inch gypsum board in wet areas (showers, tub surrounds). The thin core absorbs ambient moisture rapidly, leading to catastrophic sagging and mold growth. Use 1/2-inch glass-mat gypsum (e.g., DensShield) for wet-area curves instead.
- Screw Blowouts: If the screw head breaks the face paper, the holding power drops to zero. Move 2 inches away and drive a replacement screw.
Cost Breakdown and Material Yield
While the per-sheet cost of 1/4 inch gypsum board is lower than 1/2-inch or 5/8-inch variants, the total installed cost is often higher due to increased labor and finishing requirements.
- Material Cost: $13.00 to $19.00 per 4x8 sheet (approx. $0.40 to $0.60 per sq ft).
- Waste Factor: Calculate a 15% to 20% waste factor for curved installations due to off-cuts and breakage during bending, compared to the standard 10% for flat walls.
- Finishing Labor: Budget for an additional skim coat (Level 5 finish) over the entire surface. The thin face paper is highly susceptible to joint compound "photographing" and fuzzing if not sealed with a PVA drywall primer or a dedicated skim coat prior to painting.
- Fastener Cost: Shorter 1-inch and 3/8-inch screws cost roughly 15% more per pound than standard 1-5/8-inch screws, adding roughly $8 to $12 per 1,000 sq ft of coverage.
Expert FAQ
Can I use 1/4 inch gypsum board for a fire-rated wall assembly?
No. Type X fire-rated gypsum board is manufactured with glass fibers and is only available in 1/2-inch and 5/8-inch thicknesses. A single layer of 1/4-inch board provides negligible fire resistance and cannot be used to meet building code requirements for garage separations, furnace rooms, or multi-family demising walls.
How do I handle electrical boxes when overlaying plaster with 1/4-inch board?
You do not need to replace the boxes. Purchase 1/4-inch plastic electrical box extenders (often called "box rings" or "outlet shims"). Slide them over the existing devices to bring the face of the box flush with the new 1/4-inch drywall surface, ensuring compliance with NEC code regarding gaps around electrical receptacles.
Should I hang 1/4 inch board horizontally or vertically on flat walls?
For overlay applications, hang the panels horizontally. This staggers the horizontal butt joints and prevents continuous vertical seams that could align with underlying plaster cracks, minimizing the risk of reflective cracking through the new surface.
Written by
James ThorntonJames Thornton is a construction industry veteran with 25 years of hands-on experience in wood framing, lumber grading, and residential building codes. He started as a framing carpenter in rural Oregon, earned his ICC Residential Building Inspector certification, and eventually became a senior plan reviewer for the City of Portland Bureau of Development Services. James holds a B.S. in Wood Science & Technology from Oregon State University and is a certified lumber grader through the West Coast Lumber Inspection Bureau (WCLIB). He has inspected over 3,000 residential construction sites and authored the city's internal guide on advanced framing techniques (2x6 at 24" O.C.). James lives in Bend, OR, where he builds custom timber-frame cabins and competes in lumberjack sports.
More from James Thornton
View all
Insulation
Best Home Insulation Materials: Complete 2026 Guide
Compare top home insulation materials for 2026. Find R-values, installed costs per square foot, and best uses for fiberglass, spray foam, and mineral wool.
Aug 4, 2026

Sustainable Building
Certify Your Green Building Material for LEED and WELL
Step-by-step guide to certifying a green building material for LEED v5 and WELL v2. Master EPDs, HPDs, and VOC limits for 2026 project specifications.
Aug 4, 2026

Stone & Masonry
Veneer Stacked Stone Panels: Interior Design & Style Showcase
Discover how veneer stacked stone panels transform interiors. Explore modern design profiles, material pairings, and technical installation specs.
Aug 4, 2026