Troubleshooting Gypsum Board Expansion Joint Cracks & Failures
Learn how to diagnose and repair failing gypsum board expansion joints. Expert fixes for cracking, tearing, and ASTM C840 spacing violations.

The Physics of Drywall Movement and Joint Failure
A gypsum board expansion joint (often referred to interchangeably as a control joint or perimeter relief joint) is not a decorative reveal; it is a critical structural accommodation. Buildings shift. Thermal fluctuations, wind loads, seismic activity, and long-term concrete creep cause the underlying framing to deflect and twist. When a continuous plane of drywall exceeds its tensile capacity, it fractures. The expansion joint is engineered to be the weakest point in the assembly, forcing the building's kinetic energy to dissipate in a controlled, hidden, or easily repairable gap rather than spider-webbing across your Level 5 finish.
When these joints fail—manifesting as torn paper, popping beads, or parallel hairline fractures—the root cause is almost never the drywall panel itself. The failure lies in improper spacing, amateur taping attempts, or the use of rigid finishing compounds in high-deflection zones. Troubleshooting these failures requires a forensic approach to the framing below and the finishing materials above.
Diagnostic Matrix: Identifying the Root Cause of Failure
Before picking up a utility knife, you must accurately diagnose the failure mode. Misdiagnosing a structural deflection issue as a simple tape failure will result in a callback within six months. Use the matrix below to isolate the exact point of failure in your gypsum board expansion joint.
| Symptom | Probable Root Cause | Required Corrective Action |
|---|---|---|
| Hairline crack running perfectly parallel to the joint edge | Joint was improperly taped and mudded over by an inexperienced finisher, defeating its purpose. | Route out the compound, expose the gap, and apply an elastomeric sealant. Never tape an expansion joint. |
| Vinyl or metal bead popping loose from the drywall edge | Mechanical fasteners failed, or the bead was bedded in setting-type compound that shrank and pulled away from the flange. | Remove loose bead. Re-secure flanges with 1-inch drywall screws every 6 inches. Re-bed with flexible adhesive. |
| Diagonal tearing at the corners of ceiling grids or soffits | Missing perimeter relief joints where the ceiling plane intersects with rigid structural columns or shear walls. | Cut a new perimeter isolation joint using a router, install backer rod, and seal with high-elongation caulk. |
| Crushing or buckling of the vinyl joint insert | Joint was installed too tightly without the required 1/4-inch clearance for thermal expansion during a hot summer installation. | Trim the drywall edge to restore a minimum 3/8-inch gap. Replace the crushed vinyl insert with a new extrusion. |
Code Compliance: Are Your Joints Spaced Correctly?
Many repair failures stem from the fact that the original installation violated basic spacing codes. If the drywall plane is too vast, no amount of flexible sealant will save it from fracturing. According to ASTM C840 and the Gypsum Association GA-216 guidelines, expansion joints are strictly mandated in the following scenarios:
- Maximum Linear Distance: Control joints must be installed every 30 feet (9.1 meters) in either direction on walls and ceilings.
- Maximum Square Footage: Uninterrupted panel areas must not exceed 2,500 square feet.
- Changes in Framing: A joint is required wherever the framing material changes (e.g., transitioning from wood studs to structural steel).
- Structural Abutments: Joints must be placed where drywall abuts structural columns, shear walls, or elevator shafts that move independently of the light-frame partition.
- Ceiling Perimeters: Ceiling panels must have a perimeter relief joint (often a shadowline reveal) where they meet the wall, unless the walls are framed non-load-bearing and have clearance at the top track.
The 4-Step Repair Protocol for Compromised Expansion Joints
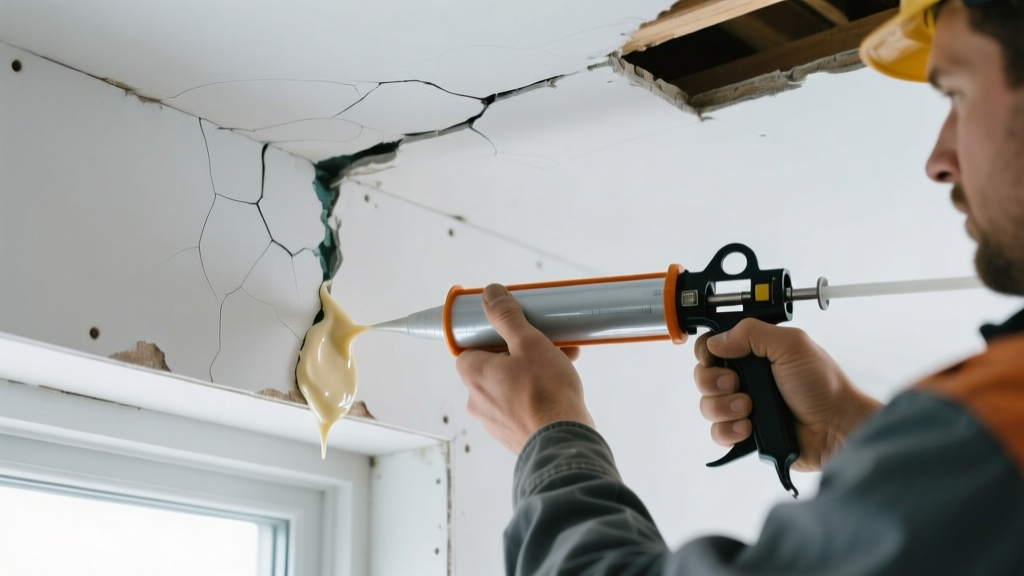
When an existing joint has failed—typically due to rigid compound bridging the gap or aged, brittle sealant tearing—you must execute a clean removal and flexible retrofit. Do not attempt to patch over the existing failure.
Step 1: Isolate and Route the Joint
Use a RotoZip or laminate trimmer equipped with a 1/4-inch V-groove drywall routing bit. Set the depth collar to exactly 5/8 inch (the thickness of standard fire-rated drywall) to avoid scoring the underlying steel studs or wood framing. Route out all hardened joint compound, paint, and old tape until you expose the raw gypsum core and a clean, uniform gap. Vacuum the joint thoroughly; dust will compromise the sealant bond.
Step 2: Prime the Exposed Gypsum Core
Raw gypsum is highly porous and will suck the moisture out of acrylic or polyurethane sealants, causing them to cure prematurely and lose elongation properties. Apply a coat of PVA primer or a specialized drywall sealer to the exposed routed edges. Allow it to dry completely (usually 45 to 60 minutes).
Step 3: Install Closed-Cell Backer Rod
For gaps wider than 1/4 inch, you must install a backer rod to create an hourglass sealant profile. This ensures the sealant adheres only to the two parallel sides of the joint (two-sided adhesion), allowing it to stretch. If it adheres to the bottom of the joint (three-sided adhesion), it will tear when the building moves. Use a 3/8-inch closed-cell polyethylene backer rod for a 1/4-inch to 1/2-inch gap. Push it in so it sits 1/4 inch below the finished surface.
Step 4: Apply Elastomeric Sealant
Do not use standard painter's caulk. You need a high-performance elastomeric sealant with a minimum elongation capacity of 25% to 50%. Products like OSI QUAD Max or Tremco Dymonic FC are industry standards. Apply a continuous bead, tool it smooth with a putty knife dipped in denatured alcohol, and allow it to cure for 7 to 10 days before applying any architectural coatings. Note that most elastomeric sealants cannot be sanded; your tooling must be flawless.
Material Selection: Vinyl vs. Metal vs. Flexible Sealant
When replacing a destroyed joint or retrofitting a missing one, selecting the right profile is critical for both aesthetics and performance. The USG Drywall Systems Construction Guide outlines several approaches depending on the architectural intent.
| Joint Type | Best Application | Pros & Cons |
|---|---|---|
| Vinyl Control Joint (e.g., USG Sheetrock Brand) | Standard commercial offices, hospitals, and residential garages where joints can be painted. | Pro: Cost-effective, easy to install, accepts paint well. Con: Can yellow under UV exposure; limited deflection capacity compared to metal. |
| Extruded Aluminum Reveal (e.g., Fry Reglet) | High-end commercial lobbies, modern retail, and areas requiring a crisp, architectural shadowline. | Pro: Extremely durable, creates a perfect shadowline, handles high lateral deflection. Con: Expensive, requires precise framing tolerances, difficult to retrofit. |
| Retrofit Flexible Sealant Joint | Repairing failed taped joints without removing large sections of drywall. | Pro: Fast, inexpensive, handles multi-directional movement. Con: Cannot be sanded flush; leaves a visible textured bead that must be painted carefully. |
Environmental Conditioning: The Hidden Culprit Behind Joint Failure
A frequently overlooked cause of gypsum board expansion joint failure is the timing of installation relative to the building's HVAC commissioning. If drywall is hung, taped, and finished in an unconditioned space during high-humidity summer months, the panels absorb ambient moisture and expand. Once the building's air conditioning is turned on and the interior dries out, the panels shrink violently. This shrinkage pulls the panels away from the control joints, tearing the paper facing or snapping the vinyl inserts.
The Gypsum Association strictly mandates that permanent environmental controls (HVAC) must be operational and maintaining a temperature between 55°F and 95°F for at least 48 hours prior to the application of joint compound, and continuously thereafter. Taping in unconditioned environments is the leading cause of catastrophic control joint separation.
When troubleshooting a widespread joint failure in a new construction project, always check the daily temperature and humidity logs from the general contractor during the finishing phase. If the environment was unconditioned, the repair protocol must include re-taping all standard butt joints and replacing all compromised expansion joint inserts, as the entire ceiling plane has likely shifted out of its original equilibrium.
Written by
James ThorntonJames Thornton is a construction industry veteran with 25 years of hands-on experience in wood framing, lumber grading, and residential building codes. He started as a framing carpenter in rural Oregon, earned his ICC Residential Building Inspector certification, and eventually became a senior plan reviewer for the City of Portland Bureau of Development Services. James holds a B.S. in Wood Science & Technology from Oregon State University and is a certified lumber grader through the West Coast Lumber Inspection Bureau (WCLIB). He has inspected over 3,000 residential construction sites and authored the city's internal guide on advanced framing techniques (2x6 at 24" O.C.). James lives in Bend, OR, where he builds custom timber-frame cabins and competes in lumberjack sports.
More from James Thornton
View all
Insulation
Best Home Insulation Materials: Complete 2026 Guide
Compare top home insulation materials for 2026. Find R-values, installed costs per square foot, and best uses for fiberglass, spray foam, and mineral wool.
Aug 4, 2026

Sustainable Building
Certify Your Green Building Material for LEED and WELL
Step-by-step guide to certifying a green building material for LEED v5 and WELL v2. Master EPDs, HPDs, and VOC limits for 2026 project specifications.
Aug 4, 2026

Stone & Masonry
Veneer Stacked Stone Panels: Interior Design & Style Showcase
Discover how veneer stacked stone panels transform interiors. Explore modern design profiles, material pairings, and technical installation specs.
Aug 4, 2026