#3 Steel Rebar Installation: Spacing, Tying, and Placement Guide
Master #3 steel rebar installation for concrete slabs. Learn exact spacing, tying techniques, lap splice lengths, and chair placement for Grade 60 reinforcement.
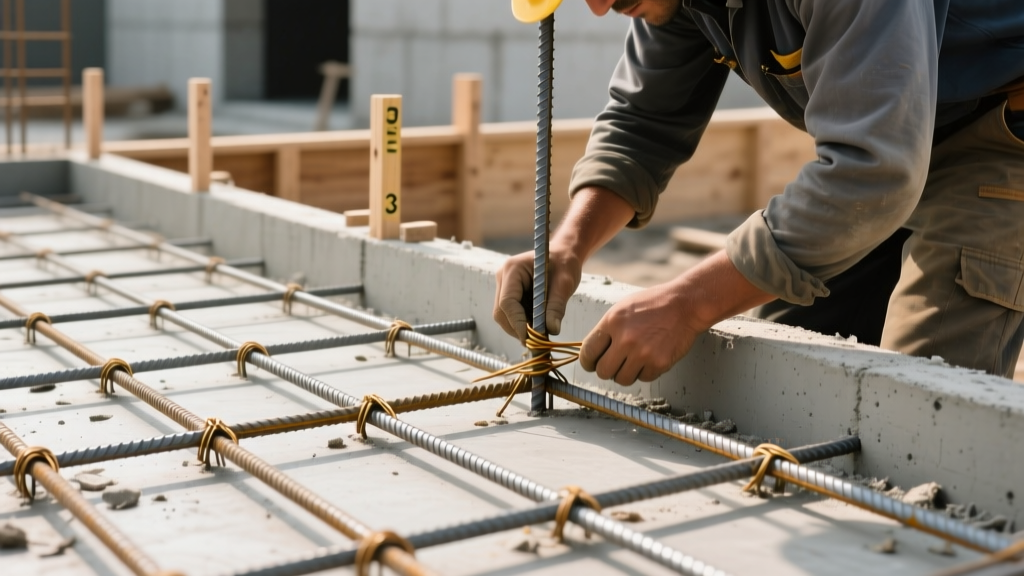
Material Specifications and Yield Strength
Number 3 steel rebar, universally designated as #3 rebar, is the foundational reinforcement for light-to-medium duty concrete flatwork. Measuring exactly 0.375 inches (3/8 inch) in nominal diameter, #3 rebar provides a cross-sectional area of 0.11 square inches and weighs 0.376 pounds per linear foot. In modern construction, Grade 60 (60,000 psi minimum yield strength) is the absolute standard for residential and commercial flatwork, offering the necessary tensile strength to prevent cracking in 4-inch to 6-inch concrete slabs.
Grid Layout and Spacing Matrices
The effectiveness of #3 rebar relies entirely on proper grid spacing relative to the slab thickness and anticipated load. Placing rebar too close together restricts concrete aggregate flow during the pour, while spacing it too far apart renders the steel structurally ineffective at controlling shrinkage and thermal cracking.
| Application Type | Slab Thickness | Recommended #3 Spacing (On Center) | Required Concrete Cover |
|---|---|---|---|
| Pedestrian Patios & Walkways | 4 inches | 24 inches | 1.5 inches |
| Residential Driveways (Light Vehicles) | 4 inches | 18 inches | 1.5 inches |
| Heavy Duty Driveways (RVs/Trucks) | 5 to 6 inches | 12 to 16 inches | 2.0 inches |
| Garage Floors | 4 to 5 inches | 16 inches | 1.5 inches |
Step-by-Step Placement and Tying Procedure
Executing a rigid, well-supported rebar mat is critical before the concrete truck arrives. Follow this precise sequence to ensure your #3 steel reinforcement survives the forces of the concrete pour without shifting.
- Prepare the Subgrade and Layout Perimeter: Ensure the compacted gravel base is level. Snap chalk lines on your formwork to mark the exact 12, 16, or 18-inch grid intervals. Do not rely on visual estimation.
- Deploy Concrete Chairs: Place heavy-duty plastic concrete chairs (such as York bar chairs or continuous high chairs) at every intersection of the chalk lines. For a 4-inch slab requiring 1.5 inches of bottom cover, use 2-inch chairs to account for slight subgrade irregularities.
- Lay the Primary Runners: Lay the first layer of #3 rebar (the "bottom" mat) across the chairs in one direction. Ensure the ends stop exactly 1.5 to 2 inches short of the wooden or metal forms to maintain edge cover.
- Lay the Cross Runners: Place the perpendicular #3 rebar on top of the first layer, creating the grid intersections.
- Tie the Intersections: Secure the grid using 16-gauge black annealed tie wire.
Field Tip: For standard #3 flatwork mats, use a snap tie at alternating intersections to save time. If the slab will experience heavy vibrator use during the pour, upgrade to a saddle tie at every intersection to prevent the mat from unzipping under vibration.
- Verify Elevation Before the Pour: Walk the perimeter and use a laser level or story pole to verify the top of the rebar grid is sitting exactly 2.5 inches above the subgrade (for a 4-inch slab with 1.5 inches of bottom cover).
Lap Splices and Development Lengths
Because #3 rebar is typically manufactured in 20-foot or 30-foot lengths, overlapping (lapping) the bars is mandatory for continuous spans. The American Concrete Institute (ACI) 318 building code strictly governs these overlaps.
For a standard #3 Grade 60 bar embedded in 3,000 psi concrete, the base tension development length ($l_d$) is approximately 12 inches. ACI mandates a Class B tension lap splice, which requires multiplying the development length by 1.3. This yields a mathematical minimum splice length of 15.6 inches. However, to account for field placement tolerances, mud accumulation, and minor cutting errors, the universal industry standard is to mandate a minimum 18-inch lap splice for all #3 rebar intersections. Always tie both ends of the lap splice securely with wire to prevent the overlapping bars from separating when the concrete vibrator is inserted nearby.
Troubleshooting Common Installation Failures
Even experienced crews make errors during rebar installation that compromise the structural integrity of the slab. Identify and correct these failure modes before the pour begins.
Rebar Sagging and "Mud Wads"
If concrete chairs are spaced too far apart (greater than 3 feet), the #3 rebar will sag under the weight of workers walking on the mat. When the concrete is poured, the sagging steel becomes encased in the lower third of the slab rather than the required mid-to-upper tension zone. Furthermore, if workers step on the rebar and push it into the wet mud or soft gravel subgrade, it creates a "mud wad" beneath the steel, eliminating the bottom cover entirely and inviting rapid corrosion. Fix: Use continuous high-chair supports for long spans and strictly enforce a "no walking on the tied mat" rule once the grid is complete.
Over-Tightening Tie Wire
Using heavy 14-gauge wire and twisting it with excessive force can actually bend #3 rebar out of alignment, creating localized stress points and altering the grid spacing. Fix: Stick to 16-gauge wire for #3 rebar and use a properly sized tie wire twister (rebar pliers). Twist only until the wire is snug and the tail is bent flat down toward the center of the slab to prevent it from protruding through the concrete surface and rusting.
2026 Material Cost and Sourcing
As of early 2026, the pricing for #3 Grade 60 steel rebar remains relatively stable, fluctuating based on regional freight costs and mill output. Contractors and owner-builders should budget based on the following current market averages:
- #3 Grade 60 Rebar (20-foot stick): $18.00 to $24.00 per piece (approx. $0.90 to $1.20 per linear foot).
- 16-Gauge Black Annealed Tie Wire (4 lb box): $22.00 to $28.00.
- Heavy-Duty Plastic Concrete Chairs (Bag of 100): $15.00 to $20.00.
- Rebar Tie Wire Twister (Pliers): $15.00 to $35.00 depending on the brand (e.g., Klein Tools or Channellock).
For large-scale projects exceeding 5,000 square feet, bypass big-box retail stores and source directly from regional rebar fabricators or specialized masonry supply houses. According to the Concrete Reinforcing Steel Institute (CRSI), purchasing pre-cut and bundled mats from a certified fabricator can reduce on-site labor costs by up to 30%, easily offsetting the slight premium in material delivery fees.