How to Install Steel Roof Panels: Pro Techniques & Tips
Master the installation of steel roof panels with our pro guide. Learn fastener placement, underlayment specs, and how to avoid common leak pitfalls.
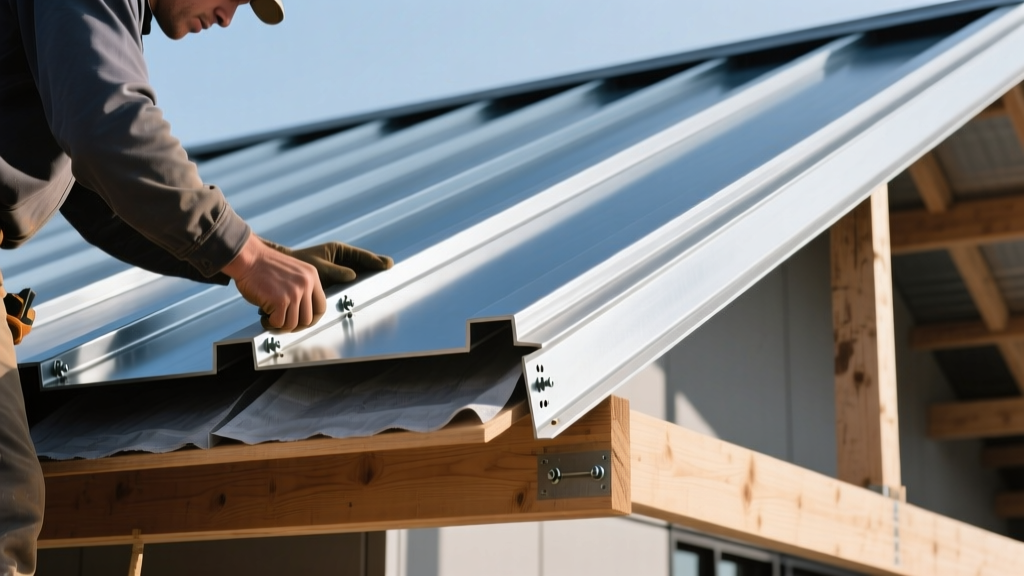
Pre-Installation: Deck Preparation and Underlayment Specs
The longevity of steel roof panels is entirely dependent on the substrate beneath them. Before unloading a single panel, verify the roof deck meets minimum structural deflection criteria (L/240 for live loads). For residential applications, 5/8-inch CDX plywood or OSB is the baseline; for commercial or agricultural structures, spaced purlins (typically 2x4 or 2x6 lumber spaced 24 inches on center) are standard.
Underlayment selection dictates secondary water shedding and condensation management. While 30-pound asphalt felt remains a code-minimum staple, synthetic underlayments (like GAF FeltBuster or Tyvek Protec) offer superior tear resistance during installation. In climates with heavy snow loads or ice damming, apply a self-adhering ice and water shield membrane along the eaves. The critical metric here is coverage: the membrane must extend a minimum of 24 inches past the interior heated wall line, not just the fascia edge.
Panel Profile Matrix: Exposed Fastener vs. Standing Seam
Choosing the correct profile dictates your slope requirements, fastening methodology, and budget. Below is a technical comparison of the two dominant steel roof panel systems used in 2026.
| Feature | Exposed Fastener (R-Panel / Corrugated) | Concealed Fastener (Standing Seam) |
|---|---|---|
| Minimum Slope | 3:12 (with sealed laps) | 1/4:12 (with factory-sealed seams) |
| Fastening System | Direct-to-deck #10 screws with EPDM washers | Sliding clips allowing thermal expansion |
| Thermal Movement | Restricted (risk of back-out) | Accommodated via clip travel |
| 2026 Installed Cost | $5.50 - $8.50 per sq. ft. | $11.00 - $18.00 per sq. ft. |
Step-by-Step Installation Procedure
Step 1: Drip Edge and Starter Trim
Install a heavy-gauge (minimum 26-gauge) steel drip edge along the eaves and rakes before laying the underlayment on the eaves, but over the underlayment on the rakes. Apply a continuous 1/4-inch bead of polyurethane sealant (such as Sikaflex-1A) beneath the drip edge flange to block wind-driven rain and capillary action.
Step 2: Laying the First Panel (The Critical Plumb Line)
The first panel dictates the squareness of the entire roof. Do not rely on the fascia or ridge for alignment. Snap a chalk line exactly 1.5 inches from the rake edge to account for the drip edge overhang and the rake trim flange. Lay the first panel so its leading edge aligns perfectly with this line. Overhang the eave by exactly 1 to 1.5 inches to ensure water drops clear of the fascia without causing capillary draw-back.
Step 3: Fastening Protocols and Torque Settings
For exposed fastener panels, use #10 x 1-inch or #10 x 1-1/2-inch pancake-head woodgrip screws featuring a bonded EPDM/neoprene washer. The tool of choice is a variable-torque drill with a 1/4-inch hex driver bit equipped with a depth-sensing nose piece.
- Eaves and Ridges: Drive a fastener in every single corrugation valley to secure against wind uplift.
- Field of the Roof: Fasten every other corrugation valley, spacing rows 12 to 24 inches apart depending on local wind load engineering requirements.
- Torque Target: The washer should be compressed flush with the metal, forming a slight bead of sealant around the edge. Overdriving spins the washer and breaks the bond; underdriving leaves a gap for water ingress.
Flashing, Ridges, and Penetrations
Water management at transitions is where 90% of metal roof leaks originate. For end laps (where two panels meet vertically), maintain a minimum 6-inch overlap for slopes 4:12 and greater, and a 12-inch overlap for lower slopes. Sandwich a strip of high-solids butyl sealant tape between the laps before driving the lap screws.
For pipe penetrations, avoid standard rubber pipe boots which degrade under UV exposure. Instead, use molded EPDM boots with a stainless steel compression ring, or preferably, fabricate a custom steel pitch pan flashed into the panel ribs. According to the National Roofing Contractors Association (NRCA), all penetration flashings must be integrated with the panel ribs, not just surface-sealed to the flat pans.
Common Failure Modes and Troubleshooting
Even with premium materials, improper technique leads to systemic failures. Reference this troubleshooting matrix if you encounter field issues:
| Failure Mode | Root Cause | Correction Protocol |
|---|---|---|
| Oil Canning (visible ripples) | Panels fastened too tightly restricting thermal expansion, or uneven decking. | Use slotted fastener holes; ensure decking is planar within 1/4 inch over 10 feet. |
| Fastener Back-Out | Thermal cycling causes panels to expand/contract, walking the screws out of the wood deck. | Switch to standing seam with sliding clips, or use larger diameter (#12) screws for re-fastening. |
| Galvanic Corrosion | Mixing dissimilar metals (e.g., copper flashing or untreated aluminum gutters touching steel). | Isolate metals using 30-mil peel-and-stick membranes or specify color-matched steel flashings. |
| Capillary Draw | Water wicking upward against gravity in unsealed side laps or eave overhangs. | Apply butyl tape in side laps; install closure strips at the eave to block the corrugation voids. |
Adhering to the technical guidelines published by the Metal Construction Association (MCA) ensures that your installation transcends basic code minimums. By respecting thermal dynamics, utilizing correct sealant chemistries, and maintaining rigorous alignment tolerances, a steel roof installation will reliably protect the structure for 40 to 60 years without major intervention.