The Complete Maintenance and Cleaning Playbook for 1x2 Lumber
Master the maintenance, cleaning, and restoration of 1x2 lumber. Learn expert playbooks for interior trim, exterior battens, and workshop jigs.
Understanding the Structural Vulnerabilities of 1x2 Lumber
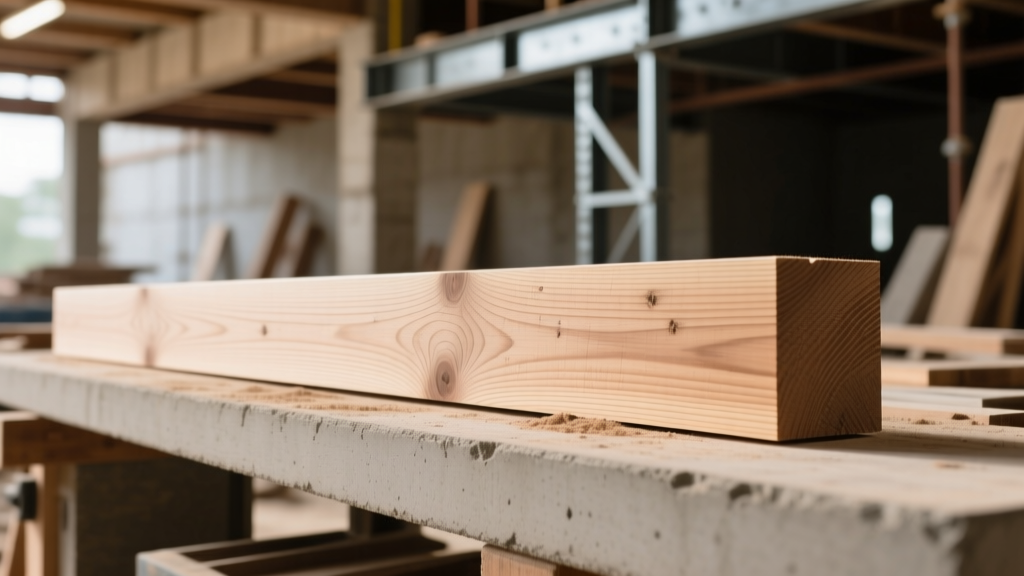
Before applying any cleaning solvents or protective finishes, it is critical to understand the physical realities of 1x2 lumber. While nominally referred to as '1x2', the actual milled dimensions of this profile are 3/4 inch thick by 1 1/2 inches wide. This high surface-area-to-volume ratio makes 1x2 stock uniquely susceptible to rapid moisture exchange, leading to cupping, twisting, and checking far faster than heavier dimensional lumber like 2x4s or 2x6s.
According to the USDA Forest Products Laboratory Wood Handbook, thin-profile wood members experience dimensional movement primarily across the grain (tangential and radial shrinkage). Because a 1x2 is only 3/4 inch thick, any moisture gradient between the face and the back will immediately result in visible cupping. Therefore, maintenance playbooks for 1x2 lumber must prioritize moisture equilibrium and UV protection above simple aesthetics.
Playbook 1: Interior Trim, Casing, and Molding
Interior 1x2 lumber is predominantly used for shadow lines, picture rail molding, and craftsman-style casing. The primary maintenance challenges here are dust accumulation in routed profiles, scuff marks from foot traffic or furniture, and the yellowing of older oil-based polyurethanes.
Routine and Deep Cleaning Protocols
- Dry Extraction (Weekly): Use a horsehair bristle brush attached to a HEPA vacuum. Horsehair is soft enough to prevent micro-scratches on satin and matte polyurethane finishes while effectively pulling dust from tight 1x2 routed grooves.
- Damp Wiping (Monthly): Mix a pH-neutral wood cleaner (such as Bona Hardwood Floor Cleaner or a dedicated trim soap) with distilled water. Avoid tap water, as dissolved minerals can leave a white, chalky residue on dark-stained 1x2 baseboards. Apply with a microfiber cloth wrung out until nearly dry.
- Scuff Removal (As Needed): For painted 1x2 trim (typically MDF or finger-jointed pine), use a melamine sponge (Magic Eraser) dampened with water. Apply less than 1 pound of pressure to avoid burning through the topcoat. For clear-coated natural wood, use a #0000 steel wool pad lubricated with paste wax to gently buff out surface scuffs without cutting through the finish.
Refinishing and Cost Expectations
When the finish on interior 1x2 trim fails, expect to spend between $1.50 and $3.00 per linear foot for professional sanding and refinishing, or roughly $0.45 per linear foot for DIY materials. Always degloss the existing finish with a liquid sanding solution (like Savogran Liquid Sandpaper) rather than mechanical sanding, which can easily round over the crisp 3/4-inch edges of the 1x2 profile.
Playbook 2: Exterior Battens, Furring, and Siding Accents
Exterior 1x2 lumber faces severe environmental stressors. Used commonly as board-and-batten accents, furring strips for rain screens, and pergola slats, these thin boards require rigorous moisture management. The American Wood Protection Association (AWPA) establishes strict standards for preservative penetration in exterior wood, which directly dictates your maintenance schedule.
Species-Specific Maintenance Matrix
Not all 1x2 exterior lumber is created equal. The maintenance cycle changes drastically based on the species and treatment type selected during installation.
| 1x2 Wood Species / Type | Primary Vulnerability | Recommended Cleaning Agent | Protective Coating & Reapplication Cycle | Est. Maintenance Cost (per LF) |
|---|---|---|---|---|
| Western Red Cedar | UV graying, extractive bleeding | Oxalic acid-based brightener (e.g., Cabot Problem-Solver) | Penetrating alkyd oil (Penofin); 2-3 years | $0.85 - $1.10 |
| Pressure-Treated Pine | Checking, warping, copper leaching | Mild oxygen bleach (Stain Solver) | Semi-transparent acrylic (Defy Extreme); 3-4 years | $0.60 - $0.90 |
| Coastal Redwood | Tannin staining, fungal decay | TSP-PF (Phosphate-free trisodium phosphate) | Film-forming water repellent; 1-2 years | $1.20 - $1.50 |
Playbook 3: Workshop Jigs, Fences, and Template Strips
Woodworkers frequently rip down 1x2 lumber to create zero-clearance inserts, crosscut sled fences, and routing templates. These functional pieces accumulate pitch, resin, and sawdust, which increases friction and ruins cut accuracy. Furthermore, metal fasteners used in jigs can cause localized iron-tannin reactions in oak or cherry 1x2s, resulting in permanent black stains.
The Pitch and Reson Removal Protocol
- Solvent Selection: Avoid harsh caustics like oven cleaner, which will break down the lignin in the 1x2 and cause the surface to become fuzzy and porous. Instead, use a dedicated blade and tool cleaner like CMT Formula 2050 or a diluted solution of Simple Green (1 part cleaner to 4 parts water).
- Application: Spray the solvent onto the 1x2 jig surface and allow a 3-minute dwell time. Do not let the solvent dry on the wood.
- Agitation: Scrub with a stiff nylon brush (never brass or steel wire, which will embed metal particles into the wood grain and cause rust spots later).
- Neutralization and Sealing: Wipe clean with a damp rag, dry immediately with compressed air, and apply a dry lubricant like TopSlick or paste wax to reduce friction for the next use.
Troubleshooting Common 1x2 Dimensional Failures
Because of its thin 3/4-inch cross-section, 1x2 lumber exhibits specific failure modes that require targeted interventions rather than general woodworking fixes.
Diagnostic Guide: Cupping and Twisting
Symptom: The 1 1/2-inch face of the 1x2 bows inward, pulling away from the substrate or framing.
Cause: Moisture differential. The exposed face dries and shrinks faster than the concealed back face.
Fix: For interior trim, remove the piece, mist the concave side with water, and stack weight on it for 48 hours to reverse the cup. Reinstall using 18-gauge brad nails placed no more than 8 inches apart, paired with a bead of flexible construction adhesive (like Liquid Nails Fuze*It) to mechanically force the board flat against the substrate.
Diagnostic Guide: Splitting at Fastener Points
Symptom: Hairline fractures radiate from nail or screw heads, particularly near the ends of the 1x2.
Cause: Wedging action from blunt fasteners or lack of pre-drilling in dense species like poplar or hardwood 1x2s.
Fix: Blunt the tips of your nails slightly with a hammer before driving them; this shears the wood fibers rather than wedging them apart. For screws, always pre-drill a pilot hole matching the shank diameter and a clearance hole for the threads. If splitting has already occurred, inject a low-viscosity cyanoacrylate (CA glue) into the crack, clamp it, and sand flush once cured.
Diagnostic Guide: Finish Delamination on Exterior Battens
Symptom: Paint or solid-color stain peels off in large, leathery sheets from exterior 1x2 battens.
Cause: Trapped moisture vapor trying to escape through a non-breathable film-forming topcoat, or failure to prime the end grain during installation.
Fix: Scrape all failing finish down to bare wood. Treat the bare wood with a borate-based fungicide to kill any surface mold. Prime with an oil-based, stain-blocking primer (such as Zinsser Cover Stain) that penetrates the wood fibers, and topcoat with a 100% acrylic exterior paint that allows water vapor transmission.