Top Types of Wood for Desks: Built-In Installation Guide
Compare the best types of wood for desks and master built-in installation. Learn structural support, moisture acclimation, and routing techniques.

Wood Selection Matrix for Built-In and Floating Desks
Selecting the right material for a built-in or floating desk requires balancing surface durability, dimensional stability, and structural load capacity. When evaluating types of wood for desks, installers must account for how the material will react to cantilevered weight and seasonal humidity shifts. Solid hardwoods offer unmatched edge durability but require specialized mounting to accommodate cross-grain movement, while engineered cores provide rigid stability for long, unsupported spans.
| Wood Species | Janka Hardness (lbf) | Tangential Shrinkage | 2026 Avg. Cost (per BF) | Best Installation Application |
|---|---|---|---|---|
| Hard Maple | 1,450 | 9.9% | $8.50 - $11.00 | High-traffic commercial built-ins |
| White Oak | 1,360 | 10.5% | $9.00 - $13.00 | Waterfall edges, heavy monitor arms |
| Black Walnut | 1,010 | 9.2% | $14.00 - $18.50 | Executive floating desks, premium finishes |
| Cherry | 950 | 9.2% | $10.00 - $14.00 | Traditional millwork, stain-grade cabinetry |
| Baltic Birch Plywood | N/A (Core) | ~2.0% | $130 - $160 (4x8 Sheet) | Long-span floating desks, torsion boxes |
According to the Janka Hardness Scale, Hard Maple and White Oak provide the necessary dent resistance for heavy office equipment and monitor arms. However, for spans exceeding 48 inches without vertical leg support, solid hardwood is prone to sagging. In these scenarios, a torsion box constructed from 3/4-inch Baltic Birch plywood with a 1/8-inch hardwood veneer is the superior structural choice.
Moisture Content and Acclimation Protocols
The most common cause of built-in desk failure is installing wood that has not reached Equilibrium Moisture Content (EMC) with the interior environment. Solid wood installed at 12% moisture content in a climate-controlled home (typically 35-45% relative humidity) will shrink, potentially tearing fasteners from the wall or cracking the finish.
Acclimation Step-by-Step
- Delivery: Move the lumber or fabricated slab into the installation room at least 14 days prior to mounting.
- Sticker the Wood: Place 3/4-inch thick wooden stickers between boards or slabs to allow air circulation on all faces.
- Climate Control: Ensure the HVAC system is operational and set to the standard living temperature (68°F–72°F).
- Verification: Use a pin-type moisture meter (such as the Wagner Meters Orion 910) to test the center and edges of the slab. Proceed only when readings consistently fall between 6.0% and 8.0%.
Structural Mounting: Solid Hardwood vs. Engineered Core
The installation methodology changes entirely depending on whether you are mounting solid wood or plywood. Solid wood expands and contracts across the grain (tangentially and radially), meaning a 30-inch deep White Oak desk top can easily expand or contract by 1/8 to 1/4 inch across its width between summer and winter. If rigidly bolted to a wall cleat, this movement will cause the wood to split.
Accommodating Wood Movement in Solid Slabs
When mounting solid hardwood types of wood for desks to a wall cleat or concealed bracket system, the fastening holes in the wood must be slotted, not round. Use a router with a 1/2-inch straight bit to elongate the clearance holes to 1 inch. This allows the wood to slide laterally over the lag screws or steel brackets as it expands and contracts. Always use a fender washer between the screw head and the wood to distribute the clamping force without restricting the slide.
Concealed Steel Bracket Routing
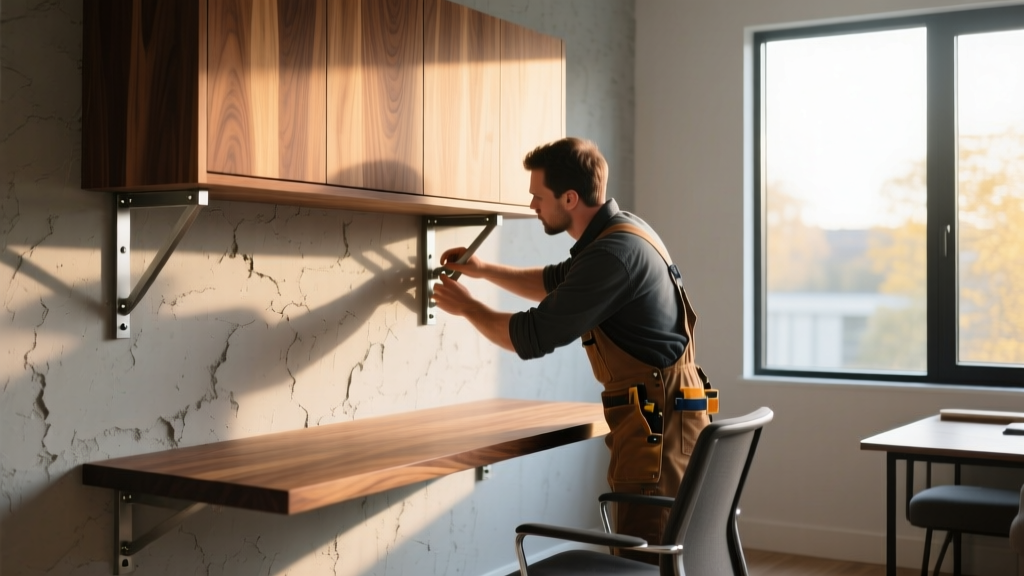
For floating desks, 1/2-inch or 3/4-inch solid steel rods or fabricated flat-steel brackets are required. The routing process demands extreme precision to prevent the desk from sloping downward under load.
- Drill Bit Selection: Use a 5/8-inch Forstner bit for a 1/2-inch steel rod. The 1/16-inch clearance allows for structural epoxy and minor alignment adjustments.
- Drilling Depth: The bore hole must be at least 2/3 the depth of the desk surface. For a standard 24-inch deep desk, the rod should penetrate 16 inches into the wood, leaving 8 inches embedded in the wall studs.
- Wall Embedment: Brackets must anchor directly into the center of 2x4 or 2x6 wall studs. Drywall anchors or toggle bolts will fail catastrophically under the sheer force of a cantilevered desk. Use 3/8-inch structural lag screws (e.g., Simpson Strong-Tie SDWS) driven 3 inches into the stud core.
- Epoxy Injection: Inject System Three Gel Magic or a high-viscosity structural epoxy into the wood bore hole before inserting the steel rod. This bonds the steel to the end-grain and prevents the rod from working loose over time.
Edge Profiling and Joinery for Desk Surfaces
The edge profile of a desk dictates both its ergonomic comfort and its structural integrity. When working with Baltic Birch plywood, the exposed plies can be embraced as a design feature, sanded to 320 grit, and sealed with a clear hardwax oil. Alternatively, installers can apply a solid hardwood edge banding using a tongue-and-groove router bit set.
Standard Ergonomic Dimensions (2026 ANSI/BIFMA Standards)
- Standard Desk Height: 29.0 to 30.0 inches from finished floor.
- Minimum Knee Clearance (Depth): 24.0 inches (critical for built-in cabinetry).
- Minimum Knee Clearance (Width): 20.0 inches.
- Overhang for Seating: Minimum 1.5 inches past the drawer bank or vertical support to prevent knee impact.
For solid slab desks, a 1/8-inch roundover or a 15-degree micro-bevel on the bottom edge is highly recommended. A sharp 90-degree edge on hardwoods like Maple will dent easily from belt buckles and chair armrests, and it creates an uncomfortable pressure point against the user's forearms during extended typing sessions.
On-Site Finishing vs. Shop Pre-Finishing
The installation environment dictates the finishing strategy. Pre-finishing a large built-in desk in a controlled shop environment yields a superior, dust-free result, but it complicates the installation phase. Scribing a pre-finished desk to an out-of-plumb wall requires sanding and touch-ups that can compromise the factory finish.
The Hardwax Oil Advantage for Installers
For built-in installations where final scribing and routing must happen on-site, two-component hardwax oils (such as Rubio Monocoat 2C or Osmo Polyx-Oil) are the optimal choice. Unlike polyurethane, which forms a brittle surface film that requires complete stripping to repair, hardwax oils penetrate the wood fibers and cure to a matte, renewable surface.
If the installer accidentally dents the surface with a level or clamps during the bracket mounting process, the damage can be spot-repaired. Simply sand the affected 3-inch area with 120-grit followed by 220-grit sandpaper, wipe with mineral spirits, and apply a localized coat of the hardwax oil. The repair will blend seamlessly into the surrounding surface, a critical advantage when working with unforgiving materials like Black Walnut or Cherry on a job site.
Written by
David NakamuraDavid Nakamura is a licensed architect (AIA) and construction technology writer focused on sustainable building methods, mass timber engineering, and high-performance building envelopes. He holds a Master of Architecture from the University of Washington and is a certified Passive House Consultant (CPHC). David spent eight years at the Seattle firm Mithun, where he led the design of three LEED Platinum projects, before founding his own practice specializing in net-zero residential design. He serves on the editorial advisory board of GreenBuilder Magazine and has authored peer-reviewed papers on cross-laminated timber (CLT) connections for the Journal of Structural Engineering. In his spare time, David teaches woodworking at Pratt Fine Arts Center and kayaks the Puget Sound.
More from David Nakamura
View all
Construction Cost
Labor Cost to Build a Deck Per Sq Ft: 2026 Installation Guide
Discover the exact labor cost to build a deck per sq ft in 2026. This installation guide breaks down contractor rates, complexity factors, and hidden fees.
Aug 4, 2026

Construction Cost
How Much Does It Cost to Build a 3 Bedroom House? Financing Guide
Learn exactly how much it costs to build a 3 bedroom house and explore 2026 financing options, construction loan types, and budget frameworks for your build.
Aug 4, 2026

Construction Cost
Cost to Build a Tennis Court: 2026 Guide
How much does it cost to build a tennis court in 2026? Breakdowns for asphalt, concrete, and synthetic surfaces plus fencing and lighting.
Jul 30, 2026