How to Install Different Types of Wood: Flooring Best Practices
Master the installation of different types of wood with expert best practices for acclimation, fastening, and moisture management in flooring and framing.

The Physics of Wood: Moisture and Movement
Wood is a hygroscopic material, meaning it continuously exchanges moisture with its surrounding environment until it reaches Equilibrium Moisture Content (EMC). When installing different types of wood, failing to account for this physical property is the primary cause of catastrophic installation failures, including cupping, crowning, and severe gapping. According to the USDA Forest Products Laboratory, wood dimensions change significantly across the tangential and radial planes, but minimally along the longitudinal grain. Therefore, installation best practices must focus entirely on managing transverse movement.
Acclimation Protocols by Wood Category
Acclimation is not merely 'letting the wood sit in the room.' It is the active process of aligning the wood's moisture content (MC) with the expected in-use environmental conditions. The National Wood Flooring Association (NWFA) mandates that the HVAC system must be fully operational and maintaining normal living conditions (typically 60°F–80°F and 30%–50% relative humidity) for at least 5 days prior to delivery.
| Wood Type | Target MC Range | Minimum Acclimation Time | Subfloor MC Differential Limit |
|---|---|---|---|
| Solid Strip (e.g., 2 1/4" Red Oak) | 6% – 9% | 7 – 10 Days | ≤ 2% (Subfloor to Wood) |
| Solid Wide Plank (e.g., 7" Walnut) | 6% – 9% | 10 – 14 Days | ≤ 2% (Subfloor to Wood) |
| Engineered Hardwood | 6% – 9% | 48 – 72 Hours | ≤ 4% (Subfloor to Wood) |
| Dense Tropical (e.g., Ipe, Cumaru) | 8% – 12% | 14 – 21 Days | ≤ 2% (Subfloor to Wood) |
Use a pinless moisture meter (such as the Wagner Meters Orion 910 or Lignomat SCM) to test at least 40 boards per 1,000 square feet, and test the subfloor in at least 20 locations. Document these readings on the subfloor itself with a marker before installation begins.
Fastening and Joinery: Matching the Method to the Material
The mechanical connection between the wood and the subfloor must accommodate seasonal movement while preventing vertical deflection. Different types of wood require vastly different fastening approaches due to variations in Janka hardness and shear strength.
Solid Hardwood (Mechanical Fastening)
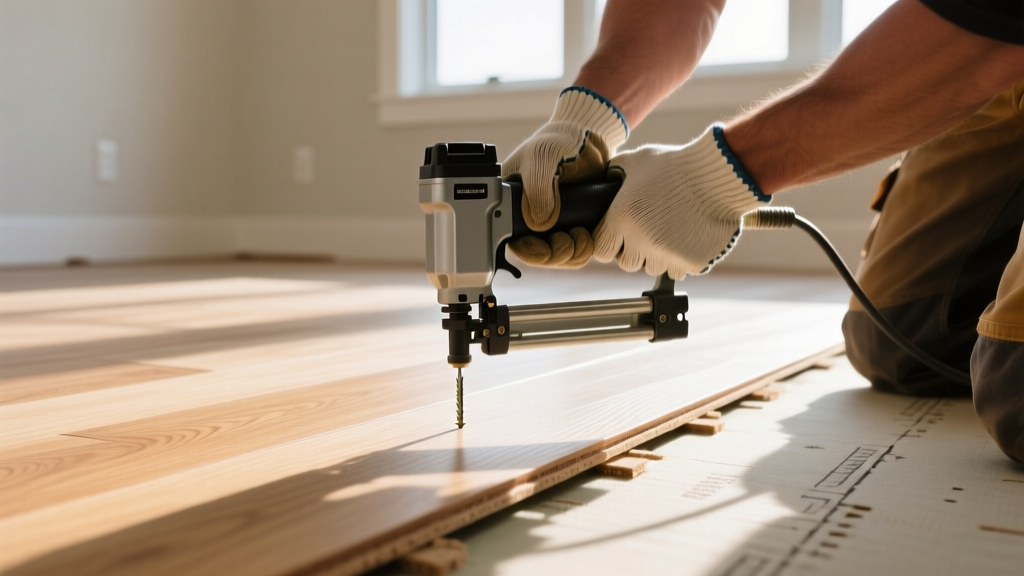
For standard 3/4-inch solid hardwood, blind-nailing or stapling is the industry standard.
- Fastener Type: 15.5-gauge staples or 16-gauge L-cleats. Cleats generally provide better holding power in dense species and reduce the risk of tongue splitting compared to staples.
- Spacing: Fasten every 8 to 10 inches along the board length, and within 1 to 3 inches of the board ends.
- Pressure: Calibrate your pneumatic compressor to 70–90 PSI. Too high will damage the tongue; too low will leave the fastener proud, causing squeaks.
Engineered Wood (Adhesive and Mechanical Hybrid)
Engineered wood is highly dimensionally stable, allowing for wider planks and glue-down installations over concrete slabs.
- Adhesive Selection: Use a high-quality urethane or silane-modified polymer (SMP) adhesive (e.g., Bona K800 or Mapei Ultrabond ECO 995). These adhesives remain slightly elastomeric, allowing the wood to expand and contract without breaking the bond.
- Trowel Size: Strictly follow the manufacturer's trowel specification. A common requirement is a 3/16" x 5/32" V-notch trowel. Using the wrong trowel starves the joint of adhesive, leading to hollow spots and hollow-sounding floors.
- Rolling: Immediately after laying the planks into the wet adhesive, roll the floor with a 100-lb to 150-lb three-section floor roller to ensure full contact and proper ridge collapse.
Dense Tropical Exotics (Pre-Drilling and Screwing)
Woods like Ipe (Janka hardness ~3,680 lbf) and Cumaru are too dense for standard pneumatic nails, which will simply bend or shatter the wood tongue.
- Pre-Drilling: You must pre-drill both the subfloor and the wood using carbide-tipped drill bits. Standard HSS bits will dull after a dozen holes.
- Fasteners: Use 304 or 316 stainless steel trim-head screws (such as Simpson Strong-Tie Headcote). Carbon steel or galvanized screws will react with the high tannin and oil content in tropical woods, causing severe black staining around the fastener head.
Expansion Gap Requirements and Edge Detailing
Wood expands primarily across its width. When installing different types of wood, the expansion gap at the perimeter is non-negotiable. If the wood expands and hits the drywall or framing, it will buckle upward (tenting).
Standard Perimeter Gap Specifications:
- Standard Strip (Under 3"): 1/2-inch gap at all vertical obstructions (walls, pipes, cabinets).
- Wide Plank (3" to 7"): 5/8-inch to 3/4-inch gap at all vertical obstructions.
- Doorways and Transitions: Always install a T-molding or threshold break at doorways between rooms. Do not run continuous wood through narrow doorways, as the differential movement between the two rooms' microclimates will cause a shear failure at the doorway.
Troubleshooting Common Installation Failures
Even with meticulous planning, environmental shifts can cause issues. Here is a diagnostic framework for the most common post-installation defects.
Symptom: Cupping (Edges are higher than the center of the board)
- Cause: A moisture differential where the bottom of the board is significantly wetter than the top. This is almost always caused by a subfloor moisture issue (e.g., a damp crawlspace, missing vapor retarder, or a plumbing leak) rather than surface spills.
- Fix: Do NOT sand the floor immediately; sanding cupped wood will result in crowning once the moisture equalizes. First, identify and eliminate the moisture source. Run commercial dehumidifiers until the MC stabilizes across the board's thickness. Only sand flat after the wood has fully stabilized, which may take several months.
Symptom: Severe Gapping (Wide spaces between boards in winter)
- Cause: The ambient relative humidity has dropped below 25%, typically due to aggressive forced-air heating systems in winter without supplemental humidification.
- Fix: This is an environmental issue, not an installation defect. The homeowner must install a whole-home humidifier or use portable units to maintain indoor RH between 35% and 45% year-round. Filling gaps with wood filler is a mistake; the wood will expand in summer and crush the filler, pushing it out and damaging the finish.
Symptom: Squeaking and Popping under Foot Traffic
- Cause: Vertical deflection. The subfloor is moving independently of the wood flooring, or the fasteners have lost their grip due to subfloor deflection exceeding the L/360 code requirement.
- Fix: For localized squeaks over joists, drive 2-inch trim-head screws through the surface (if solid wood) or use specialized breakaway squeak-relief brackets from below the subfloor. If the squeaking is widespread, the subfloor likely lacks adequate blocking or adhesive between the subfloor panels and the joists, requiring structural reinforcement from below.
Expert Summary
Successfully installing different types of wood requires abandoning a one-size-fits-all mentality. Solid strip oak, wide-plank engineered maple, and dense tropical Ipe all demand unique acclimation timelines, specific fastener metallurgies, and precise expansion allowances. By strictly adhering to subfloor flatness tolerances, verifying moisture differentials with pinless meters, and utilizing the correct elastomeric adhesives or stainless steel fasteners, contractors can eliminate the vast majority of post-installation callbacks and ensure a floor that performs flawlessly for decades.
Written by
Priya KapoorPriya Kapoor is a real estate market analyst and construction economics researcher with expertise in housing affordability, development feasibility, and infrastructure investment. She holds a Master of Regional Planning from Cornell University and previously worked as a senior analyst at CBRE's Investment Properties group, where she modeled returns for $4B in mixed-use development pipelines. Priya now runs an independent research practice advising developers, municipalities, and REITs on construction cost forecasting and market timing. She publishes the quarterly "BuildMat Market Pulse" report tracking material price indices across 12 commodity categories. Based in Austin, TX, Priya serves on the board of Habitat for Humanity Austin and is a marathon runner.
More from Priya Kapoor
View all
Construction Cost
Cost to Build a 1600 Sq Ft Home in 2026: Full Breakdown
Accurate 2026 cost to build a 1600 sq ft home—material, labor, and regional pricing breakdowns included. Plan your budget with real-time estimates.
Aug 11, 2026

Wood & Lumber
Name the Types of Wood for Pressure Treatment and Preservation
Learn how to name the types of wood best suited for pressure treatment. Compare species treatability, chemical retention levels, and 2026 preservation costs.
Aug 4, 2026

Stone & Masonry
Stone Veneer Suppliers Lindenhurst: 2026 Cost Analysis
Analyze 2026 stone veneer costs in Lindenhurst, NY. Compare local supplier pricing, delivery fees, and Suffolk County installation labor rates.
Aug 4, 2026