How to Install Different Types of Wood Molding Like a Pro
Master the installation of all types of wood molding. Learn pro techniques for coping, mitering, and fastening crown, base, and casing trim.

The Hierarchy of Trim: Matching Wood Species to Molding Types
Selecting the correct material is the first critical step when evaluating the various types of wood molding for a project. The substrate dictates the cutting technique, fastening protocol, and final finish. While medium-density fiberboard (MDF) has captured significant market share due to its low cost and lack of knots, solid wood remains the standard for high-end, stain-grade applications and environments subject to physical impact or moisture.
| Material Type | Best Application | Avg. Cost (per linear ft) | Workability & Fastening Notes |
|---|---|---|---|
| MDF (Paint-Grade) | Dry areas, crown, tall baseboards | $1.00 - $2.20 | Cuts cleanly but dulls blades. Swells if exposed to water. Requires wood glue at all joints. |
| Pine (Stain/Paint) | Baseboards, casing, rustic trim | $1.50 - $3.50 | Prone to warping. Sap bleed-through requires shellac-based primer. Pre-drill near ends to prevent splitting. |
| Poplar (Paint-Grade) | Painted casing, crown, chair rail | $2.50 - $4.50 | Excellent stability. Holds sharp routed profiles. Paints beautifully but stains unevenly due to mineral streaks. |
| Oak/Maple (Stain-Grade) | High-end casing, base, stair parts | $4.00 - $8.50+ | Extremely hard. Mandatory pre-drilling for all fasteners. Burns easily if router bits or saw blades are dull. |
Never install standard MDF baseboard or shoe molding in full bathrooms, mudrooms, or laundry areas. Even minor condensation or wet mopping will cause the bottom edge to wick moisture, swell, and crumble. Use solid poplar or PVC trim in these zones.
Acclimation and Moisture Management
Wood is hygroscopic; it absorbs and releases moisture based on the ambient relative humidity (RH). Installing types of wood molding without proper acclimation guarantees joint separation and nail pops. According to the U.S. Forest Service Forest Products Laboratory, wood dimensional change occurs primarily across the grain (tangential and radial), meaning width and thickness will fluctuate while length remains virtually unchanged.
To mitigate this, deliver all solid wood trim to the job site and let it acclimate for a minimum of 48 to 72 hours in the room where it will be installed. The HVAC system must be operational, maintaining an interior RH between 35% and 55%. As noted by Penn State Extension, using a pin-type moisture meter to verify that the trim has reached an equilibrium moisture content (EMC) of 6% to 9% is the only way to guarantee the wood is stable enough for installation.
Baseboard and Shoe Molding: Scribing and Fastening
Baseboard installation requires managing uneven floors. Never assume a floor is level. For floors with minor undulations, install the baseboard level and use shoe molding (or quarter-round) to bridge the gap between the base and the floor.
The Shoe Molding Rule
Shoe molding must be fastened exclusively to the baseboard, never to the floor. Hardwood and laminate floors require an expansion gap at the perimeter. If you pin the shoe molding through the floor, you will restrict this movement, leading to buckling in the summer months. Use an 18-gauge brad nailer with 1.25-inch brads, angling them slightly upward into the baseboard.
Coping Inside Corners on Baseboards
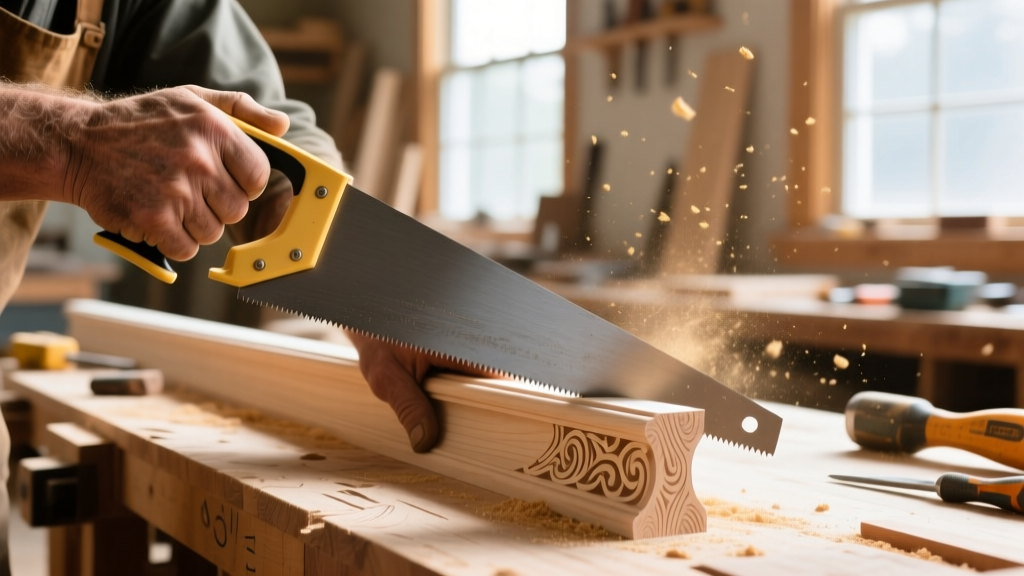
Inside corners on baseboards should always be coped, never mitered. When wood shrinks during the dry winter months, a mitered inside corner will open, exposing an unsightly V-shaped gap. A coped joint—where the profile of one board is cut with a coping saw to nest perfectly against the face of the adjacent board—allows the wood to shrink longitudinally without revealing a gap. Cut the first piece square and butt it into the corner. Cut the second piece at a 45-degree inside miter, then use a coping saw to cut along the revealed profile line, back-beveling the cut at 10 to 15 degrees for a tight face fit.
Crown Molding: Mastering the Spring Angle
Crown molding bridges the wall and ceiling, and its installation is complicated by the 'spring angle'—the angle the molding makes with the wall when installed. The vast majority of crown molding is milled with a 38/52-degree spring angle (38 degrees to the wall, 52 degrees to the ceiling), though 45/45-degree profiles exist.
Do not attempt to cut crown molding flat on the miter saw table using complex compound bevel and miter settings. Purchase or build a 'crown stop' jig that clamps to your saw fence. This allows you to cut the molding nested upside-down and backwards, exactly as it will sit on the wall, using simple 45-degree miter cuts.
Outside vs. Inside Corners
- Outside Corners: Miter both pieces at 45 degrees. Apply a thin bead of wood glue (or cyanoacrylate glue for MDF) to the end grain before pinning. End grain absorbs moisture rapidly; gluing the joint prevents seasonal shifting.
- Inside Corners: Just like baseboard, cope the inside corners. The coping saw must follow the exact contour of the crown profile. Sand the coped edge with 120-grit sandpaper wrapped around a dowel to ensure a flush fit against the adjoining piece.
Door and Window Casing: Reveal Margins
Casing (the trim around doors and windows) requires precision reveal margins. A reveal is the slight step-back between the edge of the door jamb and the edge of the casing. Standard reveals are set between 3/16-inch and 1/4-inch. This creates a shadow line that hides minor imperfections in the jamb and prevents the casing from sitting flush, which can look sloppy as the wood shifts.
When installing casing on hardwoods like oak or maple, pre-drilling is non-negotiable. Use a tapered countersink drill bit that matches the shank of your finish nails. This prevents the wood from splitting and ensures the nail head sits perfectly flush without tearing the wood fibers.
Fastening Protocols and Gap Management
The choice of fastener dictates the holding power and the size of the hole you must fill later. Modern pneumatic and cordless nailers offer three primary gauges for trim work:
| Nailer Type | Gauge | Holding Power | Best Use Case |
|---|---|---|---|
| Finish Nailer | 15-gauge | High | Crown molding to studs, heavy baseboards, securing casing to jambs. |
| Brad Nailer | 18-gauge | Medium | Shoe molding, chair rail, delicate casing, attaching stop beads. |
| Pin Nailer | 23-gauge | Low (Temporary) | Holding glued joints while the adhesive cures, securing fragile appliques. |
'Always fasten trim to the structural framing (studs, plates, or blocking), not just the drywall. Drywall alone cannot support the weight of heavy MDF crown molding or solid hardwood baseboards over time, leading to sagging and fastener pull-through.'
Managing the Drywall Gap
If the wall framing is bowed or twisted, the molding will not sit flush against the drywall. Do not force the molding tight to the wall with excessive nail pressure; this will bend the wood and create tension that will eventually pull the nails out. Instead, shim behind the molding at the stud locations to bring it flush, then caulk the remaining minor gaps with a high-quality, paintable elastomeric caulk (such as Alex Fast Dry or OSI Quad) that can stretch with seasonal wood movement.
Common Installation Failure Modes and Fixes
Even experienced carpenters encounter issues when working with the diverse types of wood molding. Recognizing these failure modes early prevents costly rework.
- Failure Mode: Miter joints opening on outside corners.
Cause: End-grain moisture absorption or framing movement.
Fix: Use mechanical fasteners (like a Collins miter clamp) while gluing, and apply a 5-minute epoxy or CA glue with an accelerator for an instant, rigid bond. For MDF, use biscuits or splines to align and lock the joint. - Failure Mode: Nail heads protruding (popping) after painting.
Cause: Driving the nail too deep, crushing the wood fibers around the head, which then swell back when exposed to humidity or primer.
Fix: Set the nail head just below the surface (about 1/16-inch). Fill with a non-shrinking, lightweight spackle rather than heavy joint compound, which shrinks and cracks. - Failure Mode: Crown molding pulling away from the ceiling.
Cause: Nailing only into the top plate of the wall, missing the ceiling joists or blocking.
Fix: Install 2x4 nailers (blocking) angled at the spring angle in the corner between the top plate and the ceiling joists before hanging the drywall. This provides a continuous, solid nailing surface for the top edge of the crown.
Mastering the installation of various types of wood molding requires moving beyond simple measuring and cutting. By respecting wood movement, selecting the appropriate substrate for the environment, and utilizing specialized joinery techniques like coping, you ensure a finish that remains flawless through years of seasonal humidity changes.
Written by
David NakamuraDavid Nakamura is a licensed architect (AIA) and construction technology writer focused on sustainable building methods, mass timber engineering, and high-performance building envelopes. He holds a Master of Architecture from the University of Washington and is a certified Passive House Consultant (CPHC). David spent eight years at the Seattle firm Mithun, where he led the design of three LEED Platinum projects, before founding his own practice specializing in net-zero residential design. He serves on the editorial advisory board of GreenBuilder Magazine and has authored peer-reviewed papers on cross-laminated timber (CLT) connections for the Journal of Structural Engineering. In his spare time, David teaches woodworking at Pratt Fine Arts Center and kayaks the Puget Sound.
More from David Nakamura
View all
Construction Cost
Labor Cost to Build a Deck Per Sq Ft: 2026 Installation Guide
Discover the exact labor cost to build a deck per sq ft in 2026. This installation guide breaks down contractor rates, complexity factors, and hidden fees.
Aug 4, 2026

Construction Cost
How Much Does It Cost to Build a 3 Bedroom House? Financing Guide
Learn exactly how much it costs to build a 3 bedroom house and explore 2026 financing options, construction loan types, and budget frameworks for your build.
Aug 4, 2026

Construction Cost
Cost to Build a Tennis Court: 2026 Guide
How much does it cost to build a tennis court in 2026? Breakdowns for asphalt, concrete, and synthetic surfaces plus fencing and lighting.
Jul 30, 2026