Laminated Veneer Lumber Installation: Beam & Header Procedures
Master laminated veneer lumber installation with expert beam and header procedures, bearing specs, and fastener requirements for structural framing.
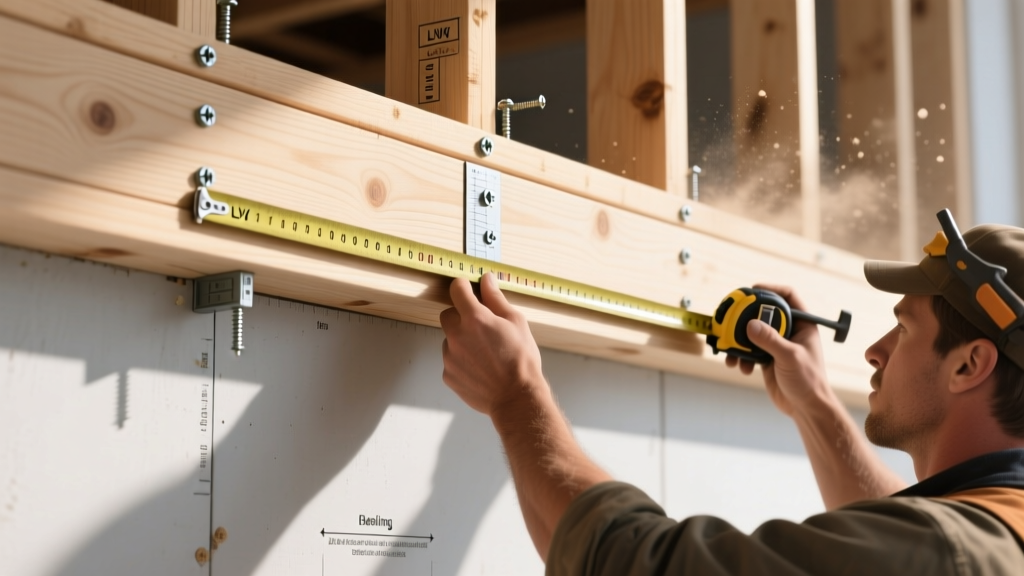
Core Structural Properties and Product Selection
Laminated veneer lumber (LVL) is an engineered wood product manufactured by bonding thin wood veneers under heat and pressure, with the grain of all veneers running parallel to the length of the member. This structural alignment yields exceptional bending strength and stiffness, making LVL the premier choice for long-span beams, headers, and rim boards. When selecting LVL for structural applications, framing contractors must evaluate the Modulus of Elasticity (E) and Fiber Bending Stress (Fb).
In modern residential and light commercial construction, the 2.0E grade is the industry baseline. Products like Boise Cascade Versa-Lam 2.0E and Weyerhaeuser Microllam 2.0E offer an Fb of 2,600 psi and an E value of 2.0 x 10^6 psi. For high-load scenarios or spans exceeding 20 feet where deflection limits (typically L/360 for live loads) govern the design, upgrading to a 2.2E or 2.4E grade provides the necessary stiffness without increasing the beam's physical depth, preserving critical headroom.
Pre-Installation: Moisture and Handling Protocols
Unlike solid sawn lumber, which can arrive at the job site with moisture content (MC) levels exceeding 19%, LVL is manufactured to a strict MC of 8% to 14%. Exposing LVL to prolonged weather before installation compromises its structural integrity and can cause localized delamination or surface checking.
According to guidelines published by APA - The Engineered Wood Association, if LVL members become saturated during construction, they must be allowed to dry to below 16% MC before being enclosed by drywall or insulation. Enclosing wet engineered wood traps moisture, creating an environment conducive to fungal decay and long-term creep deflection.
Bearing Requirements and Squash Block Installation
Proper bearing is the most frequent point of failure in LVL installations. Because LVL is highly resistant to bending, the concentrated compressive forces at the support points can easily crush the wood fibers perpendicular to the grain if the bearing area is insufficient.
Minimum Bearing Lengths
- End Bearings: Minimum 1.5 inches on masonry, concrete, or steel. Minimum 2.0 inches on wood framing.
- Intermediate/Continuous Bearings: Minimum 3.0 inches over interior load-bearing walls or columns.
Deploying Bearing Stiffeners (Squash Blocks)
When the calculated end reaction exceeds the perpendicular-to-grain compression capacity of the LVL (typically around 12,000 to 15,000 lbs for a standard 1.75-inch wide beam), bearing stiffeners are mandatory. Squash blocks are short sections of LVL or solid sawn lumber installed vertically between the top and bottom flanges of the beam at the support point. These blocks transfer the point load directly through the beam's web to the support below, preventing web crushing.
| Beam Width | Max Reaction (No Stiffeners) | Stiffener Requirement |
|---|---|---|
| 1.75" (Single Ply) | ~10,500 lbs | Required if reaction exceeds limit |
| 3.5" (Double Ply) | ~21,000 lbs | Required for heavy point loads (e.g., girder trusses) |
| 5.25" (Triple Ply) | ~31,500 lbs | Rarely required in residential; verify with engineer |
Multi-Ply Beam Assembly and Bolting Schedules
Field-assembling multiple plies of LVL to create thicker beams requires strict adherence to manufacturer bolting schedules. Relying solely on nails for multi-ply assemblies is a critical code violation; nails do not provide sufficient shear transfer to force multiple plies to act as a single monolithic unit under heavy bending loads.
Standard assembly requires 1/2-inch diameter machine bolts with washers. The bolts must be staggered and placed within specific edge distances to prevent splitting the LVL laminations.
| Parameter | 2-Ply Beam | 3-Ply Beam | 4-Ply Beam |
|---|---|---|---|
| Bolt Diameter | 1/2" | 1/2" or 5/8" | 5/8" |
| Horizontal Spacing | 18" O.C. | 18" O.C. | 12" O.C. |
| Top/Bottom Edge Distance | 1.5" min | 1.5" min | 2.0" min |
| End Distance | 6" max | 6" max | 6" max |
Fastening Joists and Hangers to LVL
Connecting floor joists to an LVL beam requires specialized hardware. Standard joist hangers designed for solid sawn lumber often lack the nail-hole density required for LVL, as the hardened phenolic resins in the veneers reduce nail withdrawal capacity compared to solid pine or fir.
According to engineering literature from Simpson Strong-Tie, contractors should use hangers specifically tested and rated for engineered wood, such as the LUS or HUC series. When face-mounting joists directly to the side of an LVL beam using structural screws, utilize high-shear fasteners like the Simpson SDWS or LedgerLok. Standard framing screws or drywall screws will snap under the shear loads generated by floor deflection.
Nailing Schedule for Rim Boards
When utilizing LVL as a rim board, the nailing schedule to the top and bottom plates is critical for transferring shear wall forces. The standard requirement is 10d common nails (3.0" x 0.148") spaced at 6 inches on center along the edges, and 12 inches on center in the field. Do not substitute 10d sinker nails (which are thinner at 0.128") unless explicitly permitted by the project engineer, as the reduced shank diameter significantly lowers shear transfer capacity.
Field Modifications: Drilling and Notching Rules
Field-cutting LVL to accommodate HVAC ductwork, plumbing stacks, or electrical chases is highly restricted. The structural integrity of LVL relies on the continuous, unbroken outer tension and compression laminations.
Absolute Prohibition: Never notch the top or bottom edge of an LVL beam. Notching severs the extreme fibers where bending stresses are highest, instantly compromising the beam's load-bearing capacity and voiding the manufacturer's warranty.
Small circular holes for wiring or small-diameter plumbing (typically under 1.5 inches) may be permitted in the middle third of the beam's depth and the middle third of its span length. However, large rectangular cutouts for ductwork are strictly prohibited in standard LVL beams. If large penetrations are unavoidable, the design must utilize open-web wood I-joists or steel beams instead.
2026 Cost Benchmarks for LVL Framing
Pricing for engineered lumber fluctuates with resin costs, timber availability, and transportation logistics. As of current 2026 market conditions, contractors should budget the following baseline material costs for standard 2.0E grade LVL:
- 1.75" x 5.25" (Headers/Rim Boards): $2.80 - $3.50 per linear foot.
- 1.75" x 9.25" (Standard Beams): $4.50 - $5.80 per linear foot.
- 1.75" x 11.875" (Long-Span Beams): $6.20 - $8.00 per linear foot.
- 3.5" x 16" (Heavy Girders): $14.00 - $18.50 per linear foot.
These figures represent raw material costs and exclude the premium for custom lengths, treated grades (e.g., borate-treated for termite zones), or specialized fire-rated coatings. When estimating total installed costs, factor in an additional 30% to 45% for crane rental (for beams exceeding 600 lbs), heavy-duty structural hardware, and specialized labor required for multi-ply bolting and squaring.
For comprehensive design tables, span limits, and load duration factors, always consult the specific manufacturer's technical design guide and verify compliance with local building codes, referencing foundational structural data available via the USDA Forest Products Laboratory.