Mastering Types of Joining Wood: Installation Best Practices
Master structural and finish carpentry with our guide to types of joining wood. Learn installation best practices, adhesive selection, and joint load limits.

The Mechanics of Wood Joinery: Load Paths and Material Limits
Selecting the correct methods among the various types of joining wood requires an understanding of how forces transfer through timber. A joint is only as strong as its weakest failure plane, which is rarely the fastener itself. According to the USDA Forest Products Laboratory's Wood Handbook, joint failure typically occurs due to shear stress in the wood fibers surrounding the fastener or adhesive starvation at the glue line. When evaluating types of joining wood for structural or finish applications, installers must account for wood movement, specifically the reality that tangential shrinkage is generally twice that of radial shrinkage. Ignoring this differential movement when gluing cross-grain joints guarantees catastrophic splitting as seasonal moisture content (MC) fluctuates.
Never apply rigid aliphatic resin (PVA) glues across perpendicular grain directions without allowing for mechanical movement. A solid wood panel glued into a rigid frame will split when humidity drops below 30% in winter months. Use slotted screw holes or floating tenons to accommodate lateral expansion.
Structural Framing Joints: Scarf, Mortise, and Tenon
Heavy timber and structural framing demand joints that can handle immense compressive and tensile loads. The American Wood Council's National Design Specification (NDS) mandates specific edge distances and end distances for structural fasteners, but the geometry of the wood joint itself carries the primary load in traditional timber framing.
Scarf Joints for Beam Splicing
When continuous timber lengths are unavailable, scarf joints are used to splice beams. For structural bending members, a minimum slope ratio of 1:8 (one unit of vertical rise for every eight units of horizontal run) is required, though a 1:12 ratio is preferred for high-tension zones.
- Preparation: Cut the scarf using a precision guided chainsaw mill or a specialized portable bandsaw to ensure perfectly mating surfaces.
- Adhesive Selection: Standard PVA glues are insufficient for structural scarf joints due to gap-filling limitations. Use a structural epoxy, such as West System 105 resin with 206 slow hardener, which provides a shear strength exceeding 4,500 psi and cures effectively in temperatures down to 60°F (15°C).
- Clamping: Apply mechanical pressure using threaded rods and steel cauls to maintain a glue line thickness of exactly 0.005 to 0.010 inches. Thicker epoxy lines reduce shear strength.
Traditional Mortise and Tenon for Timber Framing
The mortise and tenon remains the gold standard for post-and-beam construction. For an 8x8 inch Douglas Fir post, a standard tenon width should be one-third the thickness of the stock (approx. 2.5 inches).
- Tolerances: The tenon should be cut 1/16 inch shorter than the depth of the mortise to prevent the shoulder from bottoming out, which leaves a visible gap and weakens the mechanical lock.
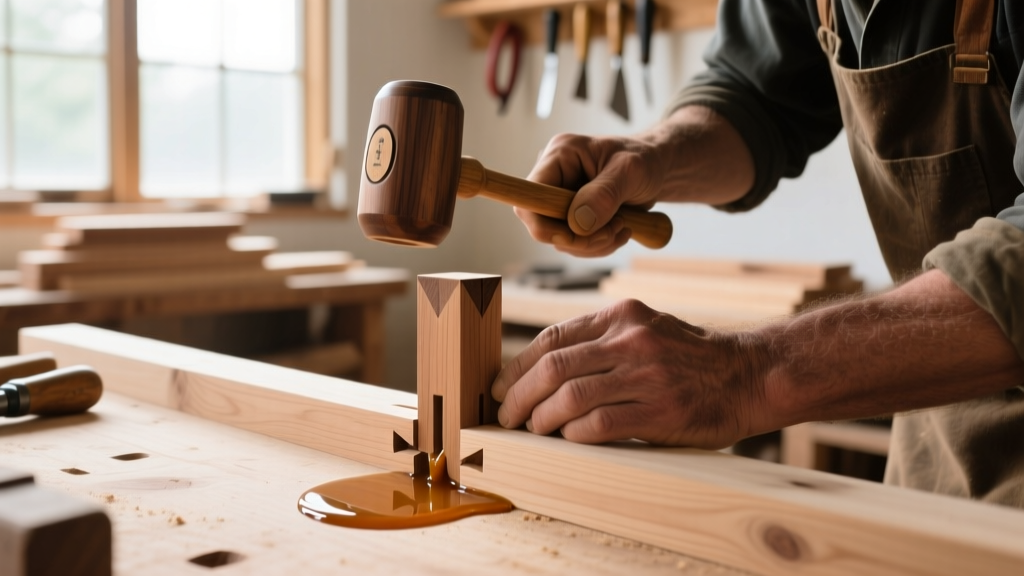
- Drawboring: To pull the joint tight without clamps, offset the peg hole in the tenon by 1/8 inch toward the shoulder relative to the hole in the mortise. Driving a 1-inch oak or locust peg through this offset forces the tenon tightly against the mortise wall.
Millwork and Cabinetry: Precision Joinery Methods
Finish carpentry and cabinetmaking prioritize speed, repeatability, and invisible aesthetics. The types of joining wood used here rely heavily on precision machinery and specialized adhesives.
Floating Tenons (Domino) vs. Traditional Dowels
Floating tenon systems, popularized by the Festool Domino DF 500, have largely replaced traditional doweling in high-end millwork. A standard 8x40mm beech tenon inserted into matching mortises provides a glue surface area roughly three times greater than a standard 3/8-inch dowel.
- Sizing Rule: The tenon thickness should never exceed one-third the thickness of the workpiece. For 3/4-inch (19mm) stock, use a 6mm or 8mm tenon. Using a 10mm tenon in 3/4-inch stock leaves only 3/16-inch of wall thickness on the mortise walls, risking blowout during routing.
- Moisture Content: Ensure purchased beech tenons are kiln-dried to 8% MC or lower. If tenons absorb ambient moisture and swell before insertion, they will compress the surrounding fibers, leading to a starved glue joint once the wood dries and shrinks back.
Pocket Hole Joinery: Limitations and Best Practices
Pocket hole joinery (using jigs like the Kreg Maxi-Jig) is highly efficient for face-frame assembly and basic carcass construction, but it is fundamentally a mechanical fastener method, not a true structural wood joint. The screw acts as a clamp, pulling the pieces together while the glue cures.
- Screw Thread Selection: Use fine-thread screws (1-1/4 inch) for hardwoods like oak and maple to prevent splitting and thread stripping. Use coarse-thread screws for softwoods like pine and plywood.
- End-Grain Limitation: Pocket screws driven into end-grain have exceptionally low withdrawal resistance. Always orient the joint so the screw bites into edge-grain or face-grain.
Adhesive and Fastener Selection Matrix
Choosing the correct adhesive is just as critical as the physical joint geometry. Below is a performance matrix for common woodworking adhesives used in modern installation.
| Adhesive Type | Shear Strength (Hard Maple) | Open Time | Best Application & Notes |
|---|---|---|---|
| Aliphatic Resin (PVA Type I) | 3,500 - 4,000 psi | 5 - 10 mins | Interior/exterior edge-gluing and cabinetry. Titebond III is the industry standard. Requires tight-fitting joints and high clamping pressure. |
| Polyurethane (PUR) | 2,500 - 3,000 psi | 20 - 30 mins | End-grain joining and multi-material bonding. Expands as it cures; requires moisture to activate. Gorilla Wood Glue is a common variant. |
| Structural Epoxy | 4,500+ psi | 30 - 90 mins | Timber framing, scarf joints, and gap-filling. Does not require clamping pressure. West System or System Three products. |
| Liquid Hide Glue | 2,500 - 3,000 psi | 10 - 15 mins | Antique restoration, musical instruments, and complex veneer work. Reversible with heat and moisture. Titebond Liquid Hide is standard. |
| CA Glue (Cyanoacrylate) | 2,000 - 2,500 psi | Seconds | Temporary tack-holding, small trim repairs, and jig building. Not suitable for structural or load-bearing wood joints. |
Troubleshooting Joint Failures in the Field
Even when utilizing the correct types of joining wood techniques, field conditions and operator errors can lead to premature joint failure. Recognizing these failure modes allows for immediate correction.
1. Starved Glue Joints
Symptom: The joint fails along the glue line, and the wood fibers on either side of the break are completely smooth, with no wood tear-out.
Cause: Excessive clamping pressure has squeezed all the adhesive out of the joint before it could penetrate the wood pores.
Fix: Calibrate clamping pressure. For softwoods, limit pressure to 100-150 psi. For dense hardwoods, 150-200 psi is optimal. A continuous, small bead of squeeze-out along the entire joint length indicates correct pressure; a dry joint indicates starvation.
2. End-Grain Absorption Failures
Symptom: Dowel or floating tenon joints on end-grain pull apart under minimal lateral stress.
Cause: End-grain acts like a bundle of straws, wicking liquid PVA glue deep into the wood fibers, leaving the actual glue line dry and starved.
Fix: 'Size' the end-grain before final assembly. Mix a 50/50 solution of PVA glue and water, brush it onto the end-grain, and let it sit for 5 minutes. This seals the pores. Follow up with full-strength glue for the final assembly.
3. Fastener Blowout and Splitting
Symptom: Wood splits along the grain line when driving screws or lag bolts near the edge of a timber.
Cause: Ignoring the minimum edge distance requirements outlined in structural engineering codes, or failing to pre-drill in high-density species.
Fix: Always maintain an edge distance of at least 1.5 times the fastener diameter. For structural lag screws in species like Southern Yellow Pine or White Oak, pre-drill the pilot hole to 70% of the screw's shank diameter and the clearance hole to 100% of the shank diameter to prevent hydraulic splitting.
Before cutting any precision joinery, allow the lumber to acclimate to the environment where it will be installed. Interior millwork should be acclimated to 6-8% Moisture Content (MC) in climate-controlled spaces. Use a pin-type moisture meter (such as the Delmhorst J-2000) to verify the core moisture, not just the surface.
Written by
James ThorntonJames Thornton is a construction industry veteran with 25 years of hands-on experience in wood framing, lumber grading, and residential building codes. He started as a framing carpenter in rural Oregon, earned his ICC Residential Building Inspector certification, and eventually became a senior plan reviewer for the City of Portland Bureau of Development Services. James holds a B.S. in Wood Science & Technology from Oregon State University and is a certified lumber grader through the West Coast Lumber Inspection Bureau (WCLIB). He has inspected over 3,000 residential construction sites and authored the city's internal guide on advanced framing techniques (2x6 at 24" O.C.). James lives in Bend, OR, where he builds custom timber-frame cabins and competes in lumberjack sports.
More from James Thornton
View all
Insulation
Best Home Insulation Materials: Complete 2026 Guide
Compare top home insulation materials for 2026. Find R-values, installed costs per square foot, and best uses for fiberglass, spray foam, and mineral wool.
Aug 4, 2026

Sustainable Building
Certify Your Green Building Material for LEED and WELL
Step-by-step guide to certifying a green building material for LEED v5 and WELL v2. Master EPDs, HPDs, and VOC limits for 2026 project specifications.
Aug 4, 2026

Stone & Masonry
Veneer Stacked Stone Panels: Interior Design & Style Showcase
Discover how veneer stacked stone panels transform interiors. Explore modern design profiles, material pairings, and technical installation specs.
Aug 4, 2026