Types of Wood Joint: A Structural Selection Framework
Master the types of wood joint with this structural selection framework. Compare shear strength, wood movement tolerance, and mechanical fasteners.

The Three-Axis Joint Selection Framework
Selecting the correct joint is not a matter of aesthetic preference; it is an engineering decision dictated by physics. When evaluating the various types of wood joint, professional fabricators and structural engineers rely on a three-axis framework: Stress Vector Alignment, Dimensional Movement Tolerance, and Production Tooling ROI. A joint that excels in tensile strength may fail catastrophically under shear stress or seasonal moisture fluctuation. According to the USDA Forest Products Laboratory Wood Handbook, the anisotropic nature of wood means that joint geometry must actively manage load paths while accommodating cellular shrinkage.
Axis 1: Stress Vector and Load Path
Every joint experiences three primary forces: tension (pulling apart), compression (pushing together), and shear (sliding parallel). Traditional joinery relies on mechanical interlock to resist these forces, whereas modern mechanical fasteners rely on friction and the shear strength of metal. For example, a standard pocket hole screw offers high withdrawal resistance (tension) but virtually zero racking resistance (shear) without the aid of adhesive. Conversely, a through-wedged tenon provides massive shear and racking resistance due to the mechanical lock of the wedge expanding the tenon inside the mortise.
Joint Strength Comparison Matrix
The following matrix compares common joinery methods across critical structural metrics. Data assumes standard kiln-dried hardwoods (e.g., Hard Maple, 12% MC) bonded with ANSI/HPVA Type I PVA adhesive.
| Joint Type | Tensile Strength | Shear / Racking Resistance | Reversibility | Primary Failure Mode |
|---|---|---|---|---|
| Blind Mortise & Tenon | High | Very High | Low (Destructive) | Tenon shear at shoulder |
| Through Dovetail | Very High | Moderate | Low | Pin board splitting |
| Festool Domino (10mm) | High | High | Moderate | Beech tenon snap under torsion |
| Dowel (3/8" Fluted) | Moderate | Moderate | Low | Dowel shear or hole wall blowout |
| Pocket Screw (1.5") | Low (without glue) | Very Low | High | Screw stripping in MDF/Softwood |
Axis 2: Accommodating Wood Movement
Wood is hygroscopic. As relative humidity shifts, wood expands and contracts primarily across the grain (tangentially and radially), with negligible longitudinal movement. The Wood Database notes that flat-sawn Red Oak shrinks 8.6% tangentially but only 5.4% radially. Quartersawn White Oak is significantly more stable, shrinking 5.6% tangentially and 3.6% radially. This differential movement dictates joint selection for panels, tabletops, and wide assemblies.
Panel Joinery and Cross-Grain Catastrophes
When joining solid wood panels, rigid cross-grain joints guarantee failure. If you attach a solid wood tabletop to a perpendicular apron using rigid glue and pocket screws, the top will crack as it attempts to expand in high humidity. Instead, selection frameworks must incorporate movement-accommodating joints:
- Figure-8 Fasteners and Z-Clips: Allow lateral translation while securing the top vertically.
- Slip Tenons (Housed Dadoes): Used in frame-and-panel construction. The panel floats inside a grooved frame, never glued, allowing it to expand into the 1/4" void space.
- Breadboard Ends: A classic technique where a tongue-and-groove joint is secured with drawbore pegs only in the center, while the outer pegs pass through elongated slots to permit seasonal expansion.
Axis 3: Production Volume and Tooling ROI
The theoretical strength of a joint is irrelevant if it cannot be executed within the project's economic constraints. The selection framework must balance joint integrity with fabrication time.
Traditional vs. Modern Mechanical Joinery
Hand-cut dovetails offer unparalleled tensile strength and aesthetics but require 45+ minutes per corner for a master craftsman. In high-volume 2026 cabinet manufacturing, this is economically unviable. Modern fabricators utilize floating tenon systems, such as the Festool Domino DF 500 or the larger XL DF 700 for structural doors. These machines cut precise mortises in seconds, utilizing compressed, corrugated European beech tenons. When water-based PVA glue is introduced, the beech tenon swells, creating a mechanical lock inside the mortise that rivals traditional integral tenons at a fraction of the labor cost.
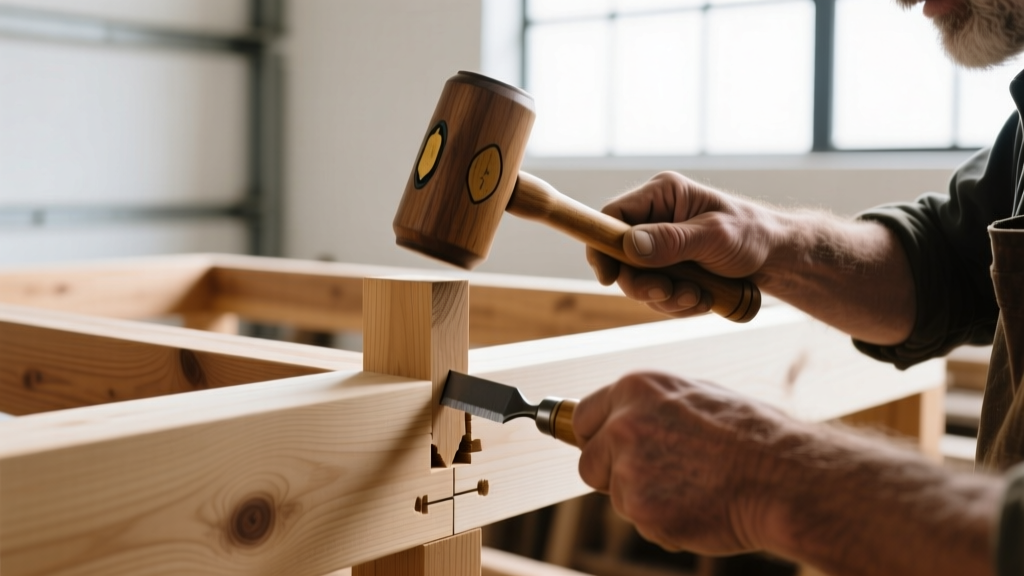
For structural timber framing, the selection shifts toward CNC-machined timber joints. 5-axis CNC routers can mill complex, interlocking Japanese-style timber joints (such as the Kanawa Tsugi or spliced scarf joints) with 0.1mm tolerances, eliminating the need for on-site chisel work while maintaining historical structural integrity.
Adhesive Selection and Glue Line Tolerances
A joint is only as strong as its adhesive bond. The American Society for Testing and Materials (ASTM) sets rigorous standards for wood adhesives, specifically ASTM D905 for block shear testing. Matching the adhesive to the joint type and wood species is mandatory:
| Adhesive Type | Optimal Glue Line | Best Joint Application | Limitations |
|---|---|---|---|
| PVA (Type I / Titebond III) | 0.003" - 0.005" | Dowels, Dominos, Edge Gluing | Requires high clamping pressure; fails on oily woods. |
| Epoxy (West System 105/206) | 0.010" - 0.040" | Loose-fitting joinery, Teak/Ipe | Poor UV resistance; requires solvent wipe for oily woods. |
| Polyurethane (Gorilla Glue) | 0.005" - 0.010" | Miter joints, end-grain sealing | Expands during cure; requires moisture to activate. |
| Hide Glue (Liquid or Hot) | 0.002" - 0.005" | Luthiery, antique restoration | Low moisture resistance; short open time for hot hide glue. |
Troubleshooting Common Joint Failure Modes
Even perfectly selected joints fail if execution parameters are ignored. Use this diagnostic checklist when analyzing joint failures in the field or workshop:
1. Starved Glue Joints
Symptom: The joint separates cleanly, with wood fibers missing from both surfaces, but the glue line appears paper-thin and brittle. Cause: Excessive clamping pressure squeezed the adhesive out of the joint before it could cure, or the wood was too dry (below 6% MC), causing rapid adhesive absorption. Fix: Calibrate clamps to 150-250 PSI for softwoods and 200-350 PSI for hardwoods. Use a thicker adhesive or pre-size end-grain with a 50/50 water-glue wash.
2. Dovetail Crushing and Racking
Symptom: The pins of a dovetail joint crush inward, and the drawer or box racks diagonally. Cause: Incorrect dovetail angle for the species. Using a 1:8 angle (standard for hardwoods) on a softwood like Eastern White Pine results in fragile end-grain that crushes under compression. Fix: Adhere to species-specific ratios. Use a 1:6 angle (approx. 9.5 degrees) for softwoods to increase the bearing surface, and a 1:8 angle (approx. 7 degrees) for hardwoods to prevent splitting the pin board during assembly.
3. Mortise Blowout
Symptom: The wall of the mortise fractures outward when the tenon is driven home. Cause: Insufficient margin between the mortise edge and the end of the workpiece, or driving a tenon that was cut 0.010" too thick without chamfering the edges. Fix: Maintain a minimum end-margin equal to the thickness of the mortise width. Always chamfer the leading edges of the tenon using a block plane or sandpaper to guide it into the mortise and reduce hydraulic pressure from trapped glue.
Final Selection Protocol
Stop defaulting to pocket screws for casework or dowels for heavy doors. Map the stress vectors, calculate the tangential shrinkage of your specific lumber batch, and select the joint geometry that physically resolves those forces. Whether utilizing CNC-milled timber framing joints or hand-cut blind dovetails, the integrity of the structure relies on respecting the cellular mechanics of the material.
Written by
James ThorntonJames Thornton is a construction industry veteran with 25 years of hands-on experience in wood framing, lumber grading, and residential building codes. He started as a framing carpenter in rural Oregon, earned his ICC Residential Building Inspector certification, and eventually became a senior plan reviewer for the City of Portland Bureau of Development Services. James holds a B.S. in Wood Science & Technology from Oregon State University and is a certified lumber grader through the West Coast Lumber Inspection Bureau (WCLIB). He has inspected over 3,000 residential construction sites and authored the city's internal guide on advanced framing techniques (2x6 at 24" O.C.). James lives in Bend, OR, where he builds custom timber-frame cabins and competes in lumberjack sports.
More from James Thornton
View all
Insulation
Best Home Insulation Materials: Complete 2026 Guide
Compare top home insulation materials for 2026. Find R-values, installed costs per square foot, and best uses for fiberglass, spray foam, and mineral wool.
Aug 4, 2026

Sustainable Building
Certify Your Green Building Material for LEED and WELL
Step-by-step guide to certifying a green building material for LEED v5 and WELL v2. Master EPDs, HPDs, and VOC limits for 2026 project specifications.
Aug 4, 2026

Stone & Masonry
Veneer Stacked Stone Panels: Interior Design & Style Showcase
Discover how veneer stacked stone panels transform interiors. Explore modern design profiles, material pairings, and technical installation specs.
Aug 4, 2026