How to Apply Timber Floor Sealer: Pro Steps for a Durable Finish
Master timber floor sealer application with our pro guide. Learn prep steps, coat techniques, cure times, and troubleshooting for a flawless wood finish.
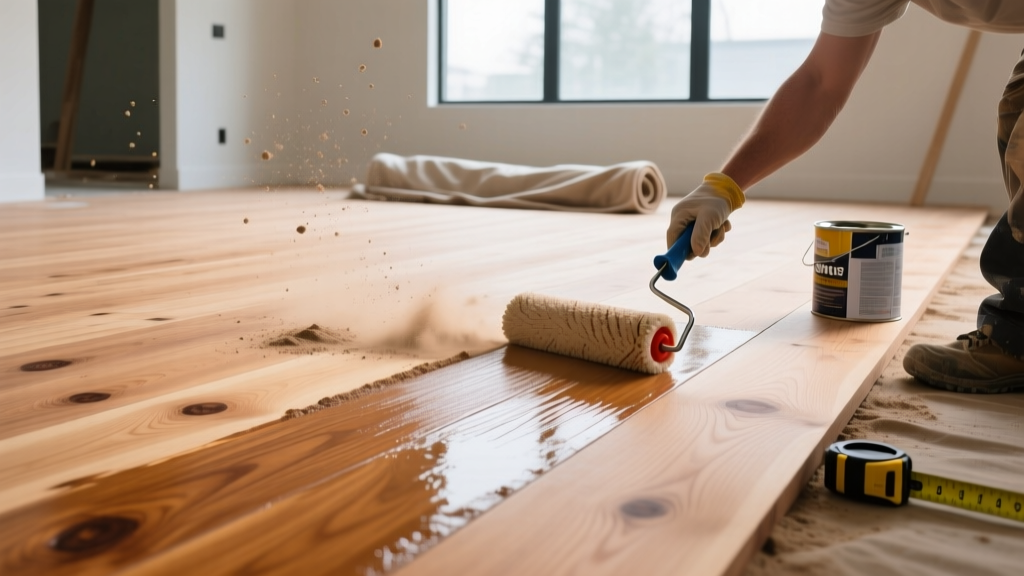
Pre-Application Environmental and Subfloor Baselines
Applying a timber floor sealer is a chemical process heavily dictated by ambient conditions and substrate readiness. Before opening a single can of finish, you must verify that the jobsite meets strict environmental thresholds. Failure to do so is the primary cause of adhesion failure, blushing, and uneven curing.
- Temperature: Maintain 65°F to 75°F (18°C - 24°C) at floor level, not just ceiling level.
- Relative Humidity (RH):strong> Keep between 35% and 55%. Water-based sealers will dry too fast below 30%, causing lap marks; oil-based sealers will remain tacky above 60%.
- HVAC Status: The building's permanent HVAC system must be operational and running for at least 5 days prior to application to acclimate the space.
Subfloor moisture content is equally critical. For wood subfloors, use a pin-type moisture meter (such as the Ligno-Mat SD) to take readings every 100 square feet. The timber flooring must be within 2% to 4% of the subfloor's moisture content, with an absolute target of 6% to 9% for most North American climates. If installing over concrete, perform an ASTM F2170 in-situ relative humidity test; readings must not exceed 75% RH before proceeding with any moisture-mitigating primers or sealers.
Sanding and Surface Preparation Protocol
The mechanical profile of the wood dictates how deeply the timber floor sealer penetrates. A proper sanding sequence follows the 'rule of thirds'—each successive grit should remove the scratches left by the previous grit, which is roughly one-third the size.
- Rough Cut (36 or 40 Grit): Use a drum or planetary sander to flatten the floor and remove old finish. Keep the sander moving to avoid dish-out.
- Medium Cut (60 Grit): Remove the deep scratches from the rough cut. Edge the perimeter with a 60-grit edger.
- Fine Cut (80 or 100 Grit): For water-based sealers, stop at 100 grit. For oil-based sealers or hardwax oils, progress to 120 grit. Sanding too fine (e.g., 150+ grit) burnishes the wood, closing the pores and preventing the sealer from achieving a mechanical bond.
- Multi-Disc Buffing: Use a planetary multi-disc sander (like the Lagler Trio) for the final pass to eliminate edger swirl marks.
Water-Popping (Optional but Recommended for Stained Floors): If you are applying a stain before the sealer, 'water-pop' the grain to ensure even pigment absorption. Mix 50% distilled water and 50% denatured alcohol. Apply with a microfiber mop in the direction of the grain. The alcohol accelerates evaporation, preventing the wood from absorbing excess water and swelling. Allow 2 to 4 hours to dry completely before staining.
Vacuum the entire floor using a HEPA-filtered shop vac, followed by a thorough wipe-down with a mineral-spirit-dampened microfiber cloth to remove microscopic dust. Never use standard household tack cloths, as they often contain silicone or wax residues that will cause fisheyes in the sealer.
Choosing the Right Timber Floor Sealer
Selecting the correct chemistry depends on traffic expectations, VOC regulations, and desired aesthetics. According to EPA guidelines on indoor air quality, minimizing VOCs is crucial for occupied spaces, making water-based and hardwax options increasingly popular.
| Sealer Type | VOC Level | Dry Time (Recoat) | Durability (Taber Cycles) | Best Application Tool |
|---|---|---|---|---|
| 2K Water-Based Poly (e.g., Bona Traffic HD) | < 150 g/L | 2 - 3 Hours | 4,000+ | T-Bar or 3/8' Microfiber Roller |
| Oil-Modified Poly (e.g., Poloplaz Primero) | 450 g/L | 12 - 16 Hours | 2,500 - 3,000 | Lambswool Applicator |
| Hardwax Oil (e.g., Rubio Monocoat 2C) | 0 g/L | N/A (Single Coat) | N/A (Molecular Bond) | Floor Buffer with Beige Pad |
| Penetrating Tung Oil (e.g., Waterlox Original) | 350 g/L | 24 Hours | 1,500 - 2,000 | Lambswool or Natural Bristle Brush |
For high-traffic residential and commercial projects, 2-component water-based polyurethanes like Bona Professional finishes offer the best balance of rapid cure times, extreme abrasion resistance, and non-yellowing clarity.
The Application Procedure: Step-by-Step
Step 1: Cutting In the Perimeter
Always start by 'cutting in' the edges of the room where the main applicator cannot reach. Use a high-quality 2-inch angled synthetic sash brush for water-based sealers, or a natural bristle brush for oil-based. Apply the sealer to a 4-inch band along the baseboards. Work in manageable sections (e.g., 10 linear feet at a time) so the edge does not dry before you blend it with the field application.
Step 2: Field Application and Maintaining a Wet Edge
Pour the sealer in a continuous line along your starting wall. For water-based sealers, use a Wooster T-Bar or a 3/8-inch nap microfiber roller. Push the sealer forward, then pull it back lightly to level it. The Golden Rule: Never go back over sealer that has been down for more than 3 minutes. Water-based finishes form a skin rapidly; overworking them will pull up the skin and create ridges. Keep a 'wet edge' by overlapping your previous stroke by about 2 inches. Work toward your exit door, planning your path so you do not trap yourself in a corner.
Step 3: Intercoat Abrasion
Once the first coat is dry to the touch (usually 2-3 hours for water-based), you must abrade the surface before applying the next coat. Sealers dry with microscopic peaks and valleys; abrasion knocks down the peaks to ensure a mechanical bond for the next layer. Use a floor buffer with a 120-grit sanding screen or a maroon synthetic steel-wool pad. Vacuum thoroughly and tack the floor again. Skipping this step is the most common cause of delamination between coats.
Step 4: Final Coat Application
Apply the final coat using the same technique as the first. Ensure lighting is positioned at a low angle across the floor to highlight any missed spots or puddles. Do not apply the final coat thicker than the previous coats; excessive film thickness in water-based polyurethanes can lead to a milky appearance and extended curing times.
Curing vs. Drying: Managing Client Expectations
Drying refers to the evaporation of solvents or water, allowing the surface to be touched without transferring liquid. Curing refers to the cross-linking of polymers that achieves maximum hardness. Educating clients on this difference prevents premature damage to the finish.
- 12 to 24 Hours: Dry to the touch. Light foot traffic in socks is permissible.
- 72 Hours: Furniture can be carefully placed (use felt pads, do not drag). Pets can be reintroduced.
- 7 to 14 Days: Fully cured. Area rugs can be laid down, and the floor can be cleaned with manufacturer-approved hardwood cleaners. Placing rugs before full cure traps off-gassing solvents and moisture, leading to permanent hazing.
Troubleshooting Common Application Failures
Even experienced professionals encounter finish anomalies. Here is how to diagnose and correct the three most common timber floor sealer failures, as frequently discussed in industry sanding and finishing literature.
Symptom: Fisheyes (Small Circular Craters)
Cause: Surface contamination. Silicone from furniture polish, wax residue from old floors, or oils from the installer's skin have repelled the sealer.
Fix: Stop application immediately. Allow the sealer to dry completely. Sand the affected area down to bare wood using 100-grit paper. Wipe the entire floor with a lint-free cloth dampened with mineral spirits or a dedicated hardwood floor cleaner/degreaser to remove the contaminant. Reapply the sealer.
Symptom: Blushing (Milky White Haze)
Cause: High humidity or low temperatures causing moisture to become trapped within the drying film of a water-based sealer. The water evaporates slower than the coalescing solvents, creating micro-voids that scatter light.
Fix: Increase jobsite airflow using oscillating fans (do not point fans directly at the wet floor) and run a dehumidifier to drop the RH below 50%. If the blushing persists after full cure, the floor must be sanded back to bare wood and recoated under proper environmental controls.
Symptom: Peeling or Delamination Between Coats
Cause: Inadequate intercoat abrasion, or allowing the previous coat to cure beyond its 'recoat window' (usually 24-48 hours for most polyurethanes) without sanding.
Fix: Perform a cross-hatch adhesion test (ASTM D3359) to determine the extent of the failure. If large areas peel, the entire top layer must be screened or sanded off until you reach a layer with sound adhesion. Abrade thoroughly with a 100-grit screen, clean, and reapply the topcoats.
Pro Tip: Always mix 2-component timber floor sealers by shaking the hardener and pouring it into the Part A base, then stirring gently with a paint stick for exactly 3 minutes. Let the mixture 'induct' or sit for 10 minutes before applying. This allows trapped air bubbles to escape and ensures the chemical cross-linking process has fully initiated.