Wood Deck Material Installation: Best Practices for Maximum Lifespan
Master wood deck material installation with expert framing, fastening, and gapping techniques to prevent rot, splitting, and structural failure.

The Hidden Cost of Poor Wood Deck Material Installation
Industry forensic analysis reveals that over 80% of premature wood deck failures stem from installation errors rather than inherent material defects. Whether utilizing pressure-treated Southern Yellow Pine, Western Red Cedar, or dense tropical hardwoods like Ipe, the longevity of the structure is dictated by moisture management, fastener selection, and framing tolerances. According to the Prescriptive Residential Deck Construction Guide (DCA-6) published by the American Wood Council, structural integrity relies heavily on the substructure's ability to shed water and resist lateral loads. This guide details the precise installation protocols required to maximize the lifespan of any wood deck material.
Decks that experience ledger board detachment or substructure rot typically exhibit the first signs of catastrophic failure within 5 to 7 years. This timeline directly correlates with the degradation of untreated joist tops and the corrosion of inferior galvanized fasteners reacting with modern copper-based wood preservatives (like ACQ or MCQ). Never install modern pressure-treated wood deck material using standard electro-galvanized hardware.
Substructure and Ledger Board Attachment
The ledger board connection is the single most critical structural node in a deck attached to a building. Relying solely on lag screws into dimensional lumber or engineered rim joists is a documented failure point. For maximum withdrawal resistance, use 1/2-inch hot-dipped galvanized through-bolts with washers, or specialized structural screws such as the Simpson Strong-Drive SDWS, which are specifically rated for ledger attachments.
Flashing and Moisture Diversion
Water trapped between the ledger board and the house sheathing guarantees rot. Install a self-adhering bituminous membrane (such as Grace Ice & Water Shield) over the house sheathing before mounting the ledger. After bolting the ledger, integrate a Z-flashing or flexible self-adhering flashing tape (like Trex Protect) over the top edge of the ledger, tucking it behind the house wrap and extending it down the face of the ledger by at least 2 inches. This creates a continuous drainage plane that prevents capillary action from drawing moisture into the end-grain of the ledger board.
Joist Spacing Matrix by Wood Species
Different wood deck materials possess varying Modulus of Elasticity (MOE) and bending strength values. While the USDA Forest Products Laboratory Wood Handbook provides exhaustive mechanical data, field applications require practical spacing limits to prevent deflection and bounce. The table below outlines maximum joist spacing for standard 5/4x6 and 2x6 profiles installed perpendicular to the joists.
| Wood Deck Material | Nominal Size | Max Joist Spacing (Perpendicular) | Max Joist Spacing (45° Diagonal) |
|---|---|---|---|
| Pressure-Treated SYP | 5/4 x 6 | 16" O.C. | 12" O.C. |
| Western Red Cedar | 5/4 x 6 | 16" O.C. | 12" O.C. |
| Redwood (Construction Heart) | 2 x 6 | 24" O.C. | 16" O.C. |
| Ipe / Cumaru (Tropical Hardwood) | 5/4 x 6 | 16" O.C. | 12" O.C. |
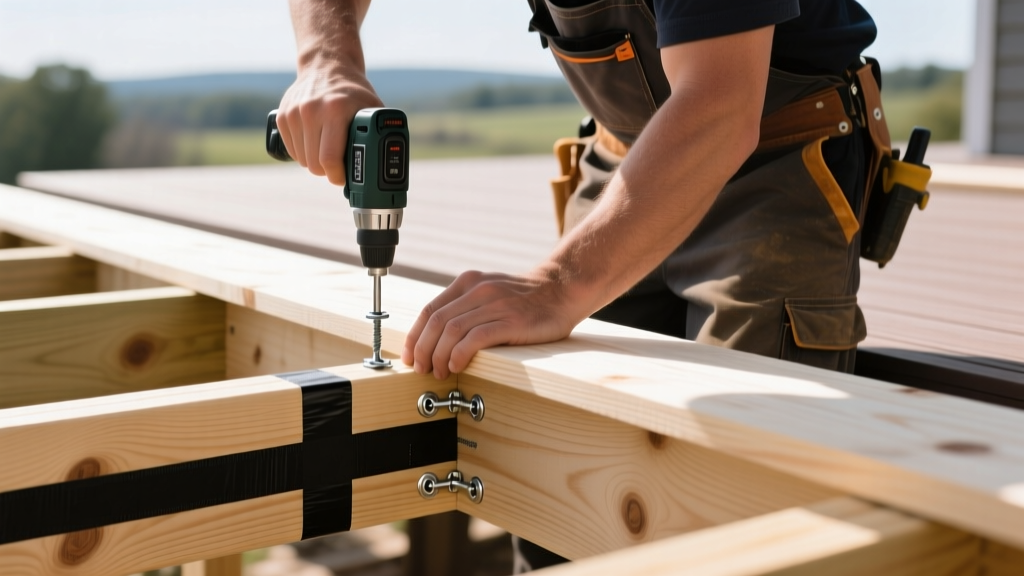
Fastening Protocols: Screws, Clips, and Corrosion Resistance
The chemical preservatives used in modern pressure-treated lumber (Alkaline Copper Quaternary and Micronized Copper Quaternary) are highly corrosive to standard metals. Furthermore, the density of tropical hardwoods demands specific fastener geometries to prevent shear failure during installation.
Fastener Material Selection
- Hot-Dipped Galvanized (HDG): Acceptable for standard pressure-treated pine in interior, dry climates. Must meet ASTM A153 standards. Avoid for Cedar or Redwood, as the zinc reaction causes black tannin streaking.
- 305 Stainless Steel: The minimum requirement for Western Red Cedar, Redwood, and pressure-treated lumber in most environments. Resists tannin staining and copper-based preservative corrosion.
- 316 Marine-Grade Stainless Steel: Mandatory for installations within 10 miles of saltwater, in high-humidity coastal zones, or when fastening dense tropical hardwoods like Ipe, which possess high tannin and oil content that can degrade lesser metals.
Edge-Fastening vs. Top-Down Fastening
For tropical hardwoods and premium clear-grade cedar, top-down screwing often results in surface splintering and visible counter-sink plugs. Utilizing an edge-fastening tool system, such as the CAMO Marksman Pro, drives 316 stainless steel screws at a 45-degree angle through the side of the board into the joist. This technique completely hides the fastener, eliminates the need for pre-drilling (which is otherwise mandatory for Ipe to prevent bit breakage), and allows the wood to shrink and swell without binding against the screw shaft.
"When installing 5/4x6 hardwood decking, always use a minimum 2-1/2 inch screw for edge fastening to ensure adequate thread embedment into the joist. In high-wind uplift zones, upgrade to 3-inch structural screws to achieve the required withdrawal resistance specified by local building codes." — Journal of Light Construction Deck Framing Guidelines
The Moisture Content Gapping Framework
Wood is hygroscopic; it absorbs and releases moisture until it reaches Equilibrium Moisture Content (EMC) with its environment. Wood shrinks and swells primarily in the tangential direction (across the growth rings), minimally in the radial direction, and virtually zero in the longitudinal direction (along the length). Therefore, gapping must account for the board's width changing, not its length.
Improper gapping leads to either buckled boards that tear out fasteners (if gapped too tight when wet) or massive gaps that catch high heels and drop small items (if gapped too wide when dry). Base your gapping strategy strictly on the Moisture Content (MC) of the wood deck material at the time of installation:
Wet / Green Lumber (MC > 15%)
Typical Materials: Fresh pressure-treated SYP.
Target Gap: 1/8" or butt-tight.
Execution: Use a 16-penny nail as a spacer. As the wood dries and shrinks tangentially over the first summer, the gaps will naturally open to the ideal 3/16" width.
Kiln-Dried / Air-Dried (MC < 12%)
Typical Materials: KDAT (Kiln-Dried After Treatment) pine, Cedar, Ipe.
Target Gap: 3/16" to 1/4".
Execution: Use a speed square edge or specialized 3/16" spacers. The wood will absorb ambient humidity and swell slightly, closing the gap to a tight, uniform fit.
End-Grain Sealing and Edge Case Protection
Moisture enters and exits wood 10 to 15 times faster through the end-grain than through the face or edge grain. When cutting any wood deck material—especially dense hardwoods and thick cedar timbers—the exposed end-grain is highly susceptible to rapid moisture loss, resulting in severe radial checking (splitting at the ends of the boards).
To prevent end-splitting, apply a wax-based emulsion sealer (such as Anchorseal) to every cut end immediately after making the cut. The sealer must be applied within minutes, before the end-grain begins to dry and micro-fracture. Brush the sealer heavily over the end-grain and extend it 1 inch onto the top and bottom faces of the board to ensure complete encapsulation. For boards that meet end-to-end over a single joist, always bevel the cut ends at a 45-degree angle (scarf joint) to shed water, apply sealer to both mating surfaces, and fasten both boards independently to the joist using stainless steel hardware to prevent uplift.
Substructure Top Protection
While the deck boards receive the most attention, the top edge of the floor joists is the most vulnerable to rot. Every time it rains, water drains through the deck gaps and pools on the horizontal surface of the joists. Before laying any wood deck material, apply a self-adhering butyl flashing tape (such as Trex Protect or G-Tape) over the top of every joist and beam. This tape seals around the fastener penetrations, preventing water from infiltrating the joist core, effectively doubling the lifespan of the substructure and ensuring the framing outlasts the decking itself.
Written by
James ThorntonJames Thornton is a construction industry veteran with 25 years of hands-on experience in wood framing, lumber grading, and residential building codes. He started as a framing carpenter in rural Oregon, earned his ICC Residential Building Inspector certification, and eventually became a senior plan reviewer for the City of Portland Bureau of Development Services. James holds a B.S. in Wood Science & Technology from Oregon State University and is a certified lumber grader through the West Coast Lumber Inspection Bureau (WCLIB). He has inspected over 3,000 residential construction sites and authored the city's internal guide on advanced framing techniques (2x6 at 24" O.C.). James lives in Bend, OR, where he builds custom timber-frame cabins and competes in lumberjack sports.
More from James Thornton
View all
Insulation
Best Home Insulation Materials: Complete 2026 Guide
Compare top home insulation materials for 2026. Find R-values, installed costs per square foot, and best uses for fiberglass, spray foam, and mineral wool.
Aug 4, 2026

Sustainable Building
Certify Your Green Building Material for LEED and WELL
Step-by-step guide to certifying a green building material for LEED v5 and WELL v2. Master EPDs, HPDs, and VOC limits for 2026 project specifications.
Aug 4, 2026

Stone & Masonry
Veneer Stacked Stone Panels: Interior Design & Style Showcase
Discover how veneer stacked stone panels transform interiors. Explore modern design profiles, material pairings, and technical installation specs.
Aug 4, 2026