Tuning Types of Wooden Hand Planes for Custom Trim Installation
Master the setup and application of different types of wooden hand planes for precision wood trim installation, scribing, and custom millwork fitting.

The Role of Wooden Hand Planes in Modern Trim Installation
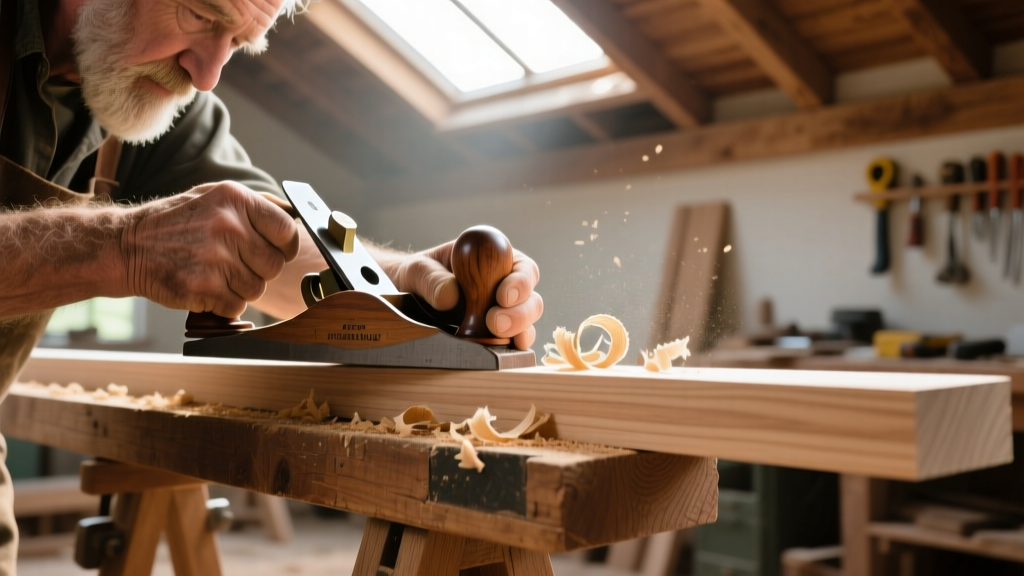
In high-end finish carpentry and historic restoration, the installation of custom millwork demands tolerances that power tools simply cannot achieve. While routers and power planers are efficient for rough dimensioning, they generate massive amounts of silica-laden dust and often leave tear-out on highly figured lumber. Understanding the specific types of wooden hand planes and mastering their on-site tuning allows craftsmen to scribe, fit, and finish architectural wood trim with microscopic precision. Wooden-bodied planes offer a distinct advantage over cast-iron models on the job site: their lower mass reduces user fatigue during repetitive scribing, and the wooden sole naturally polishes the workpiece while gliding smoothly over drywall compound and primer overspray.
Core Types of Wooden Hand Planes for Millwork Fitting
Selecting the correct plane for a specific installation task depends on the sole length, bed angle, and iron geometry. Below is a functional breakdown of the primary wooden planes used in custom trim and cabinetry installation.
| Plane Type | Sole Length | Standard Bed Angle | Primary Installation Application |
|---|---|---|---|
| Smoother (Krenov Style) | 9" - 10" | 45° to 50° | Final surfacing of figured wood panels and door casings prior to finishing. |
| Jack Plane | 14" - 15" | 45° | Truing the edges of custom built-in carcasses and leveling long baseboard runs. |
| Shoulder Plane | 5" - 7" | 12° to 15° | Tuning tenons for built-in shelving and refining coped joints on crown molding. |
| Block Plane | 6" - 7" | 12° to 20° | Chamfering sharp edges on site and trimming end-grain on baseboard returns. |
Matching the Bed Angle to Wood Species Hardness
The Janka hardness rating and grain structure of the lumber you are installing dictate the required bed angle of your wooden plane. According to the Forest Products Laboratory's Wood Handbook, wood density directly impacts shear resistance and tear-out potential.
Standard Pitch (45°) vs. York Pitch (50°)
For standard installation materials like poplar, pine, and straight-grained oak, a 45° standard pitch is ideal. It requires less physical effort to push through the cut, which is crucial when fitting hundreds of linear feet of baseboard. However, when installing highly figured woods—such as curly maple, birdseye maple, or quarter-sawn white oak—a 45° angle will violently tear the grain. For these species, you must use a wooden smoother bedded at a 50° York pitch or even a 55° pitch. The steeper angle fractures the wood fibers ahead of the cutting edge, yielding a glass-smooth surface straight off the tool, eliminating the need for abrasive sanding that can blur crisp profile details.
"When fitting quarter-sawn white oak wainscoting, a 50-degree York pitch wooden plane isn't just a luxury; it's a necessity. The steep bed angle shears the medullary rays cleanly, preventing the ray fleck from chipping out and ruining the profile." — Master Finish Carpenter
Step-by-Step: Tuning the Wooden Body and Iron for Site Work
Wooden planes are hygroscopic; they expand and contract with job site humidity. A plane tuned in a 40% humidity shop will bind in a 65% humidity new-construction home. Follow this protocol to ensure optimal performance on-site.
- Check the Sole for Wind: Place the wooden sole on a verified flat granite surface plate. Use a 0.002" feeler gauge to check the corners. If the plane rocks, the body has twisted due to moisture exchange.
- Flatten the Sole: Adhere 120-grit PSA sandpaper to the granite plate. Rub the plane in a figure-eight pattern until the sole shows uniform scratching. Focus heavily on the area immediately in front of the mouth, as this dictates the cutting depth.
- Set the Mouth Aperture: For finish installation work, the mouth opening should be tight—approximately 1/32" (0.8mm). If the mouth is too wide, the wood fibers ahead of the blade will lift and tear. If the mouth is choked, shavings will jam.
- Bed the Iron and Chipbreaker: The chipbreaker must mate perfectly with the back of the iron to prevent shavings from wedging underneath. Hone the leading edge of the chipbreaker to a 45° micro-bevel and set it exactly 1/64" behind the cutting edge. Reference the Lie-Nielsen Sharpening Guide for precise micro-bevel geometry.
- Wedge Tapping Technique: Never strike the wooden wedge with a steel hammer, which will mushroom the wood and crack the plane body. Use a dedicated wooden or brass mallet. Tap the wedge firmly, then tap the back of the plane body to retract the blade, followed by a light tap on the blade itself to advance it to the final cutting depth.
On-Site Installation Techniques: Scribing and Fitting
The true value of understanding the different types of wooden hand planes emerges during the scribing and fitting phase of installation, where walls are rarely plumb and floors are never level.
Back-Beveling Baseboards for Undulating Drywall
When installing thick hardwood baseboards against drywall that has compound buildup or slight bowing, a flush fit is impossible if the back of the board is flat. Use a wooden jack plane with a heavily cambered (curved) iron to hollow out the back center of the baseboard. This technique, known as back-beveling or relieving, ensures that only the extreme front and back edges of the baseboard contact the wall. The front edge bites tightly into the drywall, leaving no visible gap, while the hollowed center clears the irregularities.
Refining Coped Joints on Crown Molding
While coping saws and routers rough out the profile of a coped joint on crown molding, the final fit requires a wooden shoulder plane or a small wooden block plane. Because the iron on a shoulder plane extends to the absolute edge of the sole, you can plane right up to the inside corner of the cope without the tool body interfering with the adjacent wall or ceiling. Take translucent, 0.001" shavings to sneak up on the final fit, testing the joint every three strokes.
Blade Metallurgy: O1 vs. A2 Steel for Job Site Conditions
The steel used in your plane iron drastically affects maintenance intervals on the job site. A2 tool steel is heavily marketed for its edge retention, but it requires diamond stones and significant time to resharpen. For installation carpenters who need to touch up an edge in 30 seconds between cuts, O1 high-carbon tool steel is vastly superior. O1 steel sharpens effortlessly on a standard waterstone or ceramic hone, allowing you to maintain a mirror polish on the micro-bevel throughout a 10-hour installation day. As noted by experts in Popular Woodworking's handplane technique archives, the ability to quickly resharpen on-site outweighs the marginal edge-retention benefits of A2 steel when dealing with clean, pre-milled architectural lumber.
Storage and Acclimation Best Practices
Wooden planes are tools made of wood, cutting wood. Both are subject to moisture content (MC) fluctuations. Store your wooden planes in a sealed job-site box with silica gel desiccant packets to stabilize the micro-climate. Never leave a wooden plane resting on its sole on a cold concrete slab or near an active HVAC vent, as localized moisture loss will warp the sole and ruin the tuning. By respecting the material science of the tool and the lumber, finish carpenters can achieve seamless, gap-free installations that define luxury craftsmanship.
Written by
James ThorntonJames Thornton is a construction industry veteran with 25 years of hands-on experience in wood framing, lumber grading, and residential building codes. He started as a framing carpenter in rural Oregon, earned his ICC Residential Building Inspector certification, and eventually became a senior plan reviewer for the City of Portland Bureau of Development Services. James holds a B.S. in Wood Science & Technology from Oregon State University and is a certified lumber grader through the West Coast Lumber Inspection Bureau (WCLIB). He has inspected over 3,000 residential construction sites and authored the city's internal guide on advanced framing techniques (2x6 at 24" O.C.). James lives in Bend, OR, where he builds custom timber-frame cabins and competes in lumberjack sports.
More from James Thornton
View all
Insulation
Best Home Insulation Materials: Complete 2026 Guide
Compare top home insulation materials for 2026. Find R-values, installed costs per square foot, and best uses for fiberglass, spray foam, and mineral wool.
Aug 4, 2026

Sustainable Building
Certify Your Green Building Material for LEED and WELL
Step-by-step guide to certifying a green building material for LEED v5 and WELL v2. Master EPDs, HPDs, and VOC limits for 2026 project specifications.
Aug 4, 2026

Stone & Masonry
Veneer Stacked Stone Panels: Interior Design & Style Showcase
Discover how veneer stacked stone panels transform interiors. Explore modern design profiles, material pairings, and technical installation specs.
Aug 4, 2026