Fix Spalled Concrete Using Akona Polymer-Modified Concrete Resurfacer (25-lb.)
Learn how to prep, mix, and apply the Akona polymer-modified concrete resurfacer (25-lb.) to fix spalled driveways and patios with lasting results.
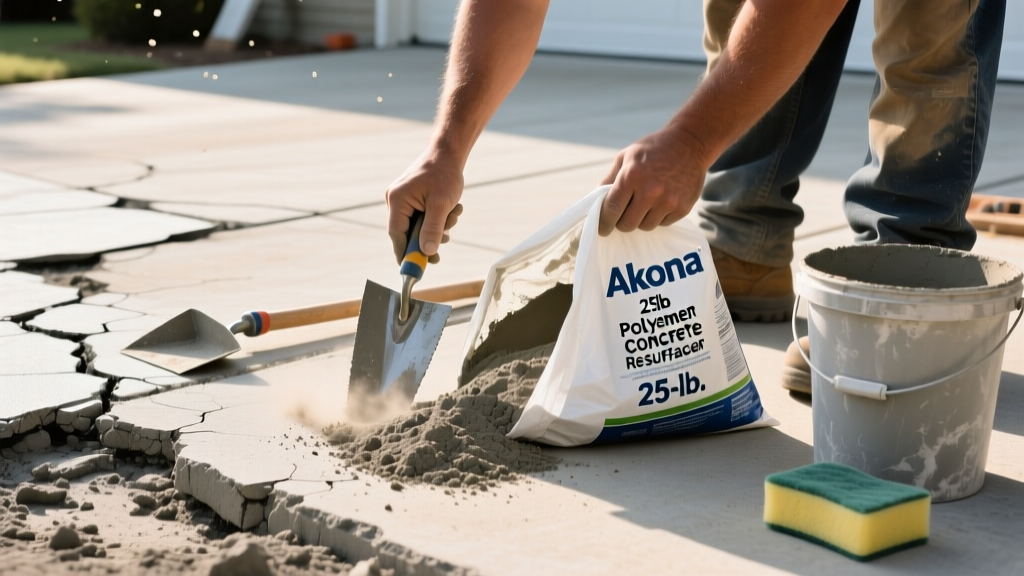
The Anatomy of Concrete Spalling and Why Polymer Modification Matters
Concrete spalling—the flaking, peeling, and pitting of a slab surface—is rarely a structural failure. Instead, it is a surface-level degradation typically driven by freeze-thaw cycling, de-icing salts, and improper initial finishing. According to the Portland Cement Association, when water saturates the capillary pores of non-air-entrained or poorly sealed concrete and subsequently freezes, the expansive ice crystals generate internal tensile stresses that exceed the concrete surface strength, causing the top layer to pop off.
For residential and light-commercial maintenance, replacing the entire slab is cost-prohibitive. This is where the Akona polymer-modified concrete resurfacer (25-lb.) becomes a critical maintenance asset. Unlike standard sand-mix cement, this product features pre-blended acrylic polymers. These polymers dramatically increase flexural strength, improve bond adhesion to the existing substrate, and allow the material to be feather-edged down to 1/16 of an inch without cracking or curling at the margins.
Pre-Application Checklist: Surface Prep and Cleaning
The most common cause of resurfacer delamination is inadequate surface preparation. The existing concrete must be clean, sound, and porous enough to accept the new polymer matrix. The International Concrete Repair Institute (ICRI) recommends achieving a specific Concrete Surface Profile (CSP) to ensure mechanical interlock. For thin polymer overlays, a CSP 3 to CSP 5 profile is generally required.
Pressure washing alone will not remove white, powdery efflorescence or deep-set automotive oil stains. Efflorescence must be treated with a 10% phosphoric acid solution, scrubbed, and thoroughly rinsed. Oil stains must be treated with a commercial-grade alkaline degreaser; otherwise, the oils will bleed through the Akona resurfacer and break down the polymer bond.
Step-by-Step Cleaning Protocol
- Clear the Area: Remove all furniture, debris, and loose vegetation from the slab joints.
- High-Pressure Washing: Use a gas-powered pressure washer delivering a minimum of 3,500 PSI. Equip it with a 15-degree (yellow) nozzle tip to provide enough aggressive cutting power to remove laitance and loose spalled material without gouging the sound concrete.
- Joint Protection: Clear out existing expansion joints using a crack chaser or angle grinder, and insert a closed-cell backer rod. Do not bridge expansion joints with the resurfacer.
- Saturation: The night before application, heavily soak the repair area with clean water. The substrate must be Saturated Surface-Dry (SSD) during mixing and application. If the concrete is bone-dry, it will flash-absorb the water from the Akona mix, killing the polymer cure and causing plastic shrinkage cracks.
Mixing Protocol for the 25-lb. Akona Resurfacer
The 25-lb. bucket of Akona resurfacer is formulated for small-to-medium maintenance patches, typically covering 12 to 15 square feet at a 1/8-inch thickness. Proper mixing is non-negotiable; introducing too much air or water will compromise the compressive and flexural strength.
| Parameter | Specification for 25-lb. Unit |
|---|---|
| Water Requirement | Approx. 2.5 to 3.0 pints (1.2 to 1.4 Liters) of clean, potable water |
| Mixing Equipment | Low-speed drill (under 600 RPM) with a helical paddle mixer |
| Target Consistency | Thick pancake batter or smooth peanut butter (holds a trowel ridge) |
| Pot Life (Working Time) | 20 to 30 minutes at 70°F (21°C); significantly less in direct heat |
| 2026 Average Retail Cost | $28.00 - $36.00 per 25-lb. bucket |
Never add water to the mix once it begins to set in the bucket. If the material stiffens during your 25-minute window, remix it vigorously with the drill for 30 seconds to reactivate the polymers. Adding late-stage water breaks the cementitious bond and guarantees surface dusting.
Application Playbook: Trowel and Squeegee Techniques
Because the Akona 25-lb. resurfacer is designed for versatile maintenance, your application tool should be dictated by the depth and nature of the spalling.
Feather-Edging Micro-Cracks and Shallow Scaling
For surface scaling less than 1/8-inch deep, use a heavy-duty rubber squeegee or a flat steel trowel. Pour the mixed resurfacer directly onto the damp (SSD) substrate. Pull the material across the surface using overlapping strokes, forcing the polymer mix deep into the pores. Immediately follow up with a steel finishing trowel held at a 15-degree angle to smooth the surface and feather the edges seamlessly into the surrounding sound concrete.
Filling Potholes and Spalled Divots (Up to 1/2 Inch)
For deeper divots, a two-coat approach prevents sagging and shrinkage cracking. Coat 1 (The Scratch Coat): Mix a slightly stiffer batch (use 2.5 pints of water). Press the material firmly into the deepest part of the divot using a margin trowel, leaving it roughly 1/8-inch below the final surface grade. Score the surface lightly with a wire brush to create a mechanical key. Allow it to set for 45 minutes. Coat 2 (The Finish Coat): Mix a standard batch and trowel it flush with the surrounding slab, blending the edges smoothly.
Curing, Sealing, and Long-Term Maintenance
Polymer-modified resurfacers require strict moisture management during the initial cure. If the surface dries too quickly, the polymers will form a plastic skin that traps unhydrated cement below, leading to a weak, chalky surface.
- Immediate Cure: As soon as the surface loses its wet sheen and can bear light finger pressure without indentation (usually 1 to 2 hours), apply a fine mist of clean water using a pump sprayer. Do not use a high-pressure hose, which will wash out the surface paste.
- Membrane Curing: For driveways exposed to direct sunlight, spray a thin, even coat of a water-based acrylic cure-and-seal (minimum 20% solids) after 24 hours. This locks in moisture and provides immediate UV and chloride protection.
- Traffic Timeline: Foot traffic is acceptable after 24 hours. Light vehicular traffic (sedans) can resume after 72 hours. Heavy trucks or RVs should be kept off the repair for a full 7 days to allow the cement matrix to reach adequate compressive strength.
Troubleshooting Common Application Failures
Even with a premium product like the Akona 25-lb. resurfacer, environmental variables and human error can cause defects. Use this diagnostic matrix to identify and fix issues.
| Symptom | Root Cause | Corrective Action |
|---|---|---|
| Delamination (hollow sound when tapped) | Substrate was dry, dusty, or contaminated with oil/laitance. | Chip away loose material, re-prep with a diamond cup wheel, and reapply. |
| Plastic Shrinkage Cracking (craze cracking) | Applied in high wind, low humidity, or direct mid-day sun without wet curing. | Grind surface smooth, apply a penetrating lithium densifier, and reseal. |
| Chalky, dusting surface | Excess water added during mixing or troweling, or freeze damage before curing. | Acid etch the surface lightly and apply a high-solids epoxy or polyurethane sealer. |
| Color mismatch with adjacent concrete | Inconsistent water ratios between batches or varying substrate porosity. | Apply a semi-transparent concrete stain to unify the entire slab aesthetic. |
By adhering strictly to surface preparation standards, respecting the precise water-to-powder ratios, and managing the curing environment, the Akona polymer-modified concrete resurfacer provides a highly durable, cost-effective maintenance solution that extends the lifespan of aging concrete slabs by a decade or more.