Porcelain vs Concrete Pavers: Installation & Base Prep Guide
Compare porcelain vs concrete pavers installation methods. Learn base prep, bedding systems, cutting specs, and 2026 labor costs for both materials.

The Core Divergence: Friction, Weight, and Tolerance
While both concrete and porcelain pavers serve as premium exterior hardscaping materials, their physical properties dictate entirely different installation protocols. Concrete pavers (governed by ASTM C936) rely on mass, interlocking geometric shapes, and the friction of a sand bedding layer to distribute loads. Porcelain pavers, typically manufactured at a 20mm (3/4-inch) thickness for exterior use, are rectified, non-porous (water absorption <0.5% per ASTM C373), and lack interlocking edges. Because porcelain does not absorb moisture and has a smooth underside, it cannot rely on traditional sand-set friction. Attempting to install 20mm porcelain pavers using standard concrete paver sand-set methods will result in lateral shifting, joint failure, and surface ponding.
Subgrade and Base Preparation (The Shared Foundation)
Regardless of the surface material, the structural integrity of any paved surface relies on the subgrade and aggregate base. Both systems require a compacted subgrade achieving a minimum 95% Standard Proctor density (ASTM D698). For poorly draining soils (clay or silt), a non-woven geotextile fabric must be laid over the subgrade to prevent aggregate intermingling.
Aggregate Base Specifications
- Pedestrian Traffic: 4 inches of compacted ASTM D2940 Class II road base or crushed angular aggregate (3/4-inch minus).
- Vehicular Traffic (Driveways): 6 to 8 inches of compacted aggregate base, installed in 2-inch lifts.
- Compaction Force: Use a vibratory plate compactor delivering a minimum of 5,000 lbs of centrifugal force. Base tolerance must be ±1/8 inch over a 10-foot straight edge.
Bedding Systems: Where the Materials Split
The bedding layer transfers the load from the paver to the base and provides initial leveling. This is where the installation methods for porcelain vs concrete pavers diverge significantly. According to the Interlocking Concrete Pavement Institute (ICPI) technical specifications, concrete pavers utilize a flexible sand-set system. Porcelain requires rigid or highly specialized bedding, as detailed in the Tile Council of North America (TCNA) exterior installation guidelines.
| Bedding Method | Concrete Pavers | 20mm Porcelain Pavers | Primary Use Case |
|---|---|---|---|
| Sand-Set | Standard (1-inch ASTM C33 sand) | Not Recommended | Patios, walkways, driveways |
| Mortar-Set | Rare (requires slab) | Standard (over concrete slab) | High-load areas, commercial plazas |
| Pedestal System | Not Compatible | Standard (Adjustable supports) | Rooftops, balconies, raised decks |
| Gravel-Set | Permeable systems only | Specialized (with rigid restraints) | Permeable landscaping, temporary paths |
Contractors frequently attempt to lay 20mm porcelain pavers on a 1-inch sand bed to save on concrete slab costs. Because porcelain lacks the mass and interlocking friction of concrete, thermal expansion and freeze-thaw cycles will cause the pavers to "walk" outward. Without a poured concrete collar or specialized epoxy edge restraints, sand-set porcelain installations routinely fail within 18 months.
Step-by-Step Installation: Concrete Pavers (Sand-Set)
- Edge Restraint Installation: Install rigid plastic or aluminum edge restraints (e.g., Perma-Edge) directly on the compacted base, securing with 10-inch galvanized steel spikes every 12 inches.
- Bedding Sand Application: Spread a uniform 1-inch layer of coarse, sharp concrete sand (ASTM C33). Do not use masonry sand, which is too fine and retains moisture.
- Screeding: Use 1-inch diameter steel pipes as screed rails. Pull a magnesium straight-edge across the pipes to achieve a perfectly level bedding layer. Remove pipes and fill voids.
- Paver Placement: Lay pavers according to the pattern, maintaining a consistent 1/16-inch to 1/8-inch joint. Do not drag pavers across the sand; drop them vertically into place.
- Initial Compaction: Run a low-amplitude vibratory plate compactor (with a urethane pad to prevent surface scratching) over the field in two perpendicular directions to seat the pavers into the sand.
- Jointing: Sweep polymeric sand into the joints, compact again to vibrate the sand to the bottom of the joint, sweep off excess, and activate with a fine mist of water.
Step-by-Step Installation: Porcelain Pavers (Mortar-Set)
For ground-level applications, mortar-set porcelain over a concrete slab provides the highest structural integrity and eliminates weed growth.
- Slab Preparation: Pour a 4-inch reinforced concrete slab (minimum 3,000 PSI) with a 1/4-inch per foot slope for drainage. The slab must cure for a minimum of 28 days.
- Membrane Application: Apply a crack-isolation or waterproofing membrane (e.g., Schluter-DITRA or Laticrete Hydro Ban) to the concrete slab to prevent telegraphing cracks.
- Thin-Set Selection: Use a high-performance, polymer-modified thin-set mortar meeting ANSI A118.15. Because porcelain has near-zero absorption, standard unmodified thin-set (ANSI A118.1) will not achieve adequate chemical bonding.
- Back-Buttering: Apply thin-set to the substrate using a 1/2-inch square-notched trowel. Simultaneously, "back-butter" the underside of the 20mm porcelain paver with the flat side of the trowel to ensure 95% minimum mortar contact.
- Setting and Spacing: Press the paver into the mortar bed. Use 1/8-inch or 3/16-inch hard plastic spacers. Do not use a vibratory plate compactor; tap gently with a white rubber mallet to level.
Cutting, Edge Restraint, and Jointing Specifications
The tooling required to cut these materials highlights their fundamental differences in hardness and brittleness.
Cutting Protocols
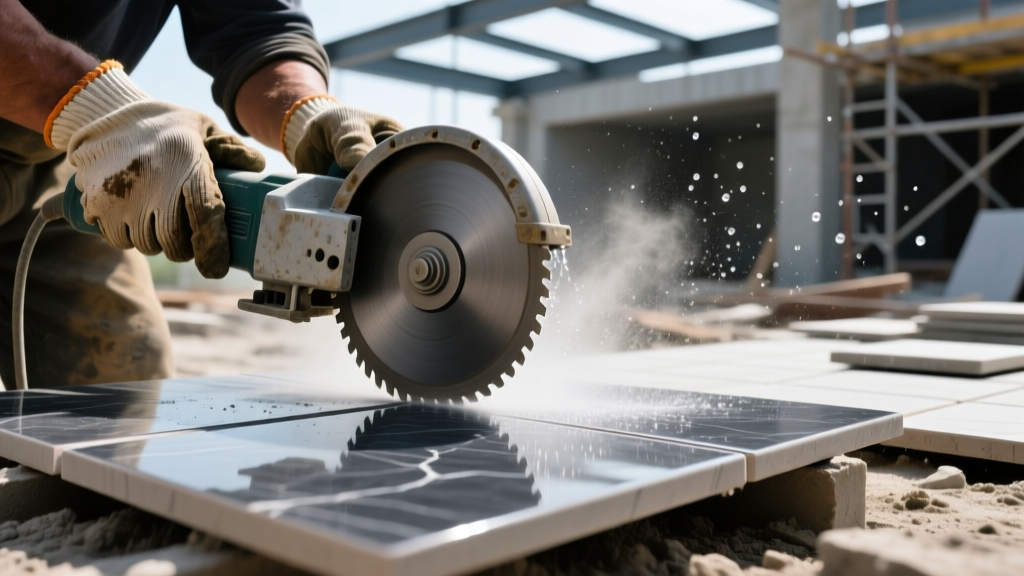
- Concrete Pavers: Cut using a gas-powered demo saw or 10-inch wet saw equipped with a segmented diamond blade. Segmented blades clear dust efficiently and prevent the blade from binding in the abrasive concrete matrix.
- Porcelain Pavers: Cut using a continuous-rim (turbo or smooth) diamond blade specifically rated for ultra-hard porcelain. A continuous water feed is mandatory to prevent thermal shock, which will micro-fracture the glaze and cause edge chipping.
Expert Tip: When cutting 20mm porcelain pavers for coping or stair treads, never use an angle grinder for the final pass. The high RPM and lack of water cooling will glaze the diamond matrix and chip the rectified edge. Always finish cuts on a bridge saw with a stabilized feed rate.
Jointing Materials
Concrete pavers utilize polymeric sand, which hardens to resist washout while allowing minor flex. Porcelain pavers installed on a mortar bed require a flexible, stain-resistant grout. Standard cementitious grout will crack due to the differing thermal expansion coefficients of the porcelain and the concrete slab. Use a high-performance epoxy grout or a urethane-based grout (e.g., SpectraLOCK or Flexcolor CQ) for exterior porcelain joints.
2026 Material and Installed Cost Matrix
The following cost estimates reflect Q1 2026 national averages for residential hardscaping, including demolition of existing surfaces, base preparation, materials, and professional labor.
| Cost Factor | Concrete Pavers (Sand-Set) | 20mm Porcelain Pavers (Mortar-Set) | 20mm Porcelain (Pedestal System) |
|---|---|---|---|
| Material Cost (per sq. ft.) | $4.50 - $8.00 | $11.00 - $22.00 | $14.00 - $28.00 |
| Base & Bedding Materials | $1.50 - $2.50 | $4.00 - $6.50 (incl. slab & thin-set) | $6.00 - $10.00 (pedestals & framing) |
| Professional Labor (per sq. ft.) | $8.00 - $14.00 | $16.00 - $28.00 | $12.00 - $20.00 |
| Total Installed Cost (per sq. ft.) | $14.00 - $24.50 | $31.00 - $56.50 | $32.00 - $58.00 |
Maintenance and Lifecycle Considerations
While concrete pavers present a lower initial installation cost, they require ongoing maintenance. Concrete is susceptible to efflorescence (white salt deposits), UV fading, and surface erosion over a 15-year period. Sealing is required every 3 to 5 years to lock in joint sand and enhance color. Porcelain pavers, fired at over 2,200°F, are completely UV stable, impervious to freeze-thaw spalling, and do not produce efflorescence. The higher upfront cost of porcelain is offset by a near-zero maintenance lifecycle and a structural lifespan exceeding 50 years.
Written by
David NakamuraDavid Nakamura is a licensed architect (AIA) and construction technology writer focused on sustainable building methods, mass timber engineering, and high-performance building envelopes. He holds a Master of Architecture from the University of Washington and is a certified Passive House Consultant (CPHC). David spent eight years at the Seattle firm Mithun, where he led the design of three LEED Platinum projects, before founding his own practice specializing in net-zero residential design. He serves on the editorial advisory board of GreenBuilder Magazine and has authored peer-reviewed papers on cross-laminated timber (CLT) connections for the Journal of Structural Engineering. In his spare time, David teaches woodworking at Pratt Fine Arts Center and kayaks the Puget Sound.
More from David Nakamura
View all
Construction Cost
Labor Cost to Build a Deck Per Sq Ft: 2026 Installation Guide
Discover the exact labor cost to build a deck per sq ft in 2026. This installation guide breaks down contractor rates, complexity factors, and hidden fees.
Aug 4, 2026

Construction Cost
How Much Does It Cost to Build a 3 Bedroom House? Financing Guide
Learn exactly how much it costs to build a 3 bedroom house and explore 2026 financing options, construction loan types, and budget frameworks for your build.
Aug 4, 2026

Construction Cost
Cost to Build a Tennis Court: 2026 Guide
How much does it cost to build a tennis court in 2026? Breakdowns for asphalt, concrete, and synthetic surfaces plus fencing and lighting.
Jul 30, 2026