How to Apply Concrete Patch for Permanent Driveway and Slab Repairs
Learn how to apply concrete patch for permanent driveway and slab repairs. Step-by-step surface prep, product selection, and curing techniques.
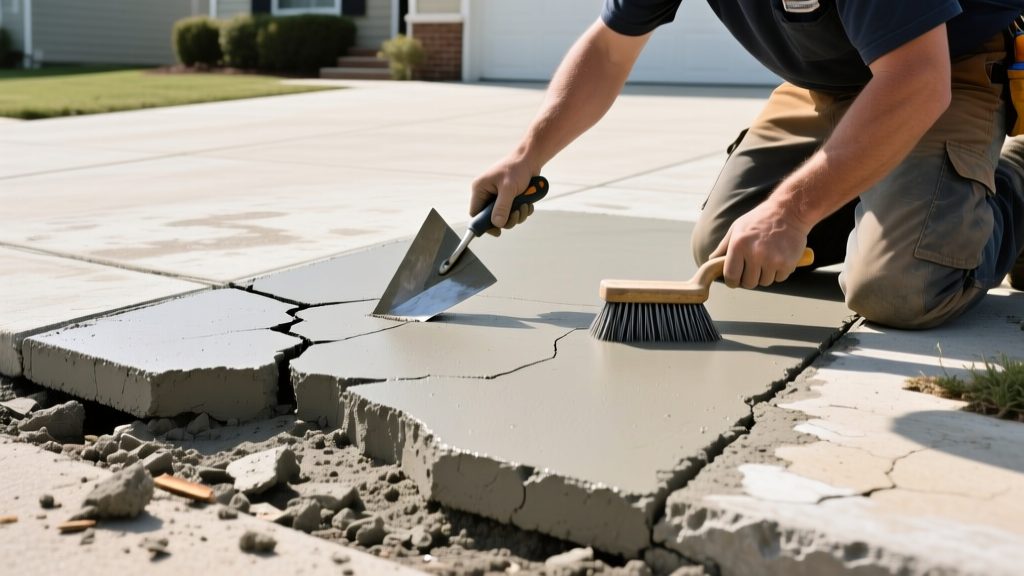
Diagnosing the Damage: Selecting the Right Concrete Patch
Concrete slabs fail locally before they fail globally. Spalling, pop-outs, and edge breaks compromise structural integrity by exposing the underlying matrix and rebar to water intrusion and oxidation. Applying a concrete patch is not merely about filling a void; it requires matching the thermal expansion coefficient, compressive strength, and modulus of elasticity of the host substrate. Selecting the wrong chemistry guarantees a failed repair within a single freeze-thaw cycle.
According to the Portland Cement Association (PCA), surface scaling and spalling are most frequently caused by freeze-thaw deterioration in non-air-entrained concrete or improper finishing practices that trap bleed water at the surface. To counteract this, your patching material must possess high flexural strength and low permeability.
| Damage Profile | Recommended Patch Chemistry | Key Characteristics | Industry-Standard Examples |
|---|---|---|---|
| Hairline Cracks (<1/8") | Low-viscosity Epoxy or Polyurethane | Wicks deep via capillary action; restores structural tensile strength. | Sika CrackFlex, Loctite Epoxy |
| Spalling & Scaling (<1" deep) | Polymer-Modified Cementitious | Feather-edge capability, high flexural strength, bonds to thin margins. | Quikrete Vinyl Patcher, Mapcrete |
| Deep Holes & Potholes (>1" deep) | Fast-Setting Hydraulic or Sand Mix | High compressive strength (4,000+ PSI), low shrinkage, rapid set times. | SikaTop-122, RapidSet Cement All |
| Active Leaks & Voids | Hydraulic Cement | Expands as it cures, sets in 3-5 minutes, stops active water flow. | Drylok Fast Plug, ThorPlug |
The 80% Rule: Surface Preparation Protocols
The most common cause of concrete patch failure is not the material itself, but inadequate surface preparation. The American Concrete Institute (ACI) Committee 546 emphasizes that surface preparation dictates the bond strength of any repair. You must achieve a clean, sound, and properly profiled substrate before mixing any material.
Never attempt to patch a shallow spall with standard concrete mix. Standard mixes require a minimum thickness of 2 inches to maintain structural cohesion. If you attempt to feather-edge a standard mix to 1/4 inch, it will crumble and pop out under foot traffic. Always use a polymer-modified vinyl patcher for transitions thinner than 1/2 inch.
Step 1: Mechanical Profiling and Edge Squaring
Loose, friable concrete must be removed until you reach a solid, unyielding substrate. Use a cold chisel and a 3-pound masonry hammer to chip away all degraded material. For larger spalled areas, use a 4-inch angle grinder equipped with a diamond cup wheel to scarify the surface and remove laitance.
- Square the Edges: Use the angle grinder with a diamond masonry blade to cut a 1/4-inch deep relief kerf around the perimeter of the repair area. This creates a hard, square shoulder that prevents the patch from feathering out to zero and shearing off under traffic loads.
- Remove Dust: Sweep the area, then use a shop vacuum and a stiff bristle brush to remove all micro-dust from the pores. Compressed air is highly effective for blowing dust out of deep crevices.
Step 2: Achieving Saturated Surface Dry (SSD) Condition
Cementitious patches require water to cure. If the host concrete is bone dry, it will act like a sponge, rapidly stealing moisture from the fresh patch and causing plastic shrinkage cracks. Conversely, standing water will dilute the water-cement ratio of your patch, destroying its compressive strength.
Soak the repair area with clean water for 2 to 4 hours before application. Just before mixing your patch, use a sponge or compressed air to remove all standing puddles. The concrete should look dark and damp, but have no visible water on the surface. This is known in the industry as the Saturated Surface Dry (SSD) condition.
Application Procedures by Damage Profile
With the substrate profiled and in an SSD state, you can begin the application. The technique varies drastically depending on the depth and geometry of the void.
Scenario A: Spalling and Shallow Surface Defects
For polymer-modified cementitious patches (like vinyl concrete patcher), the goal is a dense, burnished finish that mimics the surrounding trowel marks.
- Mix in Small Batches: Polymer-modified patches set rapidly. Mix only what you can apply in 10 minutes. Use a margin trowel in a 5-gallon bucket, adding water incrementally until you reach a stiff, peanut-butter-like consistency.
- Force the First Coat: Using a flat steel trowel, press the material forcefully into the pores of the substrate. Do not just lay it on top; you must mechanically force the paste into the microscopic voids to create a chemical and mechanical bond.
- Build and Strike Off: Overfill the patch by about 1/8 inch. Use a straight edge or the flat of your trowel to strike off the excess material, leveling it with the surrounding slab.
- Burnish: Wait until the patch loses its wet sheen and becomes thumbprint-hard (usually 15-30 minutes). Lightly mist the surface with water and use a steel trowel to burnish it flat. This closes the surface pores and creates a dense, wear-resistant crust.
Scenario B: Deep Voids and Structural Potholes
Deep holes require materials with high compressive strength and low shrinkage, such as rapid-setting hydraulic sand mixes. The Federal Highway Administration's concrete pavement guidelines recommend specific layering techniques for deep structural repairs to prevent thermal cracking during the exothermic curing process.
When filling holes deeper than 2 inches, apply the patch in multiple layers (lifts). Pouring 6 inches of rapid-set cement at once generates excessive heat during hydration, which can cause thermal shock and micro-cracking. Fill the void to within 1 inch of the surface, scratch the top layer with a rake to provide a mechanical key, let it set for 1 hour, and then apply the final 1-inch leveling coat.
"The structural integrity of a deep concrete patch relies heavily on the interfacial transition zone between the old substrate and the new material. Proper edge squaring and SSD preparation are non-negotiable for load-bearing driveway repairs."
Curing Mechanics and Long-Term Sealing
The application is only half the battle. Improper curing will reduce the surface strength of a 5,000 PSI patch to less than 2,000 PSI, leading to premature raveling and dusting.
Wet Curing vs. Membrane-Forming Compounds
Cementitious patches must retain moisture to complete the hydration process. For horizontal exterior slabs, you have two primary options:
- Wet Curing: Cover the patched area with damp burlap and a layer of 4-mil polyethylene sheeting. Tape the edges to trap the moisture. Leave this in place for a minimum of 48 hours (or up to 7 days for standard non-rapid-set mixes).
- Curing Compounds: If wet curing is impractical, spray a water-based, membrane-forming curing compound (such as W.R. Meadows Cure & Seal) over the patch immediately after the final burnish. This creates a microscopic film that prevents moisture evaporation.
Final Sealing and Protection
Once the patch has fully cured (typically 7 to 28 days, depending on the product chemistry), the entire slab—including the repair—should be sealed with a penetrating silane/siloxane water repellent. This prevents future water intrusion, halting the freeze-thaw cycle that caused the original spalling. Avoid film-forming acrylic sealers on exterior driveways, as they degrade under UV exposure and become slippery when wet. By adhering strictly to these preparation, application, and curing protocols, your concrete patch will perform as a monolithic extension of the original slab for decades.