Cinder Blocks vs Concrete Blocks: Masonry Installation Guide
Learn the structural differences and installation techniques for cinder blocks vs concrete blocks, including mortar mixes, rebar, and weight loads.

The Great Masonry Misconception: Defining the Materials
Before mixing a single batch of mortar, we must address a pervasive industry misnomer. True 'cinder blocks'—manufactured using coal cinders and ash—have not been produced for structural applications since the mid-20th century. They were phased out due to poor compressive strength, high shrinkage, and the environmental hazards of coal ash. When contractors and homeowners use the phrase 'cinder blocks vs concrete blocks' today, they are actually comparing Lightweight Concrete Masonry Units (CMUs) against Normal Weight CMUs.
Understanding the physical differences between lightweight and normal weight blocks is critical, as it dictates your mortar selection, moisture management, and reinforcement strategy during installation.
Material Specifications & Load Capacities
Normal weight blocks utilize dense aggregates like sand, gravel, and crushed stone. Lightweight blocks use expanded shale, clay, or slate aggregates that are kiln-fired to create microscopic air pockets. This fundamental difference alters how the blocks interact with mortar and structural loads.
| Feature | Normal Weight (Concrete) | Lightweight ('Cinder') |
|---|---|---|
| Aggregate Base | Sand, gravel, crushed stone | Expanded shale, clay, slate |
| Density (lbs/ft³) | 125 - 140 lbs | 85 - 105 lbs |
| Compressive Strength | 2,800 - 4,000+ psi | 1,900 - 3,000 psi |
| Water Absorption (IRA) | Low to Moderate | High (Requires pre-wetting) |
| Primary Use Case | Retaining walls, foundations, below-grade | Above-grade walls, partitions, firewalls |
Pre-Installation: Footings and Moisture Management
Footing Requirements
Both block types require a continuous poured concrete footing that extends below the local frost line. The footing must be exactly level; a 1/4-inch deviation in the footing will compound into a severe plumb error by the fourth course. For an 8-inch nominal block wall, the footing should be at least 16 inches wide and 8 inches deep, reinforced with continuous #4 rebar.
The Moisture Suction Factor
This is where the installation of lightweight blocks diverges sharply from normal weight blocks. Lightweight CMUs have a high Initial Rate of Absorption (IRA). If laid dry, they will rapidly suck the moisture out of your mortar bed, causing 'mortar burn' and destroying the bond strength before the cement can hydrate.
- Normal Weight Blocks: Generally do not require pre-wetting unless ambient temperatures exceed 90°F or the blocks have been sitting in direct sunlight.
- Lightweight Blocks: Must be lightly hosed down the evening before installation. The goal is 'saturated surface dry' (SSD)—the block should be damp to the touch inside the cells, but have no standing water or sheen on the exterior face.
Step-by-Step Installation Protocol
According to guidelines published by the Portland Cement Association, proper joint tooling and mortar selection are paramount for weather-tight masonry.
- Dry Layout: Snap chalk lines on the footing and dry-lay the first course of blocks (without mortar) to verify dimensions and minimize cutting. Leave exactly 3/8-inch gaps for mortar joints.
- Mortar Selection: Use Type S mortar (1 part Portland cement, 1/2 part hydrated lime, 4.5 parts sand) for below-grade or high-load applications. Use Type N mortar (1 part cement, 1 part lime, 6 parts sand) for above-grade, non-loadbearing lightweight walls. Mix to a consistency that holds a 90-degree ridge when sliced with a trowel.
- Laying the Lead Corners: Build the corners up to three or four courses first. Use a 4-foot level to check plumb on both faces and a mason's line to ensure the outer edges are perfectly straight.
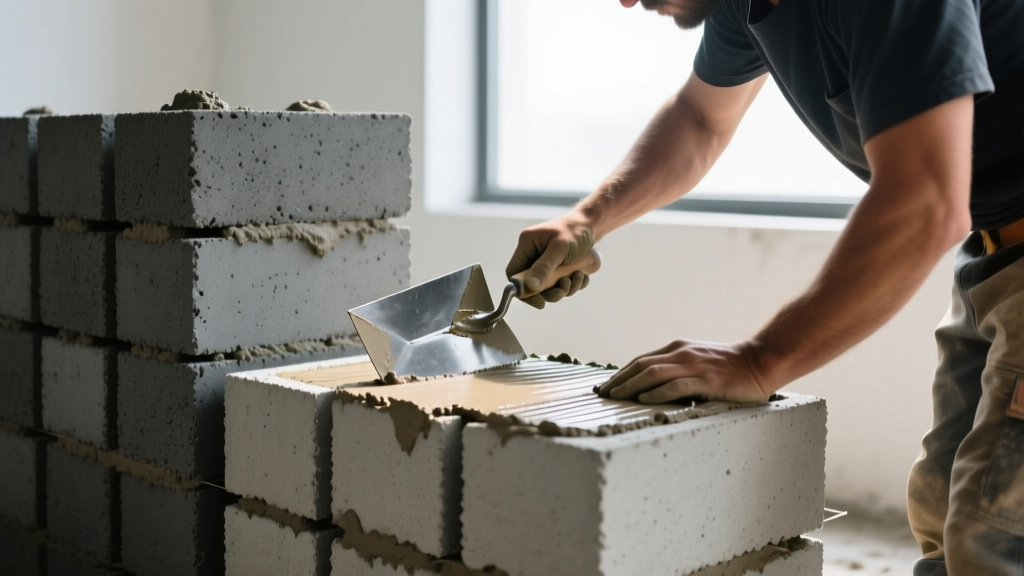
- Buttering and Bedding: Apply a 1-inch thick mortar bed to the footing. 'Butter' the end webs of the block with mortar before placing it. Do not furrow the mortar bed too deeply, as this creates a channel for water infiltration.
- Running the Line: Stretch a mason's line between the lead corners. Lay the intermediate blocks to the line, but never let the blocks physically touch the line, or it will push the entire course out of plumb.
- Tooling the Joints: Once the mortar is 'thumbprint hard' (leaves a slight indentation when pressed firmly with your thumb but doesn't stick), tool the joints. For exterior walls, always use a concave or V-joint tool. This compresses the mortar against the block, creating a dense, water-resistant seal. Never use a flush or raked joint on exterior lightweight masonry.
Reinforcement and Grouting Matrices
Unreinforced masonry is highly susceptible to lateral loads and seismic activity. Modern building codes require strategic reinforcement, which differs slightly based on the block density.
Vertical and Horizontal Steel
For standard residential construction, insert #4 (1/2-inch) or #5 (5/8-inch) vertical rebar into the footing dowels at 48-inch on-center intervals. For horizontal reinforcement, use ladder-type or truss-type joint reinforcement embedded in the mortar bed every second or third course. Truss-type is preferred for lightweight blocks as it allows for better grout flow through the cells.
The Grouting Process
Grout is not mortar; it is a high-slump concrete mixture designed to flow into the block cells and encapsulate the rebar.
- Normal Weight Grouting: Standard fine grout (pea gravel aggregate) works well. The dense walls of the block prevent the grout from losing moisture too quickly.
- Lightweight Grouting: Because lightweight blocks can absorb water from the grout, causing it to seize up inside the cell, you must use a high-slump grout (8 to 11 inches) or a self-consolidating grout (SCG). SCG requires no mechanical vibration and flows perfectly around the rebar without leaving honeycombed voids.
Always refer to The Masonry Society design codes for specific rebar sizing and cell-spacing requirements based on your local wind and seismic load maps.
Common Failure Modes and Prevention
Even experienced masons can encounter issues when switching between normal weight and lightweight materials. Watch for these specific failure modes:
1. Efflorescence on Lightweight Blocks
Because lightweight blocks are more porous, they are highly susceptible to efflorescence (white, powdery salt deposits) if exposed to moisture before the wall is sealed. Prevention: Keep block pallets covered with heavy tarps on-site. Do not lay lightweight blocks during active rain, and ensure cavity walls have proper weep holes and flashing at the base.
2. Shrinkage Cracking
Lightweight CMUs experience higher drying shrinkage than normal weight blocks as the expanded aggregates stabilize. Prevention: Install control joints (using pre-formed neoprene splines or raked joints filled with polyurethane sealant) every 20 to 25 feet, and always at wall height changes or near window openings.
3. Mortar Joint Delamination
If lightweight blocks were not pre-wetted, the mortar will cure as a dry, crumbly powder rather than a hard, hydrated bond. Prevention: Perform a field test. Trowel a small amount of mortar onto a dry block. If the mortar turns gray and loses its plasticity within 3 minutes, the blocks are too dry and must be hosed down immediately.
Mastering the installation of both block types requires respecting their unique material science. By adjusting your moisture management, mortar selection, and grout slump, you ensure a structurally sound, weather-resistant masonry wall that will perform flawlessly for decades.
Written by
James ThorntonJames Thornton is a construction industry veteran with 25 years of hands-on experience in wood framing, lumber grading, and residential building codes. He started as a framing carpenter in rural Oregon, earned his ICC Residential Building Inspector certification, and eventually became a senior plan reviewer for the City of Portland Bureau of Development Services. James holds a B.S. in Wood Science & Technology from Oregon State University and is a certified lumber grader through the West Coast Lumber Inspection Bureau (WCLIB). He has inspected over 3,000 residential construction sites and authored the city's internal guide on advanced framing techniques (2x6 at 24" O.C.). James lives in Bend, OR, where he builds custom timber-frame cabins and competes in lumberjack sports.
More from James Thornton
View all
Insulation
Best Home Insulation Materials: Complete 2026 Guide
Compare top home insulation materials for 2026. Find R-values, installed costs per square foot, and best uses for fiberglass, spray foam, and mineral wool.
Aug 4, 2026

Sustainable Building
Certify Your Green Building Material for LEED and WELL
Step-by-step guide to certifying a green building material for LEED v5 and WELL v2. Master EPDs, HPDs, and VOC limits for 2026 project specifications.
Aug 4, 2026

Stone & Masonry
Veneer Stacked Stone Panels: Interior Design & Style Showcase
Discover how veneer stacked stone panels transform interiors. Explore modern design profiles, material pairings, and technical installation specs.
Aug 4, 2026