Fiber Cement Siding Patch Material: Step-by-Step Repair Guide
Learn how to select and apply fiber cement siding patch material to fix cracks, holes, and impact damage with this detailed step-by-step repair guide.

Diagnosing Siding Damage: When to Patch vs. Replace
Fiber cement siding is highly durable, but it is not impervious to damage. Impact from landscaping equipment, structural settlement, and improper fastening can cause cracks, spalling, and gouges. Before purchasing a fiber cement siding patch material, you must accurately diagnose the damage. Patching is a cost-effective solution for localized cosmetic and minor structural flaws, but severe damage requires full board replacement.
| Damage Type | Severity / Size | Recommended Action | Ideal Patch Material |
|---|---|---|---|
| Hairline Cracks | Less than 1/8" wide | Patch & Seal | Elastomeric Acrylic Sealant |
| Surface Spalling / Chips | Shallow, less than 1/4" deep | Patch & Sand | Cementitious Vinyl Patcher |
| Deep Gouges / Impact Holes | Up to 2" diameter, through-board | Patch & Rebuild | Two-Part Exterior Epoxy |
| Structural Cracks / Rot | Spanning multiple boards or near joints | Full Replacement | N/A (Replace Board) |
Selecting the Right Fiber Cement Siding Patch Material
Not all patching compounds adhere properly to the Portland cement and cellulose fiber matrix of fiber cement siding. Using standard wood filler or interior spackle will result in rapid moisture absorption, swelling, and ultimate failure. According to industry guidelines from the James Hardie installation resources, repairs must utilize materials that accommodate the thermal expansion and contraction rates of cementitious products.
1. Elastomeric Acrylic Sealants (For Hairline Cracks)
For cracks under 1/8-inch, a high-quality, paintable elastomeric sealant is required. Products like OSI Quad Max or ColorRite offer stretch capacities up to 40%, allowing the patch to move with the siding during seasonal temperature shifts. These materials cure to a flexible rubber state, preventing the crack from telegraphing through the topcoat.
2. Cementitious Vinyl Patchers (For Surface Spalling)
When the top layer of the siding flakes or chips off (spalling), a sandable cementitious patcher like Quikrete Vinyl Concrete Patcher is ideal. These compounds bond chemically with the existing Portland cement matrix. However, they lack high flexural strength and should only be used for shallow, non-structural repairs where the patch will not be subjected to bending forces.
3. Two-Part Exterior Epoxies (For Deep Gouges)
For deep impact damage or missing corners, a two-part structural epoxy formulated for concrete and masonry (such as PC-Crete or Abatron) is the superior choice. Epoxy provides immense compressive strength, zero shrinkage upon curing, and can be sanded, routed, and drilled once fully hardened. While more expensive ($25–$40 per kit), it provides a permanent, structural rebuild of the missing material.
Fiber cement siding contains crystalline silica. Routing, sanding, or dry-scraping damaged areas generates respirable silica dust, which can cause severe lung disease. Always wear a NIOSH-approved N95 or P100 respirator, use a HEPA-filtered vacuum attachment for power tools, and wet-sand the patch material whenever possible to suppress dust.
Tools and Materials Checklist
Proper preparation dictates the longevity of the repair. Assemble the following tools before beginning:
- Rotary Tool (Dremel): Equipped with a 1/8" carbide routing bit or diamond grinding stone.
- Stiff-Bristle Nylon Brush & HEPA Vacuum: For cavity preparation.
- Putty Knives: One 1.5" flexible steel blade for application; one 3" stiff blade for striking off.
- Sandpaper: 120-grit for leveling, 220-grit for final texture blending.
- Concrete Bonding Adhesive: (If using cementitious patchers) to prevent rapid moisture loss.
- Exterior Primer & Topcoat: 100% acrylic latex exterior paint matched to the existing siding.
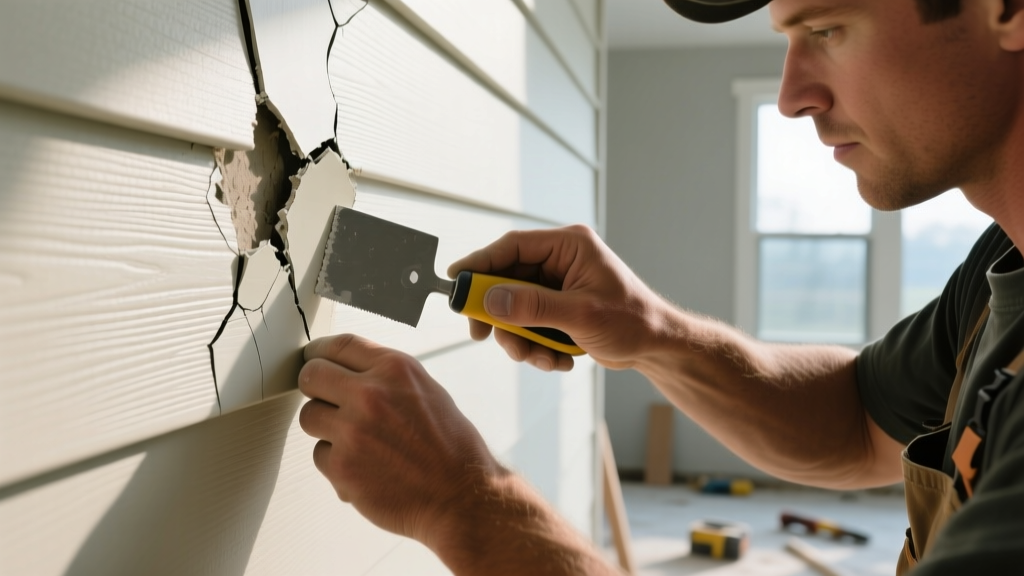
Step-by-Step Installation Guide
Follow this precise sequence to ensure maximum adhesion and a seamless visual finish. Environmental conditions matter: do not apply fiber cement siding patch material if ambient temperatures are below 40°F (4°C) or above 90°F (32°C), or if rain is expected within 12 hours.
Step 1: Route and Bevel the Damage
Do not simply smear patch material over a flush crack. Use a rotary tool to widen the crack or gouge into a V-shape or U-shape channel. Create a 45-degree bevel on the edges of the damage. This increases the surface area for mechanical adhesion and creates a physical lock for the patch material. The cavity should be at least 1/8" deep to hold a sufficient volume of filler.
Step 2: Clean and Prime the Cavity
Vacuum all dust from the routed cavity. If you are using a cementitious vinyl patcher, paint the inside of the cavity with a concrete bonding adhesive. Fiber cement is highly porous; if you apply a cement-based patch directly to dry siding, the board will suck the moisture out of the patch too quickly, causing it to crumble and fail to cure properly.
Step 3: Mix and Apply the Patch Material
For two-part epoxies, mix thoroughly on a disposable palette until the color is completely uniform. Press the material firmly into the cavity using a flexible putty knife, ensuring no air pockets remain. Overfill the cavity by approximately 10%. Most acrylic and cementitious materials will shrink slightly as solvents or water evaporate during the curing process.
Expert Tip: When repairing deep holes exceeding 1/2" in depth, apply the patch material in multiple 1/4" lifts. Allow each lift to flash off (skin over) for 15-30 minutes before applying the next. This prevents trapped solvents from causing the patch to blister or shrink excessively.
Step 4: Strike Off and Texture
Before the material fully skins over, use a stiff, wide putty knife held at a 45-degree angle to strike off the excess material flush with the surrounding board. If the existing siding has a woodgrain texture, use a damp sponge or a specialized graining tool to lightly mimic the grain pattern in the wet patch material. This step is critical for hiding the repair once painted.
Step 5: Cure, Sand, and Paint
Allow the material to cure fully. Acrylics typically require 24 hours, while epoxies may cure in 1 to 4 hours depending on the specific product formulation. Once rock-hard, wet-sand the patch using 120-grit sandpaper to level it perfectly with the surrounding surface. Follow with 220-grit to feather the edges. Wipe clean with a damp cloth, apply a coat of high-build exterior primer to seal the patch, and finish with two coats of color-matched acrylic latex topcoat.
Troubleshooting Common Failure Modes
Even with the correct fiber cement siding patch material, poor technique can lead to visible flaws. Use this troubleshooting framework to address common issues.
| Issue | Root Cause | Corrective Action |
|---|---|---|
| Flashing / Halo Effect | The patch material has a different porosity than the siding, causing the paint to dry with a different sheen. | Always seal the sanded patch with a dedicated exterior primer (e.g., Zinsser Bulls Eye 1-2-3) before applying the topcoat. Do not skip the primer step. |
| Patch Shrinkage / Pulling | Applying material too thickly in a single pass, or applying to an unprimed, dry cavity. | Route out the shrunken patch, apply bonding adhesive, and re-fill using the 1/4" lift method. Ensure edges are beveled. |
| Cracking Along the Seam | Using a rigid cementitious patcher on a long horizontal crack subject to structural flexing. | Dig out the rigid patch and switch to an elastomeric acrylic sealant (OSI Quad) which can absorb structural movement without tearing. |
Cost and Longevity Expectations
Repairing fiber cement siding is highly economical compared to full board replacement. A single tube of premium elastomeric sealant costs between $8 and $12, while a two-part concrete epoxy kit ranges from $25 to $40. In contrast, replacing a single board requires hiring a siding contractor, with minimum service call fees typically starting at $250 to $400, plus the cost of painting the new board to match the faded existing siding.
When applied correctly, a high-quality epoxy or elastomeric patch will last 10 to 15 years—often matching the remaining lifespan of the paint cycle on the siding. For comprehensive guidance on maintaining cementitious building materials and ensuring long-term durability against moisture intrusion, refer to the technical durability resources provided by the Portland Cement Association. Properly executed, a patched fiber cement board will remain structurally sound and visually indistinguishable from the rest of the exterior facade.
Written by
James ThorntonJames Thornton is a construction industry veteran with 25 years of hands-on experience in wood framing, lumber grading, and residential building codes. He started as a framing carpenter in rural Oregon, earned his ICC Residential Building Inspector certification, and eventually became a senior plan reviewer for the City of Portland Bureau of Development Services. James holds a B.S. in Wood Science & Technology from Oregon State University and is a certified lumber grader through the West Coast Lumber Inspection Bureau (WCLIB). He has inspected over 3,000 residential construction sites and authored the city's internal guide on advanced framing techniques (2x6 at 24" O.C.). James lives in Bend, OR, where he builds custom timber-frame cabins and competes in lumberjack sports.
More from James Thornton
View all
Insulation
Best Home Insulation Materials: Complete 2026 Guide
Compare top home insulation materials for 2026. Find R-values, installed costs per square foot, and best uses for fiberglass, spray foam, and mineral wool.
Aug 4, 2026

Sustainable Building
Certify Your Green Building Material for LEED and WELL
Step-by-step guide to certifying a green building material for LEED v5 and WELL v2. Master EPDs, HPDs, and VOC limits for 2026 project specifications.
Aug 4, 2026

Stone & Masonry
Veneer Stacked Stone Panels: Interior Design & Style Showcase
Discover how veneer stacked stone panels transform interiors. Explore modern design profiles, material pairings, and technical installation specs.
Aug 4, 2026