Black Top vs Concrete: Troubleshooting Driveway Failures & Repairs
Diagnose and fix surface failures with our black top vs concrete troubleshooting guide. Compare repair costs, materials, and structural solutions.

The Core Conflict: Viscoelastic Flexibility vs. Rigid Matrix
When evaluating black top vs concrete for driveway and pavement repairs, you are fundamentally dealing with two opposing structural philosophies. Black top (asphalt) is a viscoelastic material; its bitumen binder allows it to flex under thermal expansion and heavy loads, distributing stress across a granular base. Concrete is a rigid, brittle matrix that relies on high compressive strength and subgrade support, resisting deformation until its tensile limit is exceeded, resulting in sudden cracking.
Troubleshooting failures requires understanding these distinct mechanical behaviors. A repair strategy that works for a flexible asphalt surface will catastrophically fail if applied to a rigid concrete slab, and vice versa. According to guidelines published by the Asphalt Institute, over 80% of asphalt surface distress originates from base or subgrade failures, whereas the American Concrete Institute (ACI) notes that concrete failures are predominantly linked to surface finishing errors, joint spacing, and freeze-thaw cycling.
Diagnostic Matrix: Identifying Surface Failures
Before purchasing patching compounds or hiring a milling crew, accurately diagnose the distress pattern. Use this matrix to identify the root cause of your pavement failure.
| Symptom | Material | Root Cause | Immediate Action |
|---|---|---|---|
| Interconnected longitudinal & transverse cracks (Alligator) | Black Top | Base failure, water infiltration, or overloading | Full-depth excavation and base stabilization |
| Surface flaking and exposed aggregate | Concrete | Scaling from deicing salts or over-troweling bleed water | Scarify and apply polymer-modified micro-topping |
| Cracking parallel to joints/edges | Concrete | Loss of subgrade support or thermal curling stress | Rout, seal, and evaluate for mudjacking/slabjacking |
| Surface raveling and loose stones | Black Top | Bitumen oxidation, poor mix compaction, or fuel spills | Apply penetrating asphalt rejuvenator or sealcoat |
Troubleshooting Black Top (Asphalt) Degradation
Alligator Cracking & Base Failure
Alligator cracking is the most critical failure mode in asphalt. It indicates that the underlying aggregate base has failed, usually due to water infiltration through unsealed micro-cracks. Do not attempt to fix this with cold patch or surface sealers. The structural integrity is gone.
Paving a new 1.5-inch layer of hot-mix asphalt directly over alligator cracks will result in "reflective cracking" within 6 to 12 months. The underlying movement will immediately telegraph through the new overlay. You must mill down to the subgrade, re-compact the base with 3/4-inch crushed angular aggregate, and apply a tack coat before overlaying.
Raveling and Binder Oxidation
UV radiation oxidizes the bitumen binder, turning it brittle and causing the surface aggregate to dislodge (raveling). To arrest this, apply a high-solids asphalt emulsion sealcoat. For commercial or heavy-duty driveways, specify a Coal Tar Emulsion (which resists petroleum drips) or a Polymer-Modified Asphalt Emulsion. Apply using a squeegee for forced penetration, not a sprayer, ensuring ambient temperatures remain above 50°F for 24 hours post-application.
Troubleshooting Concrete Slab Failures
Spalling, Scaling, and Popouts
Concrete scaling occurs when the top 1/8 to 1/4 inch of the slab flakes away, exposing the aggregate. This is typically caused by applying deicing salts (like magnesium chloride) to non-air-entrained concrete, or by finishing the concrete while bleed water is still on the surface, which traps water at the top and weakens the paste.
Repair Protocol:
- Saw-cut the perimeter of the spalled area to a depth of 1/4 inch to create a clean, straight edge.
- Chisel out the degraded concrete to a minimum depth of 1/2 inch. Feather-edge patches will fail under tire shear.
- Clean with a high-PSI pressure washer and apply a concrete bonding adhesive (e.g., Quikrete Concrete Bonding Adhesive).
- Apply a polymer-modified patching compound. For shallow repairs (1/2 inch to 1 inch), use Quikrete Vinyl Concrete Patcher. For deeper structural spalls, use a high-strength, fiber-reinforced mortar like SikaTop 122 Plus.
Joint Sealant Failure and Infiltration
Control joints are designed to be the weakest point, forcing the concrete to crack in a straight line. When the joint sealant fails, incompressible materials (rocks, sand) enter the joint. During thermal expansion, the concrete crushes against these incompressibles, causing "spalling at the joint" or uncontrolled mid-panel cracking.
The Fix: Use a concrete saw with a diamond masonry blade to route out the old sealant and debris, creating a 1/2-inch wide by 1-inch deep reservoir. Clean with compressed air, insert a closed-cell polyethylene backer rod, and fill with a self-leveling polyurethane sealant such as Sika Sikaflex Self-Leveling Sealant. This provides a 50% movement capability and a 20-year waterproof seal.
The Intersection: Repairing the Black Top vs Concrete Transition
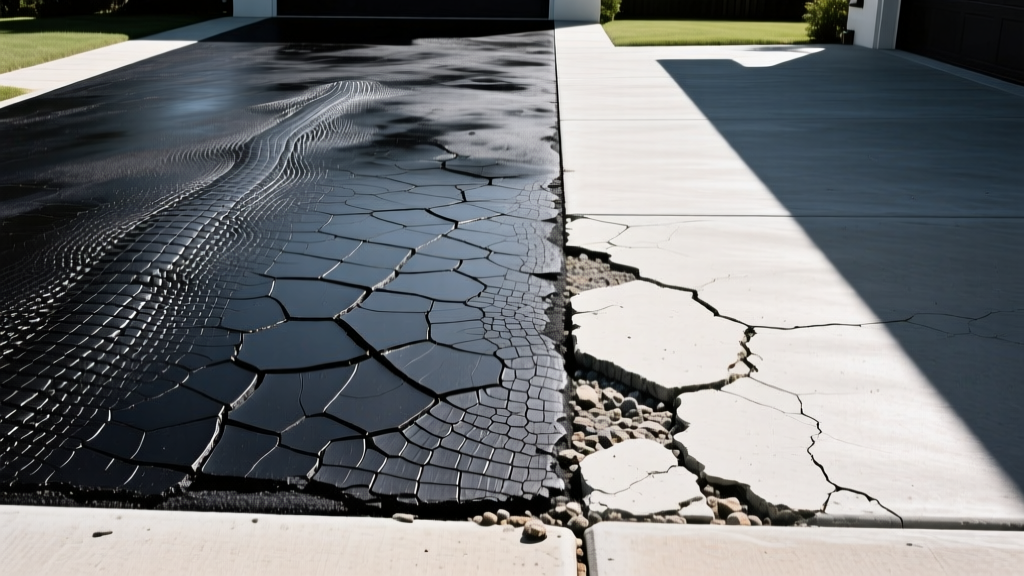
The most vulnerable point in any driveway is the transition joint where the flexible black top meets the rigid concrete garage apron or city sidewalk. Differential settlement and thermal expansion rates cause the asphalt to pull away from the concrete, creating a trench that channels water directly into the subgrade.
If you are replacing the asphalt up to a concrete apron, do not butt the hot-mix directly against the concrete. Install a 1-inch thick asphalt-impregnated expansion board or a heavy-duty geotextile slip membrane against the concrete face before paving. This absorbs the differential expansion and prevents the asphalt from buckling upward in the summer heat.
Repair Cost & Material Breakdown (2026 Estimates)
When deciding between repairing your existing surface or converting from black top to concrete (or vice versa), factor in the current material and labor economics. The Federal Highway Administration (FHWA) consistently notes that while concrete has a higher initial capital cost, its lifecycle maintenance cost is significantly lower over a 30-year period.
| Repair / Conversion Type | Material Cost (per sq ft) | Labor Cost (per sq ft) | Total Estimated Cost | Expected Lifespan |
|---|---|---|---|---|
| Asphalt Crack Sealing & Sealcoating | $0.35 - $0.60 | $0.80 - $1.20 | $1.15 - $1.80 | 3 - 5 Years |
| Asphalt Mill & Overlay (2 inches) | $1.50 - $2.50 | $2.50 - $4.00 | $4.00 - $6.50 | 12 - 15 Years |
| Concrete Joint Resealing & Patching | $1.00 - $2.00 | $3.00 - $5.00 | $4.00 - $7.00 | 10 - 15 Years |
| Concrete Mudjacking / Slabjacking | $2.00 - $4.00 | $4.00 - $6.00 | $6.00 - $10.00 | 8 - 12 Years |
| Full Conversion: Black Top to Concrete | $4.50 - $6.50 | $6.00 - $9.00 | $10.50 - $15.50 | 30+ Years |
Decision Tree: Repair, Resurface, or Replace?
Use this logical framework to determine your next move based on the current condition of your pavement.
- Scenario A: Isolated surface damage (less than 15% of total area).
- Black Top: Clean, tack, and patch with hot-pour crack sealant. Follow with a full sealcoat.
- Concrete: Saw-cut, chip out, and patch with polymer-modified mortar. Reseal all control joints.
- Scenario B: Widespread surface degradation, but base is structurally sound (no deep potholes or severe heaving).
- Black Top: Mill the top 1.5 inches and apply a fresh overlay. This restores the profile and seals the base without the cost of full excavation.
- Concrete: If scaling is uniform but joints are intact, shotblast the surface and apply a stamped concrete overlay or a micro-topping system.
- Scenario C: Base failure, severe frost heave, or massive alligator cracking / shattered slabs.
- Action: Surface repairs are a waste of capital. You must perform full-depth demolition. At this stage, evaluate converting from black top to concrete if you plan to keep the property for more than 10 years, as the long-term maintenance savings will offset the higher initial tear-out and pour costs.
Proper troubleshooting in the black top vs concrete debate isn't about which material is universally superior; it is about accurately diagnosing the specific failure mode of your existing surface and applying the correct structural or chemical intervention. Ignoring subgrade issues on asphalt or joint failures on concrete will result in recurring repair cycles that drain your maintenance budget.
Written by
David NakamuraDavid Nakamura is a licensed architect (AIA) and construction technology writer focused on sustainable building methods, mass timber engineering, and high-performance building envelopes. He holds a Master of Architecture from the University of Washington and is a certified Passive House Consultant (CPHC). David spent eight years at the Seattle firm Mithun, where he led the design of three LEED Platinum projects, before founding his own practice specializing in net-zero residential design. He serves on the editorial advisory board of GreenBuilder Magazine and has authored peer-reviewed papers on cross-laminated timber (CLT) connections for the Journal of Structural Engineering. In his spare time, David teaches woodworking at Pratt Fine Arts Center and kayaks the Puget Sound.
More from David Nakamura
View all
Construction Cost
Labor Cost to Build a Deck Per Sq Ft: 2026 Installation Guide
Discover the exact labor cost to build a deck per sq ft in 2026. This installation guide breaks down contractor rates, complexity factors, and hidden fees.
Aug 4, 2026

Construction Cost
How Much Does It Cost to Build a 3 Bedroom House? Financing Guide
Learn exactly how much it costs to build a 3 bedroom house and explore 2026 financing options, construction loan types, and budget frameworks for your build.
Aug 4, 2026

Construction Cost
Cost to Build a Tennis Court: 2026 Guide
How much does it cost to build a tennis court in 2026? Breakdowns for asphalt, concrete, and synthetic surfaces plus fencing and lighting.
Jul 30, 2026