Block vs Poured Concrete Foundation: Installation & Build Guide
Compare block vs poured concrete foundation installation. Get step-by-step build guides, labor costs, curing times, and structural specs.

The Core Divergence: Assembly vs. Monolithic Pour
Choosing between a concrete masonry unit (CMU) block foundation and a poured concrete foundation fundamentally alters your site logistics, labor scheduling, and structural detailing. While both systems can be engineered to meet identical lateral and vertical load requirements, their installation methodologies are entirely distinct. A block foundation is an assembly of discrete, hollow units bound by mortar and reinforced with grout and steel. A poured foundation is a monolithic, fluid-cured structure shaped by temporary formwork. Understanding the granular installation steps, curing timelines, and failure modes of each system is critical for general contractors and structural engineers aiming to optimize build schedules and prevent water intrusion.
CMU Block Foundation: Step-by-Step Installation
Block foundations rely heavily on the skill of the masonry crew. The structural integrity of the wall is only as strong as the mortar joints and the integration of vertical reinforcement.
Step 1: Footing Prep and First Course Layout
The installation begins with sweeping the concrete footing to remove debris and standing water. Masons snap chalk lines to establish the exact exterior dimensions. The first course of block is the most critical; it is laid on a full, 1-inch bed of Type S or Type N mortar. This base course must be perfectly leveled and squared, as any deviation here will compound vertically, causing structural misalignment and requiring excessive shimming of the sill plate later.
Step 2: Laying the Block and Reinforcement Integration
Subsequent courses are laid in a running bond pattern with a 3/8-inch mortar joint. For structural foundations, National Concrete Masonry Association (NCMA) guidelines dictate the use of ASTM C90 load-bearing units.
- Horizontal Reinforcement: Joint reinforcement (ladder or truss wire) is embedded in the mortar bed every 16 to 24 inches vertically to control shrinkage cracking.
- Vertical Reinforcement: #4 or #5 steel rebar is dropped into the hollow cores at intervals specified by the structural engineer (typically every 48 inches, plus all corners and jambs).
- Grouting: The reinforced cells are filled with high-slump, fine-aggregate grout (minimum 2,000 psi). Masons must mechanically vibrate or rod the grout to eliminate air pockets, ensuring a solid structural column within the block web.
Step 3: Parging and Waterproofing
Because mortar joints are natural pathways for hydrostatic water pressure, block walls require a continuous parge coat—a 3/8-inch layer of Portland cement plaster troweled over the exterior. Once cured, a fluid-applied or peel-and-stick rubberized asphalt waterproofing membrane is applied over the parge coat, followed by a dimpled drainage mat to protect the membrane during backfill.
Poured Concrete Foundation: Step-by-Step Installation
Poured foundations shift the complexity from manual masonry assembly to heavy equipment logistics and precise formwork engineering.
Step 1: Formwork Assembly and Bracing
Crews assemble engineered aluminum or steel-framed gang forms directly on the footing. The forms are coated with a chemical release agent to prevent the concrete from bonding to the metal. Heavy-duty steel turnbuckles and walers are used to brace the forms against the immense hydrostatic pressure of wet concrete, which can exceed 1,200 pounds per square foot at the base of an 8-foot wall.
Step 2: Rebar Cage Tying and Embeds
A continuous grid of #4 or #5 rebar is tied inside the forms. The American Concrete Institute (ACI) mandates a minimum clear cover of 2.5 inches between the rebar and the soil-facing form to prevent moisture-induced corrosion. During this stage, carpenters also install wooden or foam bucks for future window wells, and embed anchor bolts or sill plates into the top of the forms.
Step 3: The Pour, Consolidation, and Stripping
A concrete pump truck delivers a custom mix—typically 3,500 to 4,000 psi with a 5-inch slump for optimal pumpability. The concrete is poured in 3-to-4-foot lifts. Crews use internal mechanical vibrators (stingers) inserted every 18 inches to consolidate the mix, forcing air bubbles to the surface and ensuring the concrete flows completely around the rebar. Once the concrete reaches initial set (usually 12 to 24 hours), the forms are stripped, cleaned, and moved to the next section.
Installation Matrix: Time, Labor, and Equipment
| Metric | CMU Block Foundation | Poured Concrete Foundation |
|---|---|---|
| Average Build Time (2,000 sq ft footprint) | 5 to 8 days | 2 to 3 days (excluding curing) |
| Crew Size | 3-4 Masons, 2-3 Laborers | 4-5 Form Setters, 3 Finishers |
| Heavy Equipment Required | Forklift/Telehandler for block pallets | Crane (for gang forms), Concrete Pump Truck |
| Material & Labor Cost (2026 Avg) | $13.50 - $17.00 per sq ft of wall | $11.00 - $15.00 per sq ft of wall |
| Weather Sensitivity | High (Mortar freezes/burns easily) | Moderate (Mix designs can be adjusted for temp) |
Critical Failure Modes During Installation
Warning: Poured Concrete Form Blowouts
If the pour rate exceeds 7 feet per hour, or if the concrete is dropped from a height greater than 5 feet without an elephant trunk (drop chute), the hydrostatic pressure can snap the form ties. A form blowout results in thousands of dollars in wasted concrete, severe schedule delays, and a structurally compromised wall that must be demolished and repoured.
Warning: Block Foundation Honeycombing & Ungrouted Cores
In CMU construction, failing to fully consolidate the vertical grout leaves voids (honeycombing) inside the block cores. Furthermore, if horizontal mortar joints are not fully tooled and compressed, they create microscopic capillary networks. Under heavy hydrostatic load, water will wick through these ungrouted cores and weep through the interior mortar joints, bypassing exterior damp-proofing entirely.
Site Access Constraints and Logistics
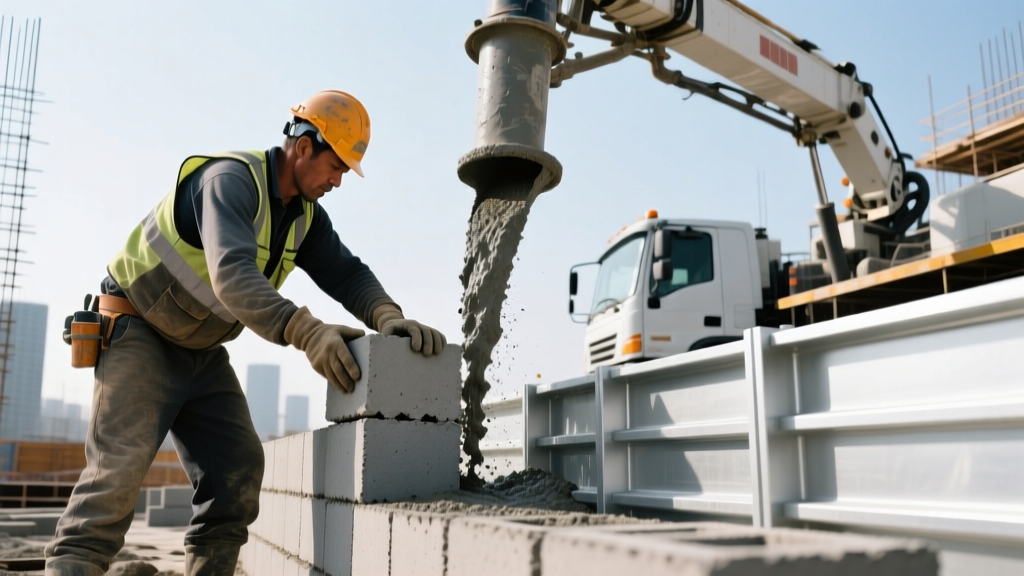
The decision between block and poured is frequently dictated by site topography and access. Poured foundations require a concrete pump truck with a 100-foot boom or a direct chute from a ready-mix truck. On steep, heavily wooded, or tight urban lots where a pump truck cannot stage, block foundations become the default choice. Pallets of CMU blocks can be offloaded on the street and manually wheeled to the footing, or moved via a compact telehandler. However, this manual handling increases labor fatigue and extends the critical path of the schedule.
Waterproofing and Backfill Timelines
Rushing the backfill process is a leading cause of foundation failure. Soil exerts massive lateral pressure on foundation walls.
- Poured Walls: According to the Portland Cement Association, poured walls should not be backfilled until the concrete has achieved at least 75% of its design strength, which typically takes 5 to 7 days under standard curing conditions. Backfilling a green poured wall can cause it to bow or shear at the footing joint.
- Block Walls: Block walls must wait until the vertical grout has fully cured and the parge coat has dried—usually a minimum of 7 to 14 days. Additionally, the floor diaphragm (the basement slab or first-floor framing) must be in place to provide lateral bracing at the top of the wall before soil is pushed against the exterior.
By aligning your structural design with the specific installation realities, curing constraints, and site logistics of your chosen foundation system, you ensure a dry, plumb, and structurally resilient substructure that will support the building for decades.
Written by
Priya KapoorPriya Kapoor is a real estate market analyst and construction economics researcher with expertise in housing affordability, development feasibility, and infrastructure investment. She holds a Master of Regional Planning from Cornell University and previously worked as a senior analyst at CBRE's Investment Properties group, where she modeled returns for $4B in mixed-use development pipelines. Priya now runs an independent research practice advising developers, municipalities, and REITs on construction cost forecasting and market timing. She publishes the quarterly "BuildMat Market Pulse" report tracking material price indices across 12 commodity categories. Based in Austin, TX, Priya serves on the board of Habitat for Humanity Austin and is a marathon runner.
More from Priya Kapoor
View all
Construction Cost
Cost to Build a 1600 Sq Ft Home in 2026: Full Breakdown
Accurate 2026 cost to build a 1600 sq ft home—material, labor, and regional pricing breakdowns included. Plan your budget with real-time estimates.
Aug 11, 2026

Wood & Lumber
Name the Types of Wood for Pressure Treatment and Preservation
Learn how to name the types of wood best suited for pressure treatment. Compare species treatability, chemical retention levels, and 2026 preservation costs.
Aug 4, 2026

Stone & Masonry
Stone Veneer Suppliers Lindenhurst: 2026 Cost Analysis
Analyze 2026 stone veneer costs in Lindenhurst, NY. Compare local supplier pricing, delivery fees, and Suffolk County installation labor rates.
Aug 4, 2026