Cement vs Concrete Mix: Installation Guide for Masonry and Slabs
Master the cement vs concrete mix debate with this installation guide. Learn exact ratios, structural limits, and step-by-step masonry and slab protocols.

The Operational Difference: Binder vs. Composite
On any active job site, the terms cement and concrete are frequently interchanged, but treating them as identical materials during installation guarantees structural failure. Understanding the cement vs concrete mix distinction is fundamentally about understanding thickness limitations and load-bearing requirements. According to the National Ready Mixed Concrete Association (NRMCA), cement is merely the binding agent (typically Portland cement, ASTM C150), while concrete is a composite material consisting of that cement binder, water, fine aggregates (sand), and coarse aggregates (gravel or crushed stone).
From an installation perspective, this physical difference dictates where each material can be applied. Pure cement-based mixes (mortars) lack the coarse aggregate required to prevent shrinkage cracking in thick applications. Conversely, concrete mixes containing 3/4-inch gravel cannot be troweled into thin 1/2-inch joints. As Penn State Extension notes, attempting to use concrete for bricklaying or pure cement for a driveway slab will result in immediate joint failure or catastrophic surface cracking.
Application Decision Matrix
Before mixing or ordering materials, cross-reference your installation task with this matrix to select the correct composite.
| Installation Task | Required Material | Min/Max Thickness | Target Compressive Strength |
|---|---|---|---|
| Brick/CMU Block Laying | Cement-Based Mortar (Type N or S) | 3/8" to 5/8" | 750 - 1,800 PSI |
| Setting 4x4 Wooden Posts | Concrete Mix (Fast-setting or standard) | 2" minimum collar | 3,000 - 4,000 PSI |
| Stone Veneer Scratch Coat | Cement-Based Mortar (Type S) | 1/2" to 3/4" | 1,800 PSI |
| Footings and Grade Beams | Concrete Mix (3/4" aggregate) | 8" minimum depth | 3,000 PSI minimum |
| Residential Driveway Slab | Concrete Mix (4,000 PSI air-entrained) | 4" minimum depth | 4,000 PSI |
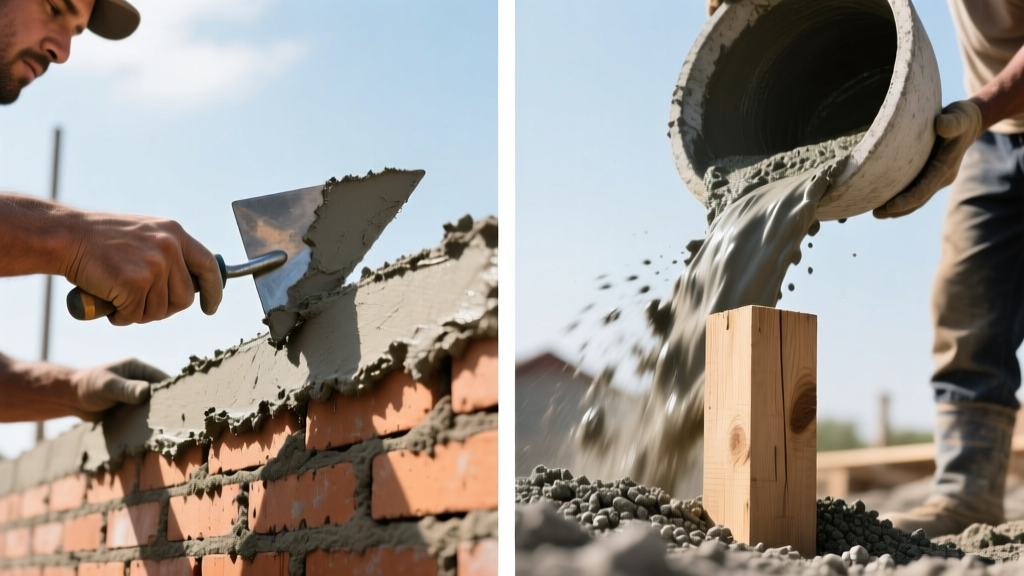
Installation Protocol 1: Cement-Based Mortar for Masonry
When your installation requires bonding masonry units (brick, cinder block, natural stone), you are installing mortar, not concrete. Mortar relies on a high ratio of fine sand and lime to cement, providing the necessary workability, water retention, and flexibility to accommodate slight structural shifts without cracking.
Material Selection and Volumetric Ratios
Under ASTM C270 standards, mortar is classified by compressive strength and flexibility. For 90% of residential and light commercial installations, you will choose between Type N and Type S:
- Type N (General Above-Grade): Mix 1 part Portland cement, 1 part hydrated lime, and 6 parts masonry sand. Yields ~750 PSI. Ideal for exterior walls above grade, parapets, and chimneys where flexibility is prioritized over raw strength.
- Type S (Below-Grade and High Load): Mix 1 part Portland cement, 0.5 parts hydrated lime, and 4.5 parts masonry sand. Yields ~1,800 PSI. Mandatory for retaining walls, foundations, and any masonry in direct contact with soil.
Step-by-Step Block Laying Installation
- Batch Mixing: Add half the required water to the mixer, introduce the dry pre-blended cement/lime/sand mix, and add remaining water incrementally. Mix for exactly 5 minutes. The target consistency is 'stiff but workable'—when you press a gloved thumb into the mortar, it should leave a clear impression without sticking to your skin.
- Bed Joint Application: Using a masonry trowel, lay a 1-inch thick bed of mortar on the footing. Furrow the center with the tip of the trowel to create a V-notch, which forces the mortar outward when the block is set, ensuring edge-to-edge contact.
- Head Joint Buttering: Apply mortar to the vertical ends (ears) of the concrete masonry unit (CMU) before placing it. Do not rely on slushing joints after the block is laid; this leaves voids that compromise shear strength and water resistance.
- Tooling: Wait until the mortar is 'thumbprint hard' (typically 20 to 45 minutes depending on ambient humidity) before striking the joints with a convex jointer. This compresses the cement paste against the masonry unit, creating a weather-tight seal.
Never apply standard concrete mix in layers thinner than 2 inches. The 3/4-inch coarse aggregate will bridge across thin gaps, creating hollow voids and preventing proper consolidation. Conversely, never pour pure cement mortar in depths exceeding 2 inches; the lack of coarse aggregate will cause severe volumetric shrinkage and thermal cracking as the cement hydrates.
Installation Protocol 2: Concrete Mix for Structural Loads
Concrete mix is engineered for mass, volume, and compressive load distribution. The inclusion of coarse aggregate (gravel) creates an interlocking skeletal structure that resists shrinkage and bears heavy dead and live loads.
Material Selection: PSI and Slump
For structural installations, specify the concrete by its 28-day compressive strength (PSI) and its slump (workability).
- Footings and Post Holes: 3,000 PSI mix with a 4-inch slump. The lower water-to-cement ratio ensures high strength and resistance to frost heave.
- Driveways and Garage Slabs: 4,000 PSI mix with 5% to 7% air-entrainment. Air-entrainment introduces microscopic bubbles that give freezing water room to expand, preventing surface spalling in cold climates.
Step-by-Step Slab and Post Installation
- Subgrade Preparation: Excavate to stable soil and compact a 4-inch base of 3/4-inch minus crushed gravel. Do not pour concrete directly onto organic topsoil or uncompacted clay, as differential settling will snap the slab regardless of the concrete's PSI rating.
- Formwork and Reinforcement: Set 2x4 or 2x6 lumber forms, ensuring a minimum 1/4-inch per foot slope for drainage. Elevate 6x6 W2.9xW2.9 welded wire mesh (WWM) or #4 rebar on 3-inch plastic dobies (chairs) so the steel sits in the upper third of the slab thickness.
- Placement and Consolidation: Place the concrete mix continuously to avoid cold joints. Use a mechanical vibrator or a square shovel to stab the edges of the forms, releasing trapped air pockets. Do not over-vibrate, which causes the heavy aggregate to sink and weak cement paste to rise to the surface.
- Screeding and Floating: Strike off the excess mix using a straight 2x4 in a sawing motion. Once the bleed water (the shiny layer of water rising to the top) has completely evaporated, pass a magnesium float over the surface to embed the aggregate and open the pores for the final trowel finish.
Curing Dynamics: Water Management Post-Installation
The hydration reaction of Portland cement requires continuous moisture. If the water evaporates too quickly, the chemical reaction halts, resulting in a weak, dusty surface prone to micro-cracking. However, the curing protocol differs slightly between mortar and concrete installations.
Curing Concrete Slabs and Footings
For large concrete pours, begin curing immediately after the final trowel finish. The most reliable method is applying a liquid membrane-forming curing compound (ASTM C309) using a pump sprayer. This traps the internal mixing water inside the slab. Alternatively, cover the slab with 6-mil polyethylene sheeting or wet burlap for a minimum of 7 days. Keep the ambient temperature of the concrete above 50°F (10°C) during this period; if temperatures drop below 40°F, use insulated concrete blankets to prevent the hydration process from freezing and halting entirely.
Curing Cement-Based Mortar
Mortar joints have a high surface-area-to-volume ratio, making them highly susceptible to rapid moisture loss, especially in wind or direct sunlight. Unlike slabs, you cannot easily spray curing compounds on brickwork without staining the masonry. Instead, mist the mortar joints lightly with a garden hose (using a fog nozzle) twice daily for 3 to 5 days, or erect temporary windbreaks and shade cloth over the fresh masonry to slow evaporation.
Troubleshooting Common Installation Failures
When installations fail, the root cause almost always traces back to a misunderstanding of the cement vs concrete mix parameters.
- Efflorescence (White Powdery Stains): Caused by adding too much water to the mix during installation, which drives soluble salts to the surface as it evaporates. Fix: Strictly adhere to the manufacturer's water-to-bag ratio. Never 'retemper' (add water to) mortar or concrete that has begun to set.
- Plastic Shrinkage Cracking: Appears as shallow, diagonal micro-cracks on fresh concrete slabs within hours of pouring. Caused by surface evaporation exceeding the bleed water rate. Fix: Apply an evaporative retardant spray during hot, windy days before the final float, and begin curing immediately.
- Mortar Joint Crumbling: Mortar turns to dust when struck with a screwdriver. Caused by freezing temperatures during the first 24 hours of installation or using expired, moisture-contaminated Portland cement. Fix: Discard any bagged cement or mortar mix that contains hard lumps. Maintain installation temperatures above 40°F.
- Post Heave and Rotation: Wooden deck posts set in 'dry' concrete mix (adding water to the hole after the dry bag) frequently fail lateral load tests and heave in freeze-thaw cycles. Fix: Always pre-mix the concrete in a wheelbarrow or mixer to a 4-inch slump before pouring it into the post hole to ensure uniform hydration and a solid mechanical collar.
Written by
Priya KapoorPriya Kapoor is a real estate market analyst and construction economics researcher with expertise in housing affordability, development feasibility, and infrastructure investment. She holds a Master of Regional Planning from Cornell University and previously worked as a senior analyst at CBRE's Investment Properties group, where she modeled returns for $4B in mixed-use development pipelines. Priya now runs an independent research practice advising developers, municipalities, and REITs on construction cost forecasting and market timing. She publishes the quarterly "BuildMat Market Pulse" report tracking material price indices across 12 commodity categories. Based in Austin, TX, Priya serves on the board of Habitat for Humanity Austin and is a marathon runner.
More from Priya Kapoor
View all
Construction Cost
Cost to Build a 1600 Sq Ft Home in 2026: Full Breakdown
Accurate 2026 cost to build a 1600 sq ft home—material, labor, and regional pricing breakdowns included. Plan your budget with real-time estimates.
Aug 11, 2026

Wood & Lumber
Name the Types of Wood for Pressure Treatment and Preservation
Learn how to name the types of wood best suited for pressure treatment. Compare species treatability, chemical retention levels, and 2026 preservation costs.
Aug 4, 2026

Stone & Masonry
Stone Veneer Suppliers Lindenhurst: 2026 Cost Analysis
Analyze 2026 stone veneer costs in Lindenhurst, NY. Compare local supplier pricing, delivery fees, and Suffolk County installation labor rates.
Aug 4, 2026