Master Concrete Backer Board Installation for Wet Areas
Learn exact steps to install concrete backer board in showers and wet areas. Includes mortar ratios, fastener spacing, and waterproofing tips.
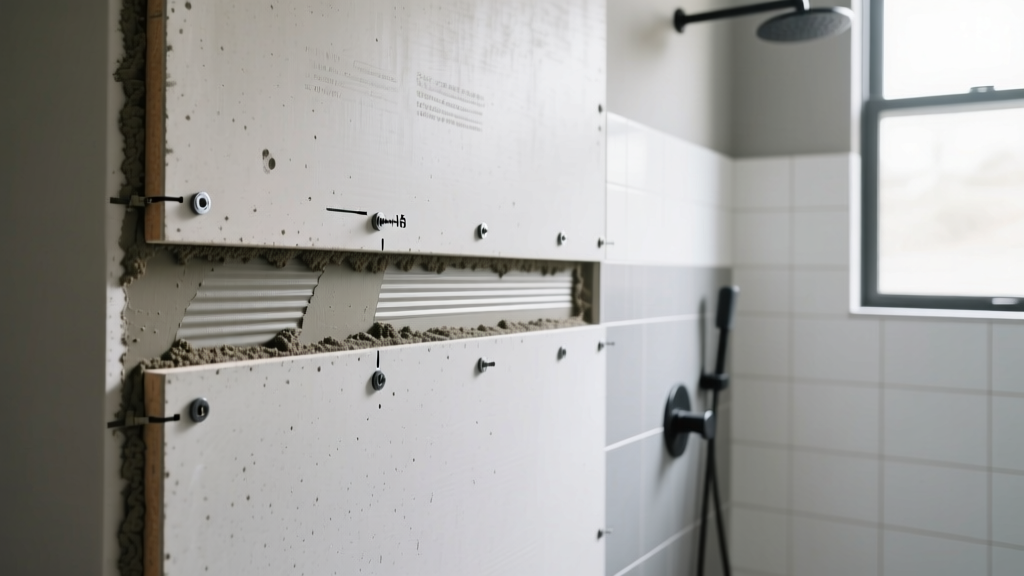
Why Concrete Backer Board Fails in Wet Environments
Tile failures in showers, steam rooms, and wet areas rarely originate from the tile or grout itself. The root cause almost always traces back to substrate deflection, improper fastening, or moisture mismanagement at the backer board level. Concrete backer board is not inherently waterproof; rather, it is dimensionally stable and rot-proof when exposed to prolonged moisture. If water penetrates the grout and tile assembly, a properly installed concrete backer board will not swell, warp, or harbor mold like gypsum-based alternatives. However, if the board is improperly fastened, lacks a continuous moisture barrier, or is installed over a deflecting subfloor, the rigid tile assembly above it will crack.
Never use standard drywall screws to secure concrete backer board. The alkaline nature of cementitious boards will corrode standard zinc-coated drywall screws within months in a wet environment, leading to rust stains bleeding through the grout lines and catastrophic loss of holding power. Always use hot-dipped galvanized, ceramic-coated, or stainless steel corrosion-resistant fasteners.
Material Matrix: Selecting the Right Backer Board
Not all backer boards share the same physical properties. Selecting the correct panel depends on the specific application, weight constraints, and cutting capabilities on the job site. Below is a technical comparison of the three dominant technologies in the 2026 market.
| Brand / Technology | Composition | Weight (per 3x5 ft panel) | Cutting Method | Best Application |
|---|---|---|---|---|
| USG Durock | Portland cement, polymer, fiberglass mesh | ~45 lbs | Score and snap (carbide blade) | High-impact floors, heavy stone tile |
| James Hardie HardieBacker 500 | Fiber-cement (cellulose fibers, cement, sand) | ~22 lbs | Score and snap (requires heavy pressure) | Wall surrounds, standard ceramic tile |
| Johns Manville GoBoard | Polyisocyanurate foam core, fiberglass facers | ~12 lbs | Standard utility knife | Multi-story showers, ceiling applications |
For heavy natural stone installations on floors, traditional cementitious boards like USG Durock remain the industry standard due to their superior compressive strength. For vertical wall applications where weight and cutting dust are primary concerns, fiber-cement or foam-core alternatives offer significant ergonomic advantages.
Framing and Subfloor Deflection Requirements
Before unrolling any mortar or cutting a single panel, you must verify the structural rigidity of the framing. The Tile Council of North America (TCNA) Handbook mandates strict deflection limits for tile substrates. Deflection is the measure of how much a floor or wall bends under load.
- Ceramic and Porcelain Tile: Maximum allowable floor deflection is L/360 (the span length in inches divided by 360).
- Natural Stone Tile: Maximum allowable floor deflection is L/720 due to the lower tensile strength of natural stone.
- Wall Stud Spacing: Wood framing must be spaced a maximum of 16 inches on center (O.C.) for standard 1/2-inch backer board. If studs are 24 inches O.C., you must use 5/8-inch backer board or add intermediate blocking.
If your floor joists fail the deflection test, you must sister the joists, add mid-span blocking, or install an additional layer of 3/4-inch exterior-grade plywood before proceeding. Installing concrete backer board over a deflecting subfloor will not stiffen the assembly; it will simply crack alongside the tile.
Step-by-Step Concrete Backer Board Installation
Follow these precise procedures to ensure a monolithic, rigid substrate. This guide assumes a standard floor application using 1/4-inch or 1/2-inch cementitious backer board.
Step 1: Subfloor Preparation and Mortar Application
Vacuum the plywood or OSB subfloor thoroughly. Any dust, debris, or drywall compound will prevent the thinset from bonding. Mix a modified thinset mortar meeting ANSI A118.4 or A118.15 standards. Using a 1/4-inch square-notched trowel, spread the mortar evenly over the subfloor. The mortar layer beneath the backer board is not for adhesion; its sole purpose is to fill microscopic voids and provide 100% uniform support, eliminating flex.
Step 2: Panel Placement and Staggering
Press the concrete backer board firmly into the fresh mortar bed. Stagger all end joints in a running bond pattern (like brickwork). Never allow four corners to meet at a single intersection, and avoid continuous vertical seams. Maintain a strict 1/8-inch gap between all panel edges and a 1/4-inch gap between the board and any adjacent walls or tub flanges to allow for thermal expansion.
Step 3: Mechanical Fastening
While the mortar is still wet, secure the board using 1-1/4-inch corrosion-resistant backer board screws (for floors) or 1-5/8-inch screws (for walls). Drive fasteners every 8 inches on center across the field of the board and along all edges. Keep screws at least 2 inches away from the panel edges to prevent blowout and crumbling. Ensure the screw heads are driven flush with the surface; do not overdrive them, as breaking the fiberglass mesh face compromises the holding power.
While a bed of thinset mortar is mandatory under concrete backer board on floors to eliminate voids, it is strictly prohibited on walls. Applying mortar between wall studs and the backer board creates an uneven surface and interferes with the vapor barrier placed behind the board.
Seam Treatment and Waterproofing Integration
Once the boards are fastened, the seams must be treated to create a continuous plane. Use 2-inch wide alkali-resistant fiberglass mesh tape. Standard drywall paper tape or standard fiberglass mesh will chemically degrade and dissolve when exposed to the high pH (alkaline) environment of cementitious mortars and thinsets.
Press the alkali-resistant tape into the 1/8-inch gaps and fill the seams with the same modified thinset mortar used for the tile installation. Smooth the mortar flat with a 6-inch taping knife, ensuring no ridges or humps remain, as these will telegraph through the tile and prevent flat installation.
The Waterproofing Imperative
Concrete backer board is water-resistant, not waterproof. Water will pass directly through the board and saturate the wood framing behind it if a secondary waterproofing membrane is not applied. For wet areas like shower pans and enclosures, you must apply a topical waterproofing membrane over the installed and taped backer board.
| Membrane Type | Examples | Application Method | Cure Time Before Tiling |
|---|---|---|---|
| Liquid-Applied | RedGard, Hydro Ban | Roller/brush (requires wet film thickness gauge) | 2 to 4 hours (depending on humidity) |
| Sheet Membrane | Schluter Kerdi, NobleSeal | Embedded in unmodified thinset (ANSI A118.1) | 24 hours for full thinset cure |
When using liquid-applied membranes, pay strict attention to the manufacturer's required wet mil thickness. Applying the liquid membrane too thin will result in microscopic pinholes that compromise the hydrostatic seal. Use a wet film thickness gauge during application to verify you are achieving the required 30 to 40 mils per coat, typically requiring two coats applied in perpendicular directions.
Troubleshooting Common Installation Errors
Even experienced installers encounter edge cases when working with concrete backer board. Here is how to address the most frequent field issues:
- Crumbled or Blown-Out Edges: If the edges of the board crumble when driving screws, your fastener is too close to the edge. Move the screw inward by at least 1 inch. If the edge is already damaged, fill the void with thinset and embed a small piece of alkali-resistant tape before proceeding.
- Board Flexing Between Joists: If you detect a spongy feeling when walking on the installed board, the subfloor below is deflecting, or the thinset bed was applied too thinly, leaving voids. You must remove the board, verify the joist deflection meets L/360, and reapply with a properly notched mortar bed.
- Alkaline Efflorescence on Seams: If you notice a white, powdery residue forming on the taped seams before tiling, it is due to moisture pulling soluble salts out of the cement. Brush the residue off with a stiff nylon brush and ensure the environment is properly ventilated to allow the thinset to cure completely before applying your waterproofing membrane.
By adhering strictly to these material specifications, deflection limits, and fastening protocols, you ensure the concrete backer board performs its intended function: providing an immovable, moisture-tolerant foundation that will support the tile assembly for decades without degradation.