Concrete Sealer vs Epoxy: The Ultimate Installation Guide
Compare concrete sealer vs epoxy for your next project. This installation guide covers surface prep, application steps, material costs, and failure modes.

The decision between applying a penetrating concrete sealer and a 100% solids epoxy coating fundamentally alters the preparation requirements, application workflow, and long-term performance of a concrete slab. While both products protect against moisture and chemical intrusion, their physical properties dictate entirely different installation protocols. A silane/siloxane sealer penetrates the capillary network of the concrete to repel water, whereas an epoxy system builds a high-mil, cross-linked polymer shield on the surface. This guide details the exact installation procedures, material specifications, and failure-point mitigations for both systems.
Decision Matrix: Concrete Sealer vs Epoxy Coatings
Before purchasing materials, map your project requirements against the physical limitations of each chemistry. Applying an epoxy coating to an exterior driveway will result in catastrophic UV degradation, while using a penetrating sealer in a heavy-duty garage will fail to protect against impact and hot tire lift.
| Feature | Penetrating Sealer (Silane/Siloxane) | Acrylic Topical Sealer | 100% Solids Epoxy Coating |
|---|---|---|---|
| Build Thickness | 0 mils (Subsurface) | 1 - 3 mils | 10 - 20+ mils |
| UV Stability | Excellent (No degradation) | Good (Non-yellowing formulas) | Poor (Chalks/yellows without UV topcoat) |
| Abrasion & Impact | Low (Does not alter surface hardness) | Medium | Extremely High (Up to 10,000 psi compressive) |
| Vapor Transmission | Allows vapor out (Breathable) | Restricts vapor (Can blister) | Blocks vapor (Requires moisture mitigation) |
| Ideal Application | Driveways, Patios, Unfinished Basements | Stamped Concrete, Walkways, Pool Decks | Garages, Warehouses, Commercial Kitchens |
Phase 1: Surface Preparation and Moisture Testing
The most common cause of coating failure is inadequate surface preparation. Both sealers and epoxies require a clean, porous substrate, but epoxy demands a specific mechanical profile to achieve a mechanical bond.
Moisture Vapor Emission Rate (MVER) Testing
Epoxy is a vapor barrier. If hydrostatic pressure pushes moisture up through the slab, the epoxy will delaminate. Perform a Calcium Chloride test per ASTM F1869. If the MVER exceeds 3 to 5 lbs per 1,000 square feet per 24 hours, you must install a moisture mitigation primer (such as a two-part epoxy moisture barrier) before the main epoxy coat. Penetrating sealers are breathable and generally tolerate higher MVER, but the pores must be dry at the exact time of application to allow capillary absorption.
Mechanical Profiling
According to the International Concrete Repair Institute (ICRI), surface profiles are graded on a Concrete Surface Profile (CSP) scale from 1 to 10.
- For Penetrating Sealers: A CSP 1 (achieved via light acid etching or a 120-grit diamond grinding pad) is sufficient to open the pores.
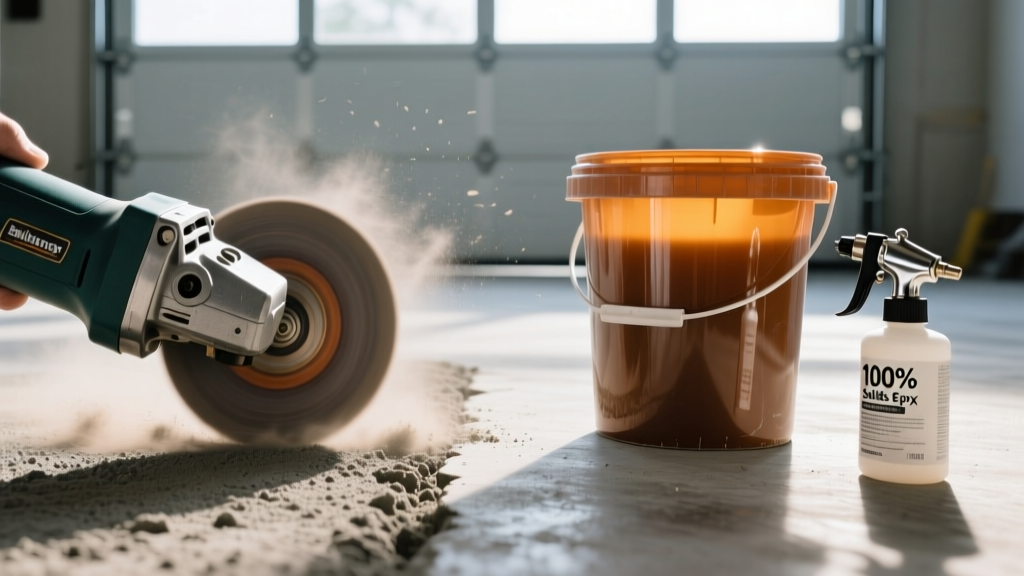
- For 100% Solids Epoxy: You must achieve a CSP 2 or CSP 3. This requires a walk-behind planetary diamond grinder equipped with 30-grit or 40-grit metal-bonded diamond segments, or a shot blaster. Acid etching is no longer recommended by manufacturers for epoxy prep due to inconsistent profiling and residual salt contamination.
Phase 2: Installing Penetrating and Acrylic Concrete Sealers
The Portland Cement Association notes that silane and siloxane sealers react chemically with the free alkali in concrete to form a hydrophobic resin within the pores. Silane molecules are smaller and penetrate deeper (up to 1/2 inch), making them ideal for dense, hard-troweled concrete. Siloxane molecules are larger, treating the surface and upper capillaries, which is better for porous or broom-finished exterior concrete.
Step-by-Step Sealer Application
- Temperature Check: Ensure ambient and surface temperatures are between 40°F and 90°F. Do not apply if rain is expected within 6 hours.
- Equipment Setup: Use a low-pressure HVLP (High Volume Low Pressure) sprayer with a 0.015 to 0.020-inch tip. High pressure atomizes the sealer, creating wind drift and wasting material.
- Flood Coat Application: Apply a continuous, wet flood coat. The concrete should look wet and glossy. Coverage rates typically range from 150 to 300 square feet per gallon, depending on slab porosity.
- Back-Rolling: Immediately back-roll the wet sealer using a 3/8-inch nap roller to work the material into the pores and eliminate puddles. Puddles will dry into white, unsightly residue that requires mechanical removal.
- Second Coat (Siloxane only): For exterior broom-finished concrete, apply a second 'wet-on-wet' coat within 5 to 10 minutes while the first coat is still tacky to ensure maximum saturation.
Phase 3: Installing 100% Solids Epoxy Floor Coatings
100% solids epoxy contains no water or solvents, meaning it does not shrink as it cures. It relies on a precise stoichiometric chemical reaction between Part A (resin) and Part B (hardener). Deviating from the manufacturer's mix ratio will result in a permanently tacky floor that never achieves full cross-linking.
Step-by-Step Epoxy Installation
- Priming (If Required): On highly porous concrete, apply a thin epoxy primer to seal the voids and prevent outgassing. Allow to cure to a 'tack-free' state (usually 12-24 hours).
- Mixing Protocol: Mix Part A and Part B at the exact volume ratio specified (commonly 2:1 or 3:1). Use a heavy-duty drill with a Jiffy mixing paddle at 400 RPM for exactly 3 minutes. Scrape the sides and bottom of the bucket to incorporate unmixed material.
- Pot Life Management: 100% solids epoxy has a strict pot life, typically 30 to 45 minutes at 72°F. Crucial Rule: Pot life halves for every 18°F increase in temperature. If the ambient temperature is 90°F, your working time drops to under 15 minutes. Mix only what you can apply within that window.
- Squeegee and Back-Roll: Pour the mixed epoxy onto the floor and pull it using a notched squeegee set to 20 mils to ensure an even thickness. Immediately cross-roll the wet epoxy with an 18-inch, 3/8-inch nap roller to level the ridges and release trapped air.
- Flake Broadcast (Optional): If utilizing decorative vinyl flakes, toss them evenly across the wet epoxy. For full coverage, apply 0.15 to 0.20 lbs per square foot. Allow to cure for 12 hours, then scrape and vacuum the excess loose flakes.
- UV Topcoat: Because epoxy degrades under UV light, a clear aliphatic polyurethane or polyaspartic topcoat is mandatory for areas receiving sunlight. Polyaspartic topcoats can be walked on in 4 hours and driven on in 24 hours, compared to 72+ hours for standard urethanes.
Warning: Outgassing and Pinholes
Outgassing occurs when air trapped in the concrete expands and pushes through the wet epoxy, leaving tiny craters or pinholes. This happens when the concrete slab temperature is rising during application (e.g., morning sunlight hitting a garage floor). Always schedule your epoxy pour for the late afternoon or evening when the slab temperature is dropping, forcing air to contract and pull the epoxy deeper into the profile.
Pro Tip: Managing Amine Blush
Standard epoxies can develop 'amine blush'—a waxy, oily film on the surface—when curing in high humidity or cool temperatures. Before applying your polyurethane topcoat, wipe the cured epoxy with a clean rag dampened with denatured alcohol or a TSP (Trisodium Phosphate) solution to remove the blush. Failure to do so will result in topcoat delamination or 'fish-eyes'.
Environmental and VOC Considerations
When selecting materials, verify compliance with local environmental regulations. The Environmental Protection Agency (EPA) strictly regulates the VOC content of architectural coatings. 100% solids epoxies naturally contain near-zero VOCs because they lack evaporative solvents. However, solvent-based acrylic sealers and certain epoxy thinners can exceed the 100 g/L VOC limits enforced in many urban districts. Always opt for water-based acrylics or 100% solids systems for interior and enclosed applications to maintain indoor air quality and regulatory compliance.
2026 Cost Breakdown: Materials and Professional Installation
The financial investment varies drastically between the two systems. The table below outlines current market rates for both DIY material costs and professional installation (including diamond grinding prep, materials, and labor).
| System Type | DIY Material Cost (Per Sq Ft) | Professional Install (Per Sq Ft) | Expected Lifespan (Heavy Use) |
|---|---|---|---|
| Penetrating Siloxane Sealer | $0.15 - $0.30 | $0.75 - $1.25 | 3 - 5 Years |
| Acrylic Topical Sealer | $0.25 - $0.50 | $1.50 - $2.50 | 1 - 3 Years |
| 100% Solids Epoxy (Primer + Base + Topcoat) | $1.20 - $2.00 | $5.50 - $8.50+ | 10 - 15+ Years |
Selecting between a concrete sealer and an epoxy coating is not a matter of finding the 'better' product, but rather matching the chemistry to the environmental and mechanical demands of the slab. By strictly adhering to ICRI profiling standards, respecting pot-life thermodynamics, and executing rigorous moisture testing, you ensure the chosen system performs to its engineered lifespan.
Written by
David NakamuraDavid Nakamura is a licensed architect (AIA) and construction technology writer focused on sustainable building methods, mass timber engineering, and high-performance building envelopes. He holds a Master of Architecture from the University of Washington and is a certified Passive House Consultant (CPHC). David spent eight years at the Seattle firm Mithun, where he led the design of three LEED Platinum projects, before founding his own practice specializing in net-zero residential design. He serves on the editorial advisory board of GreenBuilder Magazine and has authored peer-reviewed papers on cross-laminated timber (CLT) connections for the Journal of Structural Engineering. In his spare time, David teaches woodworking at Pratt Fine Arts Center and kayaks the Puget Sound.
More from David Nakamura
View all
Construction Cost
Labor Cost to Build a Deck Per Sq Ft: 2026 Installation Guide
Discover the exact labor cost to build a deck per sq ft in 2026. This installation guide breaks down contractor rates, complexity factors, and hidden fees.
Aug 4, 2026

Construction Cost
How Much Does It Cost to Build a 3 Bedroom House? Financing Guide
Learn exactly how much it costs to build a 3 bedroom house and explore 2026 financing options, construction loan types, and budget frameworks for your build.
Aug 4, 2026

Construction Cost
Cost to Build a Tennis Court: 2026 Guide
How much does it cost to build a tennis court in 2026? Breakdowns for asphalt, concrete, and synthetic surfaces plus fencing and lighting.
Jul 30, 2026