Concrete vs Blacktop Installation: Base Prep, Paving & Costs
Compare concrete vs blacktop installation. Discover base prep requirements, paving steps, curing times, and cost breakdowns for your driveway project.

Subgrade and Base Preparation: The Shared Foundation
When evaluating concrete vs blacktop for a driveway or paving project, the surface material is only half the equation. Both rigid (concrete) and flexible (blacktop/asphalt) pavements rely entirely on a properly engineered subgrade and aggregate base. Skipping or shortchanging base preparation is the primary cause of premature failure in both materials.
Excavation and Soil Stabilization
Installation begins with excavating 8 to 12 inches below the finished grade to remove organic topsoil and expansive clays. If the native subgrade consists of highly plastic clay, contractors must lay a non-woven geotextile fabric before adding aggregate. This fabric prevents the clay from migrating upward into the base course during freeze-thaw cycles, a phenomenon known as mud boils.
The Aggregate Base Course
Both materials require a compacted base of 4 to 6 inches of crushed angular stone, typically 3/4-inch minus gravel (which includes stone dust to lock the matrix together). The base must be compacted using a vibratory plate compactor or a smooth-drum roller to achieve a minimum of 95% Modified Proctor density. According to the Federal Highway Administration (FHWA), inadequate base compaction leads directly to differential settlement, causing blacktop to rut and concrete slabs to crack at the joints.
Installing Blacktop (Asphalt): The Hot-Mix Process
Blacktop, technically known as Hot-Mix Asphalt (HMA), is a flexible pavement composed of roughly 95% stone aggregate and 5% liquid asphalt cement (bitumen). The installation process is heavily dependent on temperature and timing.
Laying and Compacting the Mat
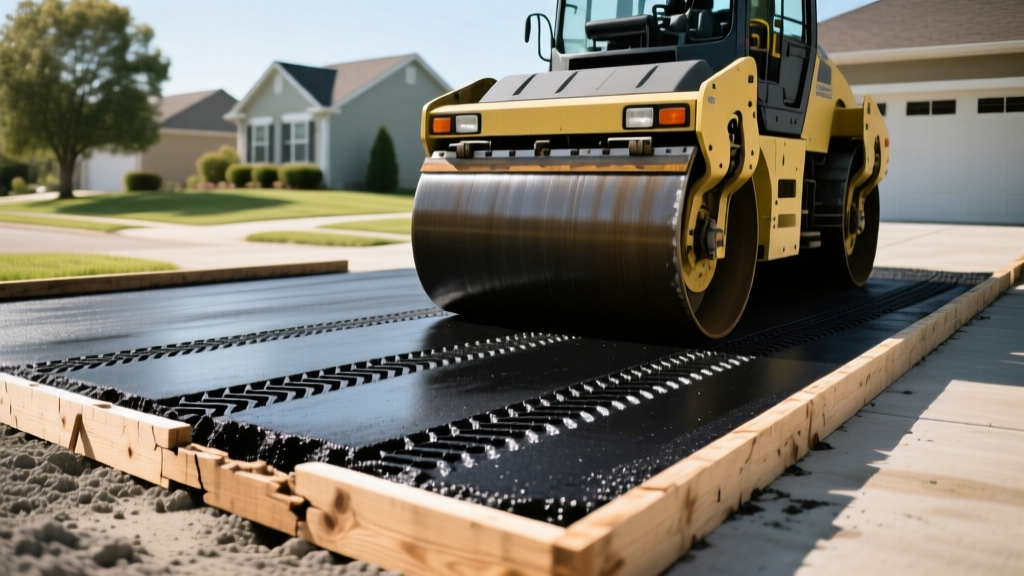
HMA is delivered to the site at temperatures between 275°F and 300°F. For a standard residential driveway, contractors typically lay a single 3-inch compacted lift, or a 2-inch binder course topped with a 1-inch surface course. The mix is spread using an asphalt paver or hand-luted for tight access areas, then immediately compacted with a 1- to 3-ton dual-drum vibratory roller.
Cooling vs. Curing
Blacktop is driveable within 48 to 72 hours once it cools to ambient temperatures. However, the liquid asphalt binder takes 6 to 12 months to fully cure and oxidize. During this initial curing phase, the surface remains susceptible to scuffing from sharp vehicle turns and power steering marks, especially in hot weather. The National Asphalt Pavement Association (NAPA) recommends waiting at least 90 days before applying a coal tar or asphalt-based sealcoat to allow the surface oils to fully off-gas.
Pouring Concrete: The Rigid Pavement Method
Concrete is a rigid pavement that distributes loads across a wide area through slab action. Unlike blacktop, concrete installation is a multi-day process involving formwork, reinforcement, pouring, finishing, and an extended curing period.
Formwork and Reinforcement
Wooden or metal forms are set to grade to define the slab edges. A standard driveway requires a minimum thickness of 4 inches, though 5 inches is recommended for areas expecting heavy truck or RV traffic. Reinforcement typically consists of #4 (1/2-inch) steel rebar placed on a 16-inch grid, elevated on plastic dobies to sit in the middle of the slab. Alternatively, 6x6 W1.4xW1.4 welded wire mesh can be used, though rebar provides superior tensile strength against heavy point loads.
The Pour and Finishing Sequence
Driveways require a 4,000 PSI air-entrained concrete mix. The air-entrainment (typically 5% to 7% microscopic air bubbles) is non-negotiable in climates with freeze-thaw cycles, as it gives expanding ice room to expand without spalling the surface. After the concrete is struck off (screeded) and bull-floated, a broom finish is applied to create a slip-resistant texture. According to the Portland Cement Association, proper finishing techniques are critical to prevent surface scaling and dusting.
The Critical Saw-Cut Window
Concrete shrinks as it hydrates. To control where it cracks, contractors must cut control joints to a depth of one-quarter the slab thickness (e.g., 1 inch deep for a 4-inch slab). These joints are typically spaced in 10x10 foot grids. The timing is critical: saw-cutting must occur within 4 to 12 hours of placement. Cut too early, and the edges ravel; cut too late, and the slab will develop random, unsightly shrinkage cracks.
Installation Matrix: Concrete vs Blacktop Side-by-Side
| Installation Metric | Blacktop (Asphalt) | Concrete |
|---|---|---|
| Minimum Base Depth | 4-6 inches compacted aggregate | 4-6 inches compacted aggregate |
| Surface Thickness | 2 to 3 inches (compacted) | 4 to 5 inches (poured) |
| Installation Time | 1 to 2 days | 3 to 5 days (including forms and curing) |
| Time to Driveable | 48 to 72 hours | 7 days (passenger vehicles) |
| Full Cure Time | 6 to 12 months | 28 days |
| Weather Constraints | Cannot pave below 50°F or in rain | Cannot pour below 40°F without insulation |
Cost Breakdown: Material, Labor, and Equipment
When deciding between concrete vs blacktop, the initial installation cost is often the deciding factor. Pricing below reflects current national averages for a standard 600-square-foot residential driveway, including excavation, base prep, and material installation.
- Blacktop Installation: $4.50 to $8.50 per square foot. Total cost: $2,700 to $5,100. The lower cost is driven by cheaper raw materials (bitumen and local aggregate) and faster installation times, which reduce labor hours.
- Concrete Installation: $8.00 to $14.00 per square foot. Total cost: $4,800 to $8,400. The premium reflects the cost of Portland cement, steel reinforcement, extensive formwork labor, and the multi-day finishing and jointing process.
- Long-Term Maintenance: Blacktop requires sealcoating every 3 to 5 years ($0.15 to $0.25 per sq ft) and occasional patching. Concrete requires minimal maintenance beyond occasional joint sealing and cleaning, offsetting its higher initial capital expenditure over a 30-year lifespan.
Common Installation Failures and How to Avoid Them
Blacktop: Edge Crumbling and Raveling
Because asphalt is a flexible mat, its edges are highly vulnerable to crumbling if unsupported. The Fix: Contractors must install a flush-set concrete curb or backfill the driveway edges with 6 inches of compacted topsoil immediately after paving. Never leave asphalt edges exposed and unsupported, as vehicle tires clipping the edge will shear the mat away from the base.
Concrete: Plastic Shrinkage Cracking
Surface-level crazing or shallow cracks often appear on concrete when surface moisture evaporates faster than bleed water rises from below, typically on hot, windy days. The Fix: Have the crew apply a liquid evaporation retardant (like Alccofine or Sika Antisol) immediately after screeding. Alternatively, use a wet-curing method by covering the slab with burlap and keeping it continuously moist for the first 3 days to slow the hydration process and ensure maximum tensile strength.
Written by
David NakamuraDavid Nakamura is a licensed architect (AIA) and construction technology writer focused on sustainable building methods, mass timber engineering, and high-performance building envelopes. He holds a Master of Architecture from the University of Washington and is a certified Passive House Consultant (CPHC). David spent eight years at the Seattle firm Mithun, where he led the design of three LEED Platinum projects, before founding his own practice specializing in net-zero residential design. He serves on the editorial advisory board of GreenBuilder Magazine and has authored peer-reviewed papers on cross-laminated timber (CLT) connections for the Journal of Structural Engineering. In his spare time, David teaches woodworking at Pratt Fine Arts Center and kayaks the Puget Sound.
More from David Nakamura
View all
Construction Cost
Labor Cost to Build a Deck Per Sq Ft: 2026 Installation Guide
Discover the exact labor cost to build a deck per sq ft in 2026. This installation guide breaks down contractor rates, complexity factors, and hidden fees.
Aug 4, 2026

Construction Cost
How Much Does It Cost to Build a 3 Bedroom House? Financing Guide
Learn exactly how much it costs to build a 3 bedroom house and explore 2026 financing options, construction loan types, and budget frameworks for your build.
Aug 4, 2026

Construction Cost
Cost to Build a Tennis Court: 2026 Guide
How much does it cost to build a tennis court in 2026? Breakdowns for asphalt, concrete, and synthetic surfaces plus fencing and lighting.
Jul 30, 2026