Concrete vs Sundae Freddy's: Sun-Dek Installation Guide
Compare bare concrete and Sun-Dek acrylic overlays (often misheard as Sundae Freddy's). Get 2026 installation specs, costs, and surface prep steps.

Material Breakdown: Structural Concrete vs. Acrylic Overlays
Choosing between a standard broom-finished concrete slab and a Sun-Dek acrylic knockdown overlay dictates not only the aesthetic outcome but the structural preparation, curing timeline, and long-term maintenance requirements. Bare concrete relies on its compressive strength (typically 3,000 to 4,000 PSI) for durability, while Sun-Dek systems rely on a polymer-modified Portland cement base coat and an acrylic sealer for UV stability and slip resistance.
| Feature | Bare Concrete Flatwork | Sun-Dek Acrylic Overlay |
|---|---|---|
| Primary Function | Structural load-bearing slab | Decorative, UV-resistant wearing course |
| Thickness | 4 to 6 inches minimum | 1/8 to 1/4 inch (overlay only) |
| Surface Temperature | High heat absorption (up to 135°F in direct sun) | Cool-deck properties (20°F to 30°F cooler) |
| Slip Resistance | Moderate (depends on broom finish) | High (knockdown texture provides grip) |
| Curing Time to Foot Traffic | 24 to 48 hours | 12 to 24 hours |
Pre-Installation Surface Preparation (The Critical Step)
The most common cause of acrylic overlay delamination is inadequate surface profiling. According to the International Concrete Repair Institute (ICRI), an acrylic polymer overlay requires a Concrete Surface Profile (CSP) of 2 to 3. A standard acid etch is rarely sufficient to achieve this profile on modern, hard-troweled concrete.
Shot Blasting vs. Scarifying
- Shot Blasting: The preferred method for achieving a CSP-2 profile. Use a walk-behind shot blaster with S280 steel shot. This opens the pores of the concrete without creating micro-fractures that can lead to outgassing and pinholes in the Sun-Dek base coat.
- Scarifying/Grinding: Use a diamond grinder with 30-grit metal-bonded segments only if the slab has heavy curing compounds or existing sealers that shot blasting cannot remove. Always follow grinding with a high-pressure wash (minimum 3,000 PSI) to remove silica dust.
Step-by-Step Sun-Dek Acrylic Overlay Installation
Installing a knockdown acrylic overlay requires strict adherence to timing and temperature parameters. The ambient temperature must be between 50°F and 90°F, and surface temperatures should not exceed 100°F during application.
Step 1: Primer and Bonding Agent
Apply a polymer-modified bonding agent (such as Sun-Dek Bond Kote or equivalent acrylic primer) using a 1/4-inch nap roller. This primer must be applied while the concrete is slightly damp (SSD - Saturated Surface Dry condition) to allow the acrylic polymers to penetrate the capillary network of the slab. Allow 1 to 2 hours of drying time until the primer is completely clear and tack-free.
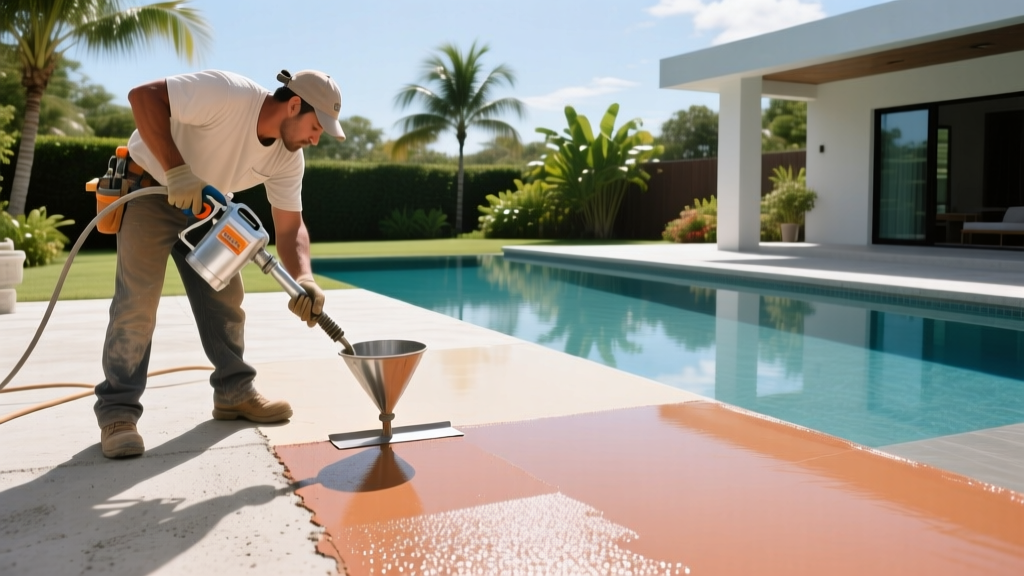
Step 2: Base Coat Application (Hopper Gun)
Mix the acrylic-modified Portland cement base coat with the liquid polymer additive. The standard ratio is 1 gallon of liquid polymer to 50 lbs of dry mix, yielding a pancake-batter consistency. Load the mixture into a turtle-style hopper gun. Set the air compressor to 60 to 80 PSI. Hold the gun 18 to 24 inches from the surface and apply the material in continuous, overlapping circular motions to create the 'splatter' texture. Work in manageable 400 sq ft sections to maintain a wet edge.
Step 3: Knockdown and Troweling
This step defines the final texture and slip resistance. Wait exactly 10 to 15 minutes after spraying (depending on ambient humidity) for the splatter to set slightly but remain pliable. Using a 24-inch 'magic trowel' (flexible steel or neoprene), pull the trowel flat across the surface to flatten the peaks of the splatter. This creates the classic cool-deck knockdown texture. Clean the trowel with a damp rag every few passes to prevent dragging.
Step 4: Sealer Application
After the base coat cures for 24 hours, apply a solvent-based or water-based acrylic sealer. For high-traffic pool decks, a two-part aliphatic polyurethane sealer is recommended for superior UV and chemical resistance. Apply at a rate of 300 to 400 sq ft per gallon, targeting a dry film thickness of 2 to 3 mils. Broadcast a non-skid polymer grit (like SharkGrip) into the first coat at a rate of 1 lb per 100 sq ft if additional slip resistance is required.
Bare Concrete Pour & Finish (Alternative Workflow)
If you opt for standard bare concrete instead of an overlay, the installation focuses on structural integrity rather than polymer chemistry. The Portland Cement Association recommends a minimum 4-inch slab thickness with a 3,000 PSI mix design for residential flatwork. Installation requires forming, compacting a 4-inch gravel sub-base, placing welded wire mesh or fiber reinforcement, and striking off the surface. The finish is achieved using a bull float followed by a coarse-bristle broom finish to create slip-resistant striations. While cheaper upfront, bare concrete lacks the thermal reflectivity of acrylic overlays, making it uncomfortable for barefoot traffic around pools in peak summer.
2026 Cost & Curing Time Comparison
Pricing reflects national averages for professional installation, including surface preparation, materials, and labor.
| System | Material Cost (per sq ft) | Installed Cost (per sq ft) | Full Cure Time |
|---|---|---|---|
| Bare Broom-Finish Concrete | $2.50 - $4.00 | $6.00 - $10.00 | 28 days (for vehicle traffic) |
| Sun-Dek Acrylic Overlay | $3.50 - $5.50 | $9.00 - $14.50 | 72 hours (for furniture/traffic) |
Common Installation Failures & Troubleshooting
Even experienced contractors encounter issues when environmental variables shift. Here is how to diagnose and prevent the most frequent failures in acrylic overlay systems:
- Pinholing and Outgassing: Caused by applying the base coat over a dry, porous slab that traps air. Fix: Always dampen the slab to an SSD state before priming, and apply the base coat during cooler morning hours to prevent rapid surface heating.
- Delamination at Control Joints: Acrylic overlays cannot bridge moving structural cracks or active control joints. Fix: Saw-cut the overlay directly over existing concrete control joints within 2 hours of the base coat setting, then fill with a flexible polyurethane joint sealant.
- Blistering under Sealer: Occurs when solvent-based sealers are applied over a base coat that still holds trapped moisture, or when applied in direct, intense sunlight. Fix: Ensure the base coat has cured for a full 24 hours and apply sealer when surface temperatures are below 90°F.
For further technical specifications on decorative concrete coatings and substrate preparation, consult the guidelines published by the Concrete Network and always refer to the specific manufacturer's Technical Data Sheet (TDS) for the exact polymer additives you are using on site.
Written by
David NakamuraDavid Nakamura is a licensed architect (AIA) and construction technology writer focused on sustainable building methods, mass timber engineering, and high-performance building envelopes. He holds a Master of Architecture from the University of Washington and is a certified Passive House Consultant (CPHC). David spent eight years at the Seattle firm Mithun, where he led the design of three LEED Platinum projects, before founding his own practice specializing in net-zero residential design. He serves on the editorial advisory board of GreenBuilder Magazine and has authored peer-reviewed papers on cross-laminated timber (CLT) connections for the Journal of Structural Engineering. In his spare time, David teaches woodworking at Pratt Fine Arts Center and kayaks the Puget Sound.
More from David Nakamura
View all
Construction Cost
Labor Cost to Build a Deck Per Sq Ft: 2026 Installation Guide
Discover the exact labor cost to build a deck per sq ft in 2026. This installation guide breaks down contractor rates, complexity factors, and hidden fees.
Aug 4, 2026

Construction Cost
How Much Does It Cost to Build a 3 Bedroom House? Financing Guide
Learn exactly how much it costs to build a 3 bedroom house and explore 2026 financing options, construction loan types, and budget frameworks for your build.
Aug 4, 2026

Construction Cost
Cost to Build a Tennis Court: 2026 Guide
How much does it cost to build a tennis court in 2026? Breakdowns for asphalt, concrete, and synthetic surfaces plus fencing and lighting.
Jul 30, 2026