Trowel Finish vs Float Finish Concrete: The Complete Guide
Discover the critical differences between trowel finish vs float finish concrete. Learn tooling, timing, costs, and ideal applications for your slab.

The Core Difference: Surface Profile and Tooling
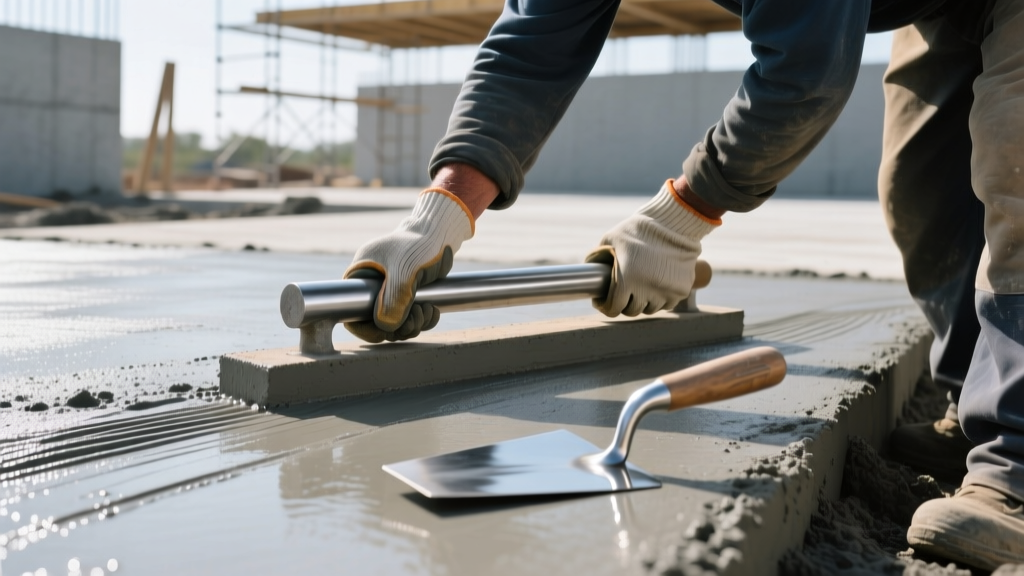
When specifying a concrete slab, the finishing technique dictates the surface density, slip resistance, and long-term durability. The debate of trowel finish vs float finish concrete ultimately comes down to the tools used and the timing of their application. A float finish pushes aggregate slightly below the surface and brings up a layer of cement paste (cream), leaving a matte, textured profile. A trowel finish, executed after floating, uses steel blades to burnish the surface, creating a dense, highly polished, and impermeable crust.
- Choose Float Finish: For exterior slabs, driveways, pool decks, and any area exposed to moisture where slip resistance (Static Coefficient of Friction > 0.60) is critical.
- Choose Trowel Finish: For interior warehouses, garages, basements, and commercial retail spaces where high abrasion resistance, forklift traffic, and easy cleaning are required.
Float Finish Concrete: Texture, Grip, and Exterior Durability
Floating is the first major finishing step after screeding and bullfloating. It is designed to level the surface, embed larger aggregate, and prepare the slab for either a broom finish or a trowel finish. For a dedicated float finish (often left as-is for a subtle matte texture or followed by a light broom), contractors typically use a magnesium or wood hand float.
The Floating Process and Timing
Timing is the most critical variable. According to the Portland Cement Association, floating must begin only after the bleed water has completely evaporated from the surface. The standard field test is the footprint test: when a worker steps onto the slab, the footprint should be no deeper than 1/4 inch. If the concrete is too wet, floating will trap water beneath the surface, leading to severe scaling later.
Tool Selection for Float Finishes
- Magnesium Floats: The industry standard. Magnesium is lighter than aluminum and does not tear the surface of the concrete, pulling up just enough cream to create a uniform, sandy texture.
- Wood Floats: Creates a rougher, more porous texture. Often used when a heavy broom finish will follow, or for exterior walkways requiring maximum slip resistance.
- Sponge Floats: Used specifically for exposed aggregate finishes to gently wash away the top layer of cement paste without displacing the stones.
Trowel Finish Concrete: Density, Smoothness, and Interior Strength
A trowel finish is never the first step; it is a secondary (or tertiary) process applied after the slab has been floated and has stiffened further. The steel blades of a trowel compress the cement paste, closing the microscopic capillaries and creating a highly dense, low-permeability surface.
The Troweling Process and the 'Ring Test'
Troweling too early is the most common cause of interior slab failure. Contractors must wait until the concrete is hard enough that a steel trowel does not pull moisture to the surface. Experienced finishers use the 'ring test': dragging a steel trowel flat across the surface should produce a high-pitched metallic ringing sound, rather than a dull scratching or squelching noise. For large commercial pours, this is achieved using ride-on or walk-behind power trowels equipped with steel pans and blades.
Hard Trowel vs. Burnished Finishes
Not all trowel finishes are identical. The number of passes and the pitch of the blades determine the final profile:
- Standard Trowel (1-2 passes): Smooth, flat, and dense. Ideal for residential garages and basements.
- Hard Trowel (3-4 passes): Achieved by increasing the blade pitch on a power trowel. Creates a glossy, highly abrasion-resistant surface for industrial warehouses.
- Burnished (High-RPM): Using specialized high-speed propane or electric trowels to generate friction heat, literally melting the cement paste into a glass-like sheen. Often paired with lithium silicate densifiers (e.g., Prosoco Consolideck LS) to lock in the finish and prevent dusting.
Head-to-Head Comparison Matrix
| Feature | Float Finish | Steel Trowel Finish |
|---|---|---|
| Surface Profile | Matte, slightly textured, porous | Smooth, dense, semi-gloss to high-gloss |
| Slip Resistance (Wet) | High (Safe for exterior/pool decks) | Low (Hazardous when wet without additives) |
| Abrasion Resistance | Moderate | Very High (Ideal for forklift traffic) |
| Primary Tooling | Magnesium or Wood Hand Float | Steel Power Trowel (Walk-behind or Ride-on) |
| Typical Application | Driveways, Sidewalks, Patios | Warehouses, Garages, Retail Floors |
Critical Timing Mistakes That Ruin Concrete Slabs
Understanding the failure modes of concrete finishing is essential for quality control. The National Ready Mixed Concrete Association (NRMCA) outlines several common defects caused by improper timing in the trowel finish vs float finish concrete process.
Applying a steel trowel while bleed water is still present, or before the concrete has sufficiently stiffened, traps water and air beneath the dense surface crust. This results in delamination (a hollow-sounding surface layer that eventually peels off) and dusting (a weak, chalky surface that continuously sheds powder).
- Over-Floating: Working the float too aggressively or for too long brings excessive water and fine cement particles to the surface. This weakens the top layer and causes crazing—a network of shallow, hexagonal shrinkage cracks that appear within the first few days of curing.
- Adding Water to the Surface: Sprinkling water on the slab to make troweling easier is a cardinal sin. It drastically increases the local water-cement ratio, guaranteeing a weak, flaky surface that will scale under freeze-thaw cycles.
- Troweling Over a Broom Finish: If a non-slip broom finish is required, the slab must never be steel troweled beforehand. The dense crust created by the trowel prevents the broom from cutting deep, effective grooves, resulting in a slip hazard once the shallow ridges wear away.
Cost Breakdown: What to Expect on Your Invoice
The choice between these finishes impacts your overall project budget. While floating is generally included in the base cost of pouring a slab, troweling requires additional labor, equipment, and time.
| Finish Specification | Equipment Required | Added Cost (per sq ft) | Total Installed Cost (per sq ft) |
|---|---|---|---|
| Standard Float (Base) | Magnesium Bull Float, Hand Float | $0.00 (Included) | $6.00 - $8.50 |
| Standard Trowel | Walk-behind Power Trowel | $0.50 - $1.00 | $6.50 - $9.50 |
| Hard Trowel (Industrial) | Ride-on Power Trowel (Multi-pass) | $1.00 - $1.75 | $7.00 - $10.25 |
| Burnished / Polished | High-RPM Propane Trowel + Densifier | $1.50 - $2.50 | $7.50 - $11.00 |
Note: Costs reflect national averages for standard 4-inch thick slabs with 4000 PSI mix designs. Regional labor rates and site accessibility will cause variance.
Frequently Asked Questions
Can I apply a sealer to both float and trowel finishes?
Yes, but the sealer type must match the porosity. Float finishes are porous and accept penetrating silane/siloxane sealers or thick acrylic film-forming sealers easily. Trowel finishes are highly dense; film-forming sealers (like epoxies or urethanes) require mechanical profiling (shot blasting or diamond grinding) to adhere properly, otherwise they will peel under traffic.
Is a trowel finish suitable for an exterior driveway?
No. A steel trowel finish creates a surface that is extremely slippery when wet or icy. For exterior driveways, a float finish followed by a medium-to-heavy broom finish is the mandatory standard to ensure vehicle traction and pedestrian safety.
How do I make an interior troweled floor less slippery without losing the smooth look?
If you require a smooth, troweled aesthetic but need higher slip resistance, specify the addition of an anti-slip additive like aluminum oxide or a polymer grit (e.g., SharkGrip) directly into the final coat of your topical sealer, rather than altering the concrete finishing process itself.
Written by
Sarah WhitfieldSarah Whitfield is a chartered quantity surveyor (MRICS) and construction cost analyst with 15 years of experience in material pricing, procurement strategy, and project budgeting. She earned her degree in Construction Management from the University of Reading (UK) and has worked on projects ranging from $2M custom homes to $180M mixed-use developments across North America and Europe. Sarah currently leads cost estimating for BuildMat Insight, maintaining a proprietary database of 4,000+ material price points updated quarterly. She is a frequent contributor to RSMeans cost data panels and has presented at the International Cost Engineering Council (ICEC) congress. Based in Denver, CO, Sarah is an avid trail runner and volunteer mentor for Women in Construction.
More from Sarah Whitfield
View all
Wood & Lumber
What Are the Different Types of Wood? A Builder's Guide
Compare structural softwoods, finish hardwoods, and engineered lumber. Analyze Janka ratings, MOE values, and 2026 pricing for construction.
Aug 4, 2026

Walls & Panels
Steel Framing vs Wood Framing: Corrosion and Moisture Defense
Compare steel framing vs wood framing for moisture resistance. Learn about galvanized coatings, condensation risks, and corrosion protection strategies.
Jul 21, 2026

Stone & Masonry
How to Cut Stone Veneer: Wet Saw vs Grinder Comparison
Compare the best tools for cutting stone veneer. We review wet saws, angle grinders, and chop saws to help you achieve clean, chip-free cuts.
Jul 21, 2026