Deck vs Concrete Patio: Installation Guide & Cost Analysis
Compare deck vs concrete patio installation. This guide covers site prep, framing, pouring, 2026 costs, and structural failure points to help you choose.

The Core Dilemma: Subgrade vs. Point-Load Footings
Choosing between a wood or composite deck and a poured concrete patio fundamentally alters your site preparation strategy. A concrete patio acts as a monolithic slab-on-grade, requiring uniform soil support across its entire footprint. In contrast, a deck transfers structural loads through discrete point-load footings, bypassing weak surface soils to anchor directly into stable substrates below the frost line.
Concrete Patio Installation: The 28-Day Hydration Timeline
Installing a concrete patio is a high-stakes, time-sensitive operation. Once the truck arrives, the chemical hydration process dictates your schedule. There is no pausing a concrete pour to fix a mistake.
Forming, Subbase, and Reinforcement
Excavate the site to a depth of 8 inches below the finished grade. Compact the native subgrade to a minimum 95% Standard Proctor density. Lay down a 4-inch base of crushed angular aggregate (3/4-inch minus gravel) and compact it in 2-inch lifts. This subbase provides crucial drainage and prevents frost heave in northern climates.
Install 2x4 or 2x6 wooden forms, staked every 3 feet and leveled with a laser transit to ensure a minimum 1/8-inch per foot slope away from the house for drainage. Lay a 6-mil polyethylene vapor retarder over the gravel to prevent the dry subbase from sucking moisture out of the wet concrete. For reinforcement, use #4 (1/2-inch) epoxy-coated rebar tied on 18-inch centers, elevated on 2-inch dobies (chairs) to sit in the upper third of the slab where tensile stresses are highest.
Pouring, Finishing, and Control Joints
Order a 4,000 PSI exterior mix with 5% to 7% air-entrainment to resist freeze-thaw scaling, and a 4-inch slump. Avoid adding water on-site to increase workability; this drastically reduces surface strength and increases shrinkage cracking. If the mix is too stiff, request the batch plant add a mid-range water reducer (plasticizer).
After screeding and bull-floating, wait for the bleed water to evaporate before applying a broom finish. Cutting control joints is non-negotiable. According to the National Ready Mixed Concrete Association (NRMCA), control joints must be saw-cut to a depth of one-quarter the slab thickness within 12 hours of placement to force shrinkage cracks to occur in straight, hidden lines rather than randomly across the surface.
Deck Installation: Framing and the Ledger Board Crucible
Deck construction relies on precision carpentry and strict adherence to structural fastening schedules. The most catastrophic failure point in residential deck building is the ledger board connection to the house.
Footings and Post Bases
Layout your footing locations using batter boards and masonry string. Dig holes 2 inches below your local frost line (typically 36 to 48 inches in northern US zones). Pour concrete into 10-inch or 12-inch Sonotube forms. While the concrete is wet, set hot-dipped galvanized or stainless-steel post bases (such as the Simpson Strong-Tie ABA44Z for 4x4 posts or ABA66Z for 6x6 posts). Never bury pressure-treated wood posts directly in the dirt or encase them in concrete; this traps moisture and accelerates rot at the most critical structural junction.
Ledger Attachment and Waterproofing
The ledger board transfers roughly half the deck's live and dead loads to the house framing. The American Wood Council's DCA 6 Prescriptive Residential Deck Construction Guide mandates specific fastening schedules. Use 1/2-inch hot-dipped galvanized lag screws or specialized structural screws (like Simpson Strong-Drive SDWS) driven into the house's rim joist or solid blocking, never just into OSB or plywood sheathing.
Head-to-Head Installation Matrix
| Installation Factor | Concrete Patio | Wood / Composite Deck |
|---|---|---|
| Typical Timeline | 3 to 5 days (prep, pour, cure) | 5 to 10 days (footings, framing, decking) |
| Skill Requirement | High (finishing requires expert timing) | Medium-High (requires structural carpentry) |
| Heavy Machinery | Required (skid steer, concrete pump/truck) | Minimal (post-hole auger, compressors) |
| Frost Heave Risk | Moderate (requires thick gravel subbase) | Low (footings bypass the frost line) |
| Permeability | Zero (requires surface slope drainage) | High (water drains through joist gaps) |
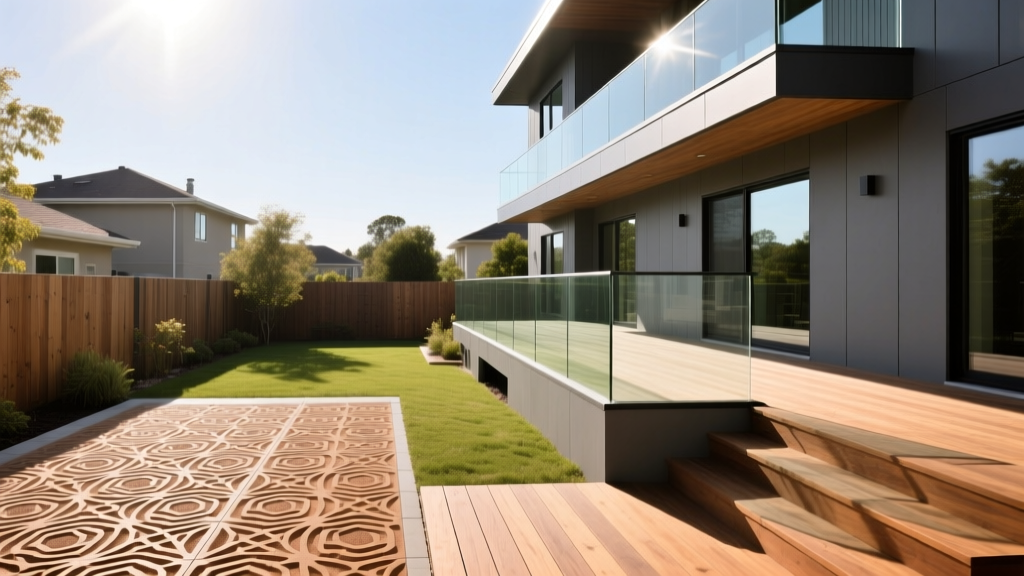
2026 Material and Labor Cost Breakdown
When evaluating the deck vs concrete patio debate, budget often dictates the final decision. Pricing fluctuates based on regional labor rates, site accessibility, and material upgrades. The following ranges reflect national averages for professional installation in 2026.
- Basic Broom-Finish Concrete Patio: $9.00 to $14.00 per square foot. Includes 4-inch slab, standard gravel base, and minimal forming.
- Decorative/Stamped Concrete: $16.00 to $24.00 per square foot. Adds color hardeners, release agents, stamping mats, and acrylic sealing.
- Pressure-Treated Pine Deck: $22.00 to $28.00 per square foot. Most economical elevated option, but requires annual sealing and has a shorter lifespan.
- Premium Composite Deck (e.g., Trex Transcend, TimberTech AZEK): $35.00 to $48.00 per square foot. High upfront cost, but utilizes hidden fastener systems and requires virtually zero structural maintenance.
Note on Permits: Deck installations almost universally require municipal building permits and structural inspections due to life-safety collapse risks. Ground-level concrete patios under 30 inches in height and unattached to the primary structure frequently bypass permitting requirements, saving $200 to $600 in administrative fees.
Long-Term Maintenance and Failure Modes
The installation is only day one. Understanding how each structure degrades informs your initial design choices.
Concrete Failure Modes
The most common installation error leading to concrete failure is inadequate subgrade compaction, resulting in slab settling and corner breakage. Surface spalling and scaling occur when the concrete is over-troweled, trapping bleed water and creating a weak, porous top layer that flakes off after the first winter. To mitigate this, apply a penetrating silane/siloxane sealer 28 days after the pour, and reapply every 3 to 5 years.
Deck Failure Modes
Moisture intrusion is the enemy of deck framing. While the decking boards get all the aesthetic attention, the hidden joists and beams are where catastrophic rot occurs. Installing composite decking over standard pressure-treated joists without applying a joist-protection tape (like Trex Protect or Grace Vycor Deck Flashing) allows water to pool on the joist tops, accelerating decay while the composite boards above look pristine. Always specify 6x6 posts for elevated decks; 4x4 posts are prone to lateral twisting and are no longer compliant under many updated 2026 IRC building codes for decks over 8 feet high.
Written by
James ThorntonJames Thornton is a construction industry veteran with 25 years of hands-on experience in wood framing, lumber grading, and residential building codes. He started as a framing carpenter in rural Oregon, earned his ICC Residential Building Inspector certification, and eventually became a senior plan reviewer for the City of Portland Bureau of Development Services. James holds a B.S. in Wood Science & Technology from Oregon State University and is a certified lumber grader through the West Coast Lumber Inspection Bureau (WCLIB). He has inspected over 3,000 residential construction sites and authored the city's internal guide on advanced framing techniques (2x6 at 24" O.C.). James lives in Bend, OR, where he builds custom timber-frame cabins and competes in lumberjack sports.
More from James Thornton
View all
Insulation
Best Home Insulation Materials: Complete 2026 Guide
Compare top home insulation materials for 2026. Find R-values, installed costs per square foot, and best uses for fiberglass, spray foam, and mineral wool.
Aug 4, 2026

Sustainable Building
Certify Your Green Building Material for LEED and WELL
Step-by-step guide to certifying a green building material for LEED v5 and WELL v2. Master EPDs, HPDs, and VOC limits for 2026 project specifications.
Aug 4, 2026

Stone & Masonry
Veneer Stacked Stone Panels: Interior Design & Style Showcase
Discover how veneer stacked stone panels transform interiors. Explore modern design profiles, material pairings, and technical installation specs.
Aug 4, 2026