Drywall vs Concrete Wall: Installation & Framing Guide
Compare drywall vs concrete wall installation methods, framing techniques, moisture barriers, and 2026 cost data for residential and commercial builds.

The Core Conflict: Framed Drywall vs. Poured Concrete
When evaluating drywall vs concrete wall systems, the comparison is rarely about choosing one to entirely replace the other in a single assembly. Instead, contractors and structural engineers must navigate how these two fundamentally different materials behave, interact, and require entirely distinct installation protocols. Drywall (gypsum board) is a lightweight, non-structural interior cladding that requires a framed substrate. Poured concrete is a high-mass, structural, and moisture-permeable barrier. The most critical installation challenges arise when these two systems intersect—specifically, when finishing interior concrete walls (like basements or tilt-up commercial panels) with drywall.
Mismanaging the transition between a porous, alkaline concrete substrate and a paper-faced, moisture-sensitive gypsum board is the leading cause of mold, efflorescence, and fastener failure in below-grade construction. This guide details the exact installation frameworks, material specifications, and structural realities required to execute both wall types flawlessly.
Decision Matrix: Material Capabilities and Limitations
Before detailing the installation steps, it is crucial to understand the physical properties dictating how each material must be handled on the job site. The following matrix compares standard 5/8-inch Type X drywall (on 2x4 wood framing at 16 inches on-center) against a standard 8-inch poured reinforced concrete wall.
| Property | Framed Drywall Assembly | 8-Inch Poured Concrete Wall |
|---|---|---|
| Weight (per sq. ft.) | ~2.2 lbs (gypsum only) / ~5.5 lbs (framed) | ~100 lbs |
| STC Rating (Sound) | 35 - 45 (standard) / 55+ (resilient channel) | 50 - 55 |
| Fire Resistance | 1 Hour (5/8" Type X per Gypsum Association) | 2 to 4 Hours (depends on thickness/rebar) |
| Moisture Tolerance | Very Low (requires vapor barrier in wet zones) | High (but requires waterproofing to prevent wicking) |
| Installation Speed | Fast (400-600 sq. ft. per day per crew) | Slow (requires forming, pouring, 28-day cure) |
Installing Drywall Over Concrete: The Hybrid Assembly
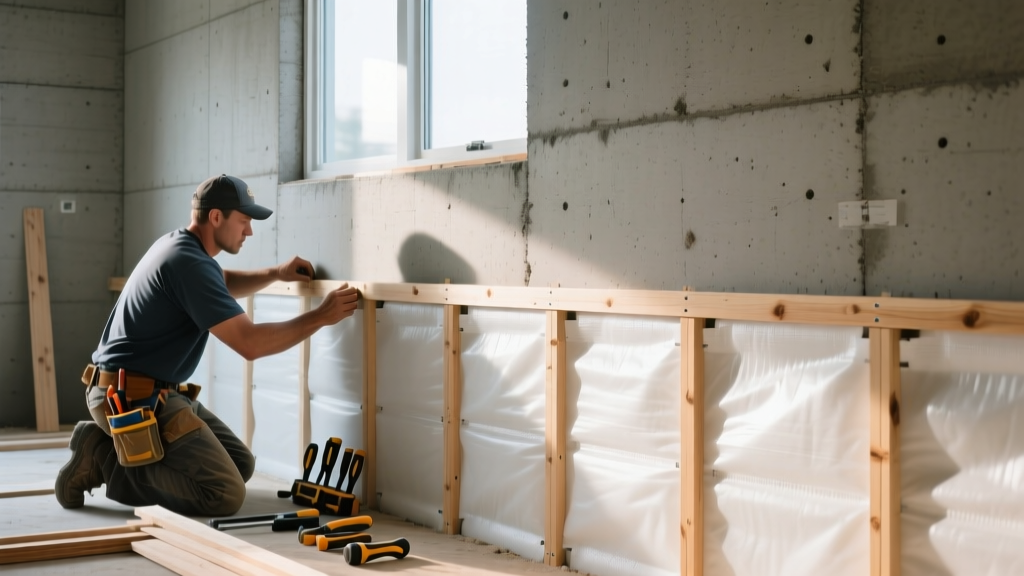
You cannot screw drywall directly to a concrete wall. Concrete is inherently porous, wicks ground moisture, and experiences thermal bridging. According to the Portland Cement Association, even fully cured concrete can transmit significant moisture vapor if not properly sealed. To install drywall over a concrete substrate, you must build a decoupled, moisture-managed furring assembly.
Step 1: Substrate Moisture Testing and Preparation
Before any framing begins, test the concrete for moisture vapor emission. Do not rely on visual inspection.
- ASTM F2170 (Relative Hum Probe): Drill holes to 40% of the slab/wall depth and insert in-situ probes. Readings must be below 75% RH before enclosing the wall.
- ASTM D4263 (Plastic Sheet Test): Tape a 2x2 foot square of 4-mil polyethylene to the concrete. Wait 24 hours. Condensation or darkening of the concrete indicates excessive moisture.
- Preparation: If moisture is present, apply a crystalline waterproofing sealer (e.g., Xypex or Penetron) or a two-part epoxy moisture barrier (e.g., Laticrete Hydro Ban) directly to the concrete before framing.
Step 2: Furring and Framing the Cavity
Create an air gap and a nailing surface. You have two primary options for the furring layer:
- Pressure-Treated (PT) Wood Furring: Use 1x3 or 2x4 PT lumber. Apply a continuous bead of polyurethane construction adhesive (like Loctite PL Premium) to the back of the lumber, press it to the wall, and secure it using 3/16" x 1-1/4" Tapcon masonry screws spaced 16 inches on-center. Warning: Never use standard drywall screws or untreated wood against concrete.
- 25-Gauge Metal Hat Channel: For superior moisture resistance and acoustic decoupling, use 7/8" metal hat channel (resilient channel). Fasten directly to the concrete using powder-actuated tools (PAT) with 1-inch pins, or Tapcons. Space channels horizontally at 16 inches or 24 inches on-center, matching your drywall orientation.
If using 2x4 PT furring, you can friction-fit R-13 or R-15 mineral wool batts (like Roxul Comfortbatt) between the studs before hanging the drywall. Mineral wool is hydrophobic and will not harbor mold if minor moisture wicking occurs, unlike fiberglass.
Step 3: Hanging and Finishing the Drywall
Once the furring is plumb and true, hang 1/2-inch or 5/8-inch moisture-resistant drywall (often called green board or purple board, such as USG Sheetrock Mold Tough). Fasten the panels to the wood or metal furring using 1-1/4" or 1-5/8" coarse-thread drywall screws, spaced 8 inches on-center at the edges and 12 inches in the field. Tape, mud, and sand using standard joint compound protocols.
Concrete Wall Construction: Formwork and Pouring Realities
While drywall installation is a dry, interior trade, concrete wall installation is a heavy, weather-dependent structural operation. Pouring a concrete wall requires precise formwork (using aluminum or engineered wood forms like Symons or Peri), steel rebar tying, and continuous pour scheduling to prevent cold joints.
Unlike drywall, which can be installed and painted in a matter of days, a concrete wall requires a 28-day curing period to reach its full design compressive strength (typically 3,000 to 4,000 PSI for residential foundations). During this 28-day window, the concrete releases massive amounts of water vapor (bleed water). This is why interior framing and drywall installation should never commence against a newly poured concrete wall until the 28-day cure is complete and moisture tests pass.
Fastening and Anchoring: Drywall vs. Concrete
A major installation difference between the two materials is how subsequent fixtures (cabinets, TVs, heavy shelving) are anchored. Drywall possesses virtually no structural shear strength on its own, whereas concrete offers immense pull-out strength but requires specialized, high-impact drilling.
| Wall Type | Anchor System | Max Weight Capacity | Installation Tool Required |
|---|---|---|---|
| Drywall (Hollow) | Toggle Bolts / Snap Toggles | 50 - 150 lbs (depending on board thickness) | Drill (1/2" bit), Screwdriver |
| Drywall (Stud Hit) | Coarse-thread wood screws (into 2x4) | 100 - 200 lbs per screw | Stud finder, Impact Driver |
| Concrete | Wedge Anchors (1/2" x 3-3/4") | 1,000+ lbs (pull-out) | Hammer drill, Carbide masonry bit, Wrench |
| Concrete | Sleeve Anchors / Tapcons | 200 - 600 lbs | Hammer drill, Impact driver |
2026 Cost and Labor Breakdown
Understanding the financial implications of drywall vs concrete wall installations requires separating material costs from labor. As of 2026, supply chain stabilization has normalized lumber and gypsum prices, but skilled concrete labor remains at a premium.
- Drywall Installation (Hanging & Finishing): $1.75 to $2.80 per square foot. This includes 1/2-inch standard board, taping, mudding, and sanding to a Level 4 finish. Framing the wall behind it adds $3.50 to $5.00 per square foot.
- Furring a Concrete Wall for Drywall: Adding 1x3 PT furring and moisture barriers to an existing concrete wall costs an additional $2.50 to $4.00 per square foot before the drywall is even hung.
- Poured Concrete Wall (New Construction): $18.00 to $32.00 per square foot of wall face. This includes excavation, forming, rebar, the concrete mix (approx. $140-$160 per cubic yard in 2026), and stripping the forms.
Common Installation Failures and Edge Cases
Even experienced crews make critical errors when bridging the gap between concrete and drywall. Avoid these specific failure modes:
1. Efflorescence Bleed-Through
If concrete is not sealed, water-soluble salts migrate to the surface, creating a white, powdery efflorescence. If drywall is installed too close to the concrete without a proper air gap and vapor barrier, this alkaline salt will wick into the gypsum core and paper facing, causing yellow/brown stains and degrading the drywall's structural integrity. Fix: Maintain a minimum 1-inch air gap and use a Class I vapor retarder.
2. Galvanic Corrosion of Fasteners
Concrete is highly alkaline (pH of 12-13). If you use standard zinc-plated drywall screws or untreated metal tracks directly against the concrete, the alkalinity will rapidly corrode the metal, leading to fastener failure and rust stains bleeding through the drywall mud. Fix: Always use hot-dipped galvanized or stainless steel fasteners, or coated masonry screws like Tapcons, for any metal touching the concrete substrate.
3. Acoustic Flanking via Rigid Connections
When furring strips are screwed rigidly into a concrete wall, and drywall is screwed rigidly to the furring, impact noise (footsteps, machinery) transfers directly through the assembly. Fix: Use acoustic isolation clips and 25-gauge hat channel rather than direct-to-concrete wood furring in multi-family or high-noise environments to achieve an STC rating above 55.
Written by
Marcus ChenMarcus Chen is a licensed structural engineer (PE) and building materials analyst with over 12 years of experience across residential, commercial, and industrial construction. He holds a Master of Science in Civil Engineering from UC Berkeley and spent six years at Thornton Tomasetti before transitioning to independent consulting and technical writing. Marcus specializes in material selection for seismic-prone regions, concrete reinforcement strategies, and lifecycle cost analysis. His work has been cited by the American Concrete Institute (ACI) and the Structural Engineers Association of California (SEAOC). When he is not on a job site or at his desk, you will find him hiking the Sierra Nevada or restoring a 1920s craftsman bungalow in Oakland, CA.
More from Marcus Chen
View all
Construction Cost
How Much Did the Eiffel Tower Cost to Build?
How much did the Eiffel Tower cost to build in 1889? We adjust for inflation and compare its budget to modern skyscraper construction.
Aug 4, 2026

Fire Resistance
What Is a Fire Resistant Material? Testing & Certification Guide
Discover what is a fire resistant material through ASTM and UL testing. Learn how fire ratings, certifications, and assemblies work in construction.
Aug 4, 2026

Construction Cost
How Much Did the Burj Khalifa Cost to Build?
How much did the Burj Khalifa cost to build? We break down the $1.5B project and extract 5 money-saving strategies for your next build.
Jul 30, 2026