Foam vs Concrete Fence Posts: Strength, Cost, and Cure Guide
Compare expanding polyurethane foam vs concrete fence posts. Discover real costs, cure times, frost heave resistance, and load limits for your next build.
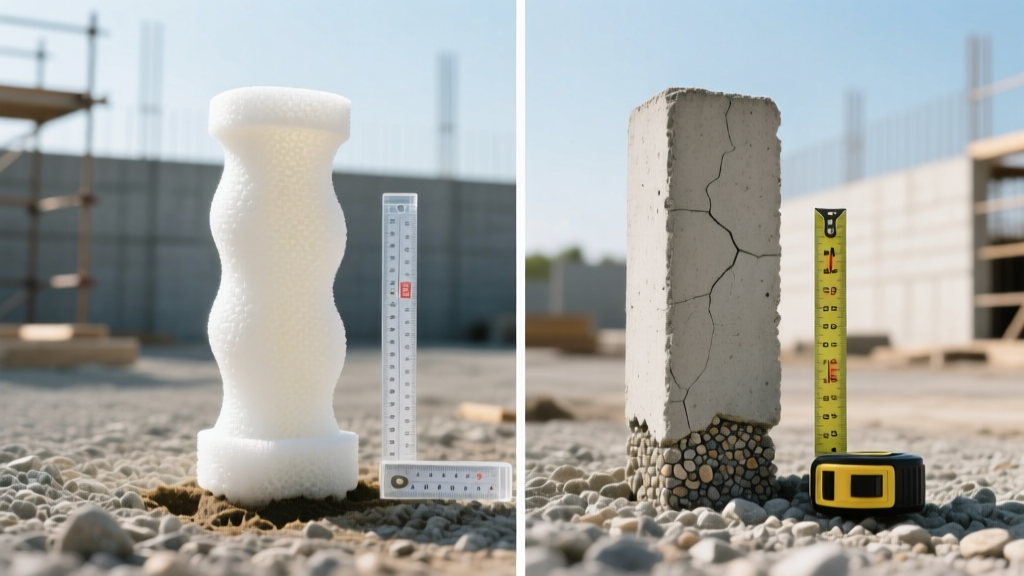
The Core Chemistry: Polyurethane Foam vs. Portland Cement
The debate over setting fence posts centers on two fundamentally different chemical processes. Traditional fence setting relies on Portland cement or Calcium Sulfoaluminate (CSA) fast-setting concrete, which cures through an exothermic hydration reaction. When mixed with water, the cement particles form calcium silicate hydrate crystals that interlock, creating a rigid, high-compressive-stone matrix.
Conversely, expanding fence post foams (like Sika Post Fix or Fast 2K) utilize a two-part polyurethane resin. When the isocyanate and polyol components mix, they undergo a rapid polymerization reaction, expanding 15 to 20 times their liquid volume. This creates a closed-cell, high-density rigid foam that locks the post in place through lateral friction and soil confinement rather than sheer mass.
Head-to-Head Material Comparison Matrix
| Property | 2-Part Polyurethane Foam | Fast-Setting Concrete (CSA) |
|---|---|---|
| Compressive Strength | 100 - 150 PSI | 4,000+ PSI (at 28 days) |
| Working Time | 2 - 3 minutes | 10 - 15 minutes |
| Initial Cure Time | 15 - 30 minutes | 2 - 4 hours |
| Weight per Post Hole | ~1.5 lbs (expanded) | 80 - 110 lbs (mixed) |
| Water Absorption | < 2% (Closed-cell) | 4% - 8% (Porous) |
| Hole Volume Required | Minimal (tight to post) | Standard (3x post width) |

Load-Bearing Capacity and Structural Limits
Understanding the physics of load transfer is critical when choosing between foam and concrete. Concrete transfers wind and lateral loads directly through its massive weight and high compressive strength into the undisturbed soil at the base of the hole. Polyurethane foam, lacking high compressive strength and heavy mass, relies entirely on the friction of the expanded foam against the post and the surrounding undisturbed soil walls.
When Expanding Foam Fails
Foam is strictly a friction-based anchor. If the surrounding soil is loose, backfilled, or highly expansive clay that shifts seasonally, the foam will simply pull out of the ground with the post. Furthermore, foam lacks the rigidity to handle high-torque lateral loads. You should never use expanding foam for:
- Gate posts supporting gates wider than 4 feet
- Privacy fences taller than 6 feet in high-wind zones (100+ mph gusts)
- Retaining wall posts or structural shade sail anchors
- Posts set in loose, sandy, or heavily disturbed topsoil
When Concrete is Mandatory
According to the USDA Forest Products Laboratory, heavy structural loads and high-moisture environments demand the mass and compressive resistance of concrete. Any post acting as a structural hinge (like a heavy wooden gate) or supporting overhead loads (pergolas, carports) requires a concrete footing that extends below the local frost line and bell-outs at the base to resist uplift.
When pouring concrete, many DIYers create a 'bell' shape at the bottom of the hole by over-digging. In freezing climates, frost lenses form in the soil and grip this wide concrete base, pushing the entire post upward (frost heave). To prevent this, concrete should be poured in a straight, cylindrical shaft or tapered slightly inward at the bottom.
True Cost Breakdown: Material and Labor
In 2026, the material costs for both methods have stabilized, but the total installed cost requires factoring in labor time and site preparation.
Material Costs Per Post
- Expanding Foam: A standard two-part polyurethane kit costs between $9.00 and $13.00 per post. This price is fixed regardless of hole depth, as the foam expands to fill the void.
- Fast-Setting Concrete: A 50 lb bag of Quikrete Fast-Setting Concrete Mix costs roughly $6.00 to $8.00. However, a standard 8-inch wide, 24-inch deep hole requires 1.5 to 2 bags, bringing the material cost to $9.00 to $16.00 per post.
The Hidden Labor Variable
While foam appears slightly cheaper or equal in material cost, the labor savings are massive. Mixing, carrying, and tamping 100 lbs of wet concrete per hole is physically exhausting. Foam requires carrying a lightweight pouch, snipping the divider, and pouring. For a 20-post fence line, foam saves approximately 4 to 6 hours of grueling manual labor, making it highly cost-effective if you are paying hourly help or value your own time.
Soil Compatibility and Drainage Dynamics
Soil type dictates the longevity of your fence installation. Polyurethane foam is a closed-cell material, meaning it will not wick groundwater. This provides a distinct advantage in preventing wood rot at the subterranean grade line. However, because foam is lightweight, buoyancy becomes an issue in areas with high water tables. If the water table rises above the foam anchor, the buoyant force can literally float the post out of the ground.
Concrete, being porous, acts as a sponge. Water trapped in the concrete matrix against a wooden post accelerates fungal decay. To mitigate this, professional installers pour a 2-inch gravel base beneath the concrete for drainage and slope the top of the concrete collar away from the wood post at a 15-degree angle to shed surface runoff.
Step-by-Step Installation Nuances
The Foam Pour Technique
- Dimension the Hole: Dig a hole exactly 2 to 3 inches wider than the post. Foam requires tight soil confinement; a hole that is too wide will result in foam blowout and inadequate lateral support.
- Depth: Dig to 1/3 the height of the above-ground post (e.g., 24 inches deep for a 6-foot fence).
- Moisture Prep: Polyurethane requires moisture to catalyze. Lightly mist the soil walls and the wooden post with a spray bottle before pouring. Do not use standing water.
- Pour and Brace: Mix the two-part pouch and pour. You have exactly 15 to 20 seconds before expansion begins. The foam will expand aggressively; use wooden braces to keep the post plumb, as the expansion pressure can push a post out of alignment if left unsupported.
The Concrete Tamping Method
- Dimension the Hole: Dig to 3 times the width of the post (e.g., 12 inches wide for a 4x4 post) to provide adequate mass.
- Gravel Base: Add 3 inches of crushed gravel to the bottom for drainage. Do not pour concrete directly onto dirt.
- Dry-Pour vs. Wet-Mix: For fast-setting CSA concrete, you can pour the dry mix into the hole and add water (approx. 1 gallon per 50 lb bag). Use a rebar stake to aggressively tamp and mix the slurry in the hole, ensuring no dry pockets remain at the bottom.
- Cap and Slope: Trowel the top of the wet concrete into a conical slope away from the post to prevent water pooling.
Environmental and Cleanup Realities
Spilled polyurethane foam is a permanent nightmare. Once cured, it bonds tenaciously to skin, tools, and wheelbarrows. It cannot be wiped away with water; it requires mechanical scraping or specialized solvent wipes. Furthermore, the empty plastic pouches and chemical residues are not biodegradable and must be disposed of as hazardous household waste in many municipalities.
Concrete, by contrast, is entirely mineral-based. Spills can be swept up, and empty paper bags are easily recycled or composted. If a concrete post needs to be removed decades later, it can be broken up with a sledgehammer and the chunks reused as aggregate or fill dirt. Removing a foam-anchored post requires cutting the foam with a reciprocating saw, and the chemical remnants remain in the soil indefinitely.
Final Verdict: Which Should You Choose?
The decision between expanding foam products and traditional concrete should be based strictly on the structural demands of your specific project and your local soil conditions.
- Choose Expanding Foam If: You are installing a lightweight chain-link fence, a standard 4-to-5-foot wooden picket fence in stable, well-draining soil, or working on a rocky site where digging wide holes is impossible and you need to drill narrow core holes.
- Choose Fast-Setting Concrete If: You are hanging heavy privacy gates, building a 6-foot+ solid privacy fence in high-wind regions, setting posts in loose or expansive clay soils, or installing structural pergola footings.
By matching the material properties of polyurethane and Portland cement to the specific mechanical loads of your fence line, you ensure a plumb, secure installation that will withstand decades of seasonal shifting.
Written by
James ThorntonJames Thornton is a construction industry veteran with 25 years of hands-on experience in wood framing, lumber grading, and residential building codes. He started as a framing carpenter in rural Oregon, earned his ICC Residential Building Inspector certification, and eventually became a senior plan reviewer for the City of Portland Bureau of Development Services. James holds a B.S. in Wood Science & Technology from Oregon State University and is a certified lumber grader through the West Coast Lumber Inspection Bureau (WCLIB). He has inspected over 3,000 residential construction sites and authored the city's internal guide on advanced framing techniques (2x6 at 24" O.C.). James lives in Bend, OR, where he builds custom timber-frame cabins and competes in lumberjack sports.
More from James Thornton
View all
Insulation
Best Home Insulation Materials: Complete 2026 Guide
Compare top home insulation materials for 2026. Find R-values, installed costs per square foot, and best uses for fiberglass, spray foam, and mineral wool.
Aug 4, 2026

Sustainable Building
Certify Your Green Building Material for LEED and WELL
Step-by-step guide to certifying a green building material for LEED v5 and WELL v2. Master EPDs, HPDs, and VOC limits for 2026 project specifications.
Aug 4, 2026

Stone & Masonry
Veneer Stacked Stone Panels: Interior Design & Style Showcase
Discover how veneer stacked stone panels transform interiors. Explore modern design profiles, material pairings, and technical installation specs.
Aug 4, 2026