Installing Gypsum Board on Concrete Wall: Direct Bond vs Furring
Learn how to install gypsum board on concrete wall surfaces using direct adhesive bonding or furring channels. Compare costs, moisture risks, and methods.

The Substrate Challenge: Alkalinity and Moisture Vapor
Attaching gypsum board directly to concrete or masonry requires navigating two hostile substrate conditions: high alkalinity and moisture vapor transmission (MVT). Fresh concrete has a pH level between 12 and 13. Standard paper-faced gypsum boards are highly susceptible to alkali attack, which breaks down the cellulose fibers in the paper facing, leading to premature degradation and fastener pop-outs. Furthermore, concrete is inherently porous. Without proper moisture management, hydrostatic pressure and vapor drive can wick moisture into the gypsum core, triggering mold growth and structural softening.
Before any installation begins, the concrete must be fully cured. According to the Gypsum Association, the surface pH must be tested and verified to be below 10. Additionally, moisture vapor emission rates (MVER) should be tested using a calcium chloride test (ASTM F1869) or an in-situ relative humidity probe (ASTM F2170). If MVER exceeds 3 lbs per 1,000 square feet per 24 hours, direct adhesive bonding is strictly prohibited, and a decoupled furring system must be utilized.
Method 1: Direct-to-Masonry Adhesive Bonding
Direct bonding is the most cost-effective and space-saving method for installing gypsum board on concrete wall assemblies. It eliminates the need for framing lumber or steel studs, preserving interior square footage. However, it is strictly limited to interior, above-grade walls or below-grade walls that have been positively waterproofed on the exterior with a continuous membrane.
Material Specifications and Adhesive Selection
The success of a direct-bond application hinges entirely on the adhesive. Standard drywall mud will not adhere to concrete. You must use a specialized masonry adhesive or a high-grade polyurethane construction adhesive. USG Corporation recommends their Sheetrock Brand Adhesive, while Loctite PL Premium Polyurethane is a widely accepted alternative for high-moisture environments. The adhesive must be applied in continuous vertical beads to prevent air pockets where condensation could accumulate.
Step-by-Step Application Flow
- Surface Preparation: Remove all form release agents, dust, and efflorescence from the concrete using a stiff-bristle brush and a mild acid wash if necessary. The wall must be completely dry to the touch.
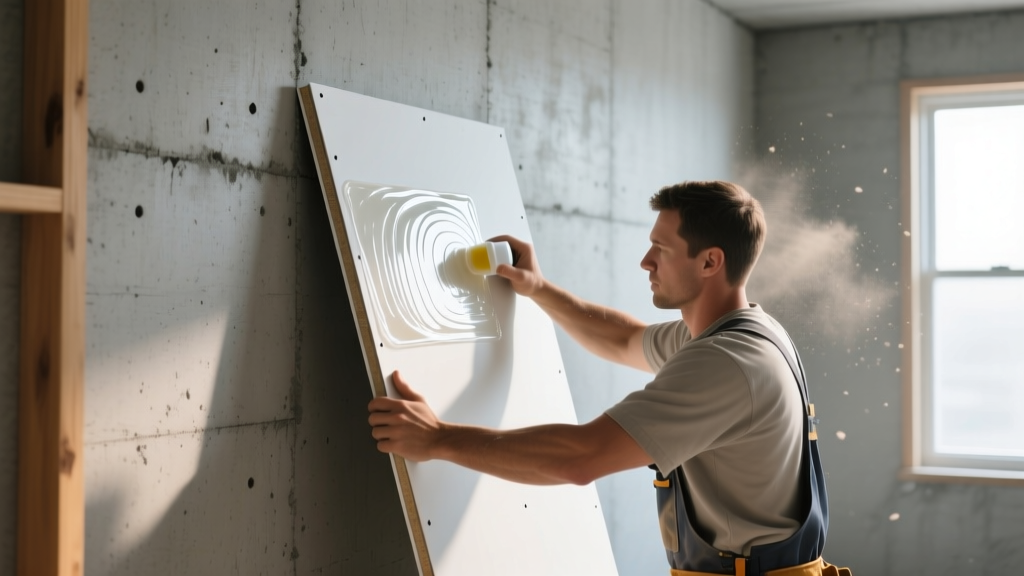
- Adhesive Application: Apply a 3/8-inch thick continuous bead of masonry adhesive to the back of the gypsum board. Run vertical beads spaced 16 inches on-center (o.c.). Apply a continuous bead around the entire perimeter of the panel, keeping the bead 1 inch away from the edges to prevent squeeze-out.
- Positioning and Pressing: Lift the panel into place, leaving a 1/2-inch gap at the floor to prevent wicking from slab moisture. Press the panel firmly against the concrete.
- Mechanical Bracing: Use temporary wooden T-braces or deadmen to hold the panel tightly against the wall for a minimum of 24 hours while the adhesive cures.
- Fastener Supplementation: While the adhesive bears the structural load, drive 1-1/4 inch masonry nails or Tapcon screws through the board into the concrete at the top and bottom plates to prevent edge curling during the curing phase.
Method 2: Furring Channel Framing (The Decoupled Approach)
When dealing with below-grade foundations, active moisture issues, or the need to run electrical and plumbing utilities, direct bonding is insufficient. Furring channels create a vital air gap and capillary break between the concrete and the gypsum board. This method also provides acoustic decoupling, significantly improving the Sound Transmission Class (STC) rating of the wall assembly.
Hat Channel vs. Wood Furring: A Structural Comparison
While 1x3 or 1x4 wood furring strips were historically common, they are prone to warping, rotting, and providing a food source for mold. In modern 2026 construction, 25-gauge steel hat channels (furring channels) are the industry standard for masonry applications.
| Feature | 25-Gauge Steel Hat Channel | 1x3 Wood Furring Strips |
|---|---|---|
| Moisture Resistance | Excellent (Galvanized steel will not rot) | Poor (Susceptible to rot and mold) |
| Dimensional Stability | Perfectly straight, no warping or twisting | High variance, requires shimming |
| Fastening to Concrete | Ramset powder-actuated pins or Tapcon screws | Tapcon screws or masonry nails |
| Depth / Space Loss | 7/8 inch to 1-1/2 inches | 3/4 inch (actual dimension) |
Vapor Barrier Integration
When framing with furring channels over below-grade concrete, a 6-mil polyethylene vapor retarder must be installed between the concrete and the furring channels. The channels are fastened directly through the poly into the concrete using 3/16-inch x 1-1/4-inch Tapcon screws spaced 24 inches o.c. The gypsum board is then attached to the steel channels using 1-inch Type S drywall screws, ensuring the screw heads dimple the paper without breaking it.
Application Showcase: Commercial Core vs. Residential Basement
The choice between direct bonding and furring often depends on the specific architectural application and the environmental control of the space.
Commercial Elevator and Stair Cores
In commercial high-rises, elevator shafts and stairwells are frequently constructed using poured-in-place concrete or CMU blocks. Because these spaces are strictly climate-controlled and above-grade, direct adhesive bonding is the preferred method. Contractors utilize 5/8-inch Type X fire-rated gypsum board, applying heavy-duty masonry adhesive to achieve the required 1-hour or 2-hour fire resistance ratings without sacrificing the tight spatial tolerances required for elevator cab clearances.
Residential Below-Grade Living Spaces
For finished residential basements, furring channels paired with rigid foam insulation are mandatory. Concrete foundations in residential builds are rarely waterproofed to the standard required for direct gypsum bonding. By installing 1-inch XPS rigid foam board against the concrete, followed by a 6-mil vapor barrier, and then 25-gauge hat channels, builders create a thermal break that prevents cold concrete from cooling the interior gypsum surface below the dew point, effectively eliminating condensation-driven mold growth.
2026 Cost Breakdown: Direct Bond vs. Furring
Material and labor costs vary significantly between the two methods. The following estimates reflect 2026 national averages for commercial and high-end residential installations, assuming the use of moisture-resistant fiberglass-faced gypsum panels.
| Cost Component | Direct Adhesive Bond | Steel Furring Channel System |
|---|---|---|
| Gypsum Panels (1/2" Mold-Resistant) | $0.65 - $0.85 / sq ft | $0.65 - $0.85 / sq ft |
| Adhesive / Fasteners | $0.30 - $0.45 / sq ft | $0.90 - $1.20 / sq ft (Channels, Tapcons, Poly) |
| Labor (Installation & Bracing) | $1.10 - $1.50 / sq ft | $2.25 - $3.00 / sq ft |
| Total Estimated Cost | $2.05 - $2.80 / sq ft | $3.80 - $5.05 / sq ft |
Troubleshooting Common Failure Modes
Even with meticulous preparation, specific failure modes can compromise a gypsum-to-concrete installation. Recognizing these edge cases is critical for long-term durability.
Efflorescence Delamination
If the concrete substrate was not properly sealed or if exterior drainage is poor, water migrating through the concrete will carry soluble salts to the surface. This efflorescence crystallizes behind the gypsum board, creating immense physical pressure that can literally push the board off the wall, breaking the adhesive bond. Fix: Efflorescence must be wire-brushed and treated with a penetrating silane-siloxane sealer before any adhesive is applied.
Adhesive Starvation and Hollow Spots
Applying adhesive in 'dabs' or 'dots' rather than continuous beads creates voids behind the board. These voids become collection points for condensation and allow the board to flex when impacted, leading to cracked joint compound. Fix: Always use continuous vertical beads and a notched trowel for perimeter adhesive to ensure 100% continuous contact lines.
Joint Compound Degradation in High Humidity
Finishing joints on a concrete-backed wall introduces water into the system via the joint compound. If standard pre-mixed all-purpose compound is used, the drying time is extended significantly due to the lack of airflow behind the board, increasing the risk of mold. Fix: Use a setting-type compound (e.g., USG Durabond 90) for the taping and first coat. Setting compounds cure via chemical reaction rather than evaporation, introducing significantly less free water into the assembly and hardening in 90 minutes regardless of ambient humidity.
For comprehensive guidelines on moisture management and indoor air quality during masonry finishing, refer to the EPA Mold and Moisture Guidelines. Proper execution of these detailing steps ensures that the finished wall performs identically to a standard wood-framed assembly, despite the challenging concrete substrate.
Written by
David NakamuraDavid Nakamura is a licensed architect (AIA) and construction technology writer focused on sustainable building methods, mass timber engineering, and high-performance building envelopes. He holds a Master of Architecture from the University of Washington and is a certified Passive House Consultant (CPHC). David spent eight years at the Seattle firm Mithun, where he led the design of three LEED Platinum projects, before founding his own practice specializing in net-zero residential design. He serves on the editorial advisory board of GreenBuilder Magazine and has authored peer-reviewed papers on cross-laminated timber (CLT) connections for the Journal of Structural Engineering. In his spare time, David teaches woodworking at Pratt Fine Arts Center and kayaks the Puget Sound.
More from David Nakamura
View all
Construction Cost
Labor Cost to Build a Deck Per Sq Ft: 2026 Installation Guide
Discover the exact labor cost to build a deck per sq ft in 2026. This installation guide breaks down contractor rates, complexity factors, and hidden fees.
Aug 4, 2026

Construction Cost
How Much Does It Cost to Build a 3 Bedroom House? Financing Guide
Learn exactly how much it costs to build a 3 bedroom house and explore 2026 financing options, construction loan types, and budget frameworks for your build.
Aug 4, 2026

Construction Cost
Cost to Build a Tennis Court: 2026 Guide
How much does it cost to build a tennis court in 2026? Breakdowns for asphalt, concrete, and synthetic surfaces plus fencing and lighting.
Jul 30, 2026