How to Troubleshoot and Repair 5 Types of Concrete Damage
Expert guide to diagnosing and repairing damage across 5 types of concrete, including high-strength, fiber-reinforced, pervious, and stamped slabs.

The Diagnostic Approach to Concrete Failure
Concrete is not a monolithic material. The specific binder, aggregate gradation, and chemical admixtures used in a mix design fundamentally alter how the slab behaves under stress, how it degrades over time, and—most importantly—how it must be repaired. Applying a standard Portland cement patch to a high-strength structural beam or using an acrylic sealer repair on a pervious pavement system will result in rapid secondary failure.
As a troubleshooting framework, the American Concrete Institute (ACI) Committee 546 emphasizes that repair materials must match the modulus of elasticity, thermal expansion, and permeability of the host concrete. Below is an expert-level diagnostic and repair guide tailored to the 5 most common types of concrete encountered in residential and commercial construction.
1. Standard Portland Cement (Normal-Strength) Concrete
Profile: 2,500 to 4,000 PSI compressive strength. Governed by ASTM C150. Used in 80% of residential driveways, sidewalks, and non-structural slabs.
Primary Failure Mode: Plastic Shrinkage and Freeze-Thaw Scaling
Standard concrete is highly susceptible to plastic shrinkage cracking if cured improperly, and surface scaling if the air-entrainment percentage falls below the optimal 4-6% range in freeze-thaw climates.
- Diagnostic Test: Use a crack width comparator card. If shrinkage cracks are less than 1/16-inch wide and non-structural, they are cosmetic. If scaling exposes aggregate but the subsurface sounds solid when struck with a hammer, the structural integrity is intact.
- Repair Protocol: For active shrinkage cracks, route the crack to a minimum 1/2-inch depth using a diamond V-groove blade. Clean with compressed air and fill with a self-leveling polyurethane sealant like Sikaflex-1a or Quikrete Advanced Polymer Concrete Crack Sealant. Do not use rigid cementitious patches on horizontal shrinkage cracks; they will crack again during thermal expansion.
- Cost Metric: $2.50 to $4.50 per linear foot for routing and polyurethane sealing.
2. High-Strength Concrete (HSC)
Profile: 6,000 to 10,000+ PSI. Achieved via low water-to-cement ratios (0.25-0.30) and silica fume admixtures. Common in high-rise columns, post-tensioned decks, and heavy-load industrial floors.
Primary Failure Mode: Deep Structural Spalling and Brittle Shear Cracking
Because HSC is incredibly dense and stiff, it lacks the ductility of normal-strength concrete. When it fails, it tends to spall deeply or exhibit sudden, brittle shear cracking rather than gradual yielding.
- Diagnostic Test: Perform a sounding test using a drag chain or hammer to map delaminated zones. For shear cracks, ultrasonic pulse velocity (UPV) testing is required to determine the depth of the fracture.
- Repair Protocol: Standard polymer-modified mortars will fail under HSC's high stress transfer. You must use a high-modulus, low-viscosity structural epoxy. Inject cracks using Sikadur-52 or Master Builders MasterInject 1315 at pressures between 400 and 800 PSI to ensure complete penetration into micro-fissures. For spalls, chip out to sound concrete, prime with an epoxy bonding agent, and patch with a high-strength, non-shrink grout (e.g., Five Star Grout).
- Cost Metric: $12.00 to $22.00 per linear foot for high-pressure epoxy injection.
3. Fiber-Reinforced Concrete (FRC)
Profile: Incorporates steel, glass, or synthetic macro/micro fibers (ASTM C1116) to control cracking and improve impact resistance. Frequently used in warehouse floors, shotcrete applications, and industrial pavements.
Primary Failure Mode: Surface Fuzzing and Localized Impact Craters
Over-troweling FRC pushes the cement paste to the surface while trapping fibers just below, leading to "fuzzing" or "hairball" surfaces as the thin paste layer wears away. Heavy point-loads can cause localized impact craters where fibers pull out rather than yielding.
- Diagnostic Test: Inspect the surface under raking light. If fibers are protruding more than 1/8-inch and catching on foot traffic or pallet jacks, the surface requires remediation. Check impact craters for loose aggregate.
- Repair Protocol: For surface fuzzing, do not attempt to grind the fibers flush; this will leave rust stains (if steel) or pockmarks (if synthetic). Instead, scarify the surface lightly and apply a polymer-modified micro-topping like Ardex SD-M or Mapcrete Microtopping at a thickness of 1/16 to 1/8 inch. For impact craters, saw-cut a clean perimeter, remove loose material, and patch with a rapid-setting, fiber-reinforced repair mortar like MAPEI Planitop XS.
- Cost Metric: $4.00 to $7.00 per square foot for micro-topping application.
4. Stamped and Decorative Concrete
Profile: Standard or high-strength base mix treated with color hardeners, release agents, and stamped with polyurethane mats. Protected by acrylic or polyurethane sealers.
Primary Failure Mode: Sealer Blushing, UV Fading, and Joint-Line Fractures
The most common troubleshooting calls for decorative concrete are not structural, but aesthetic. "Blushing" occurs when moisture becomes trapped beneath a non-breathable acrylic sealer, turning it opaque white. Furthermore, stamping often ignores underlying control joints, leading to unsightly random cracking through the decorative pattern.
- Diagnostic Test: Apply a few drops of xylene to a white, "blushed" area of the sealer. If it temporarily turns clear and glossy, the issue is trapped moisture (blushing). If it remains white, the sealer has chemically degraded or delaminated and requires full stripping.
- Repair Protocol: For mild blushing, a xylene bath and back-rolling will re-emulsify the sealer and release the moisture. For severe delamination, strip the sealer using a chemical stripper like PROSOCO Sure Klean Strippable Sealer Remover, followed by a hot water pressure wash. Re-stain using a penetrating silicate stain (e.g., Solomon Colors) and reseal with a breathable, UV-stable polyaspartic or high-solids polyurethane sealer.
- Cost Metric: $3.50 to $6.00 per square foot for chemical stripping and resealing.
5. Pervious (Porous) Concrete
Profile: Zero-slump mix with little to no fine aggregates, creating a network of interconnected voids (15-25% porosity). Used for stormwater management and LEED-certified parking lots. Governed by EPA Green Infrastructure guidelines.
Primary Failure Mode: Pore Clogging, Edge Raveling, and Loss of Permeability
Pervious concrete is highly vulnerable to sediment clogging from adjacent landscaping and edge raveling from snowplows or heavy turning vehicles. Standard patching materials will destroy the permeability of the system.
Step-by-Step Pervious Concrete Rehabilitation
- Permeability Testing: Use an ASTM C1701 single-ring infiltrometer. If the infiltration rate drops below 0.1 inches per minute, rehabilitation is required.
- Deep Cleaning: Standard pressure washing pushes sediment deeper into the pores. Use a hydro-vacuum truck or a specialized regenerative air sweeper to extract embedded silt and clay particles.
- Edge Raveling Repair: Do not use standard concrete to patch edges. Saw-cut the raveled edge to a straight line. Mix an open-graded aggregate with a high-strength, UV-stable epoxy binder (such as FilterPave or Master Builders MasterTop 1240) and hand-trowel it into the void to restore both structural integrity and permeability.
- Joint Re-sealing: Fill saw-cut joints with a closed-cell backer rod and a specialized pervious-compatible sealant to prevent water from undermining the sub-base.
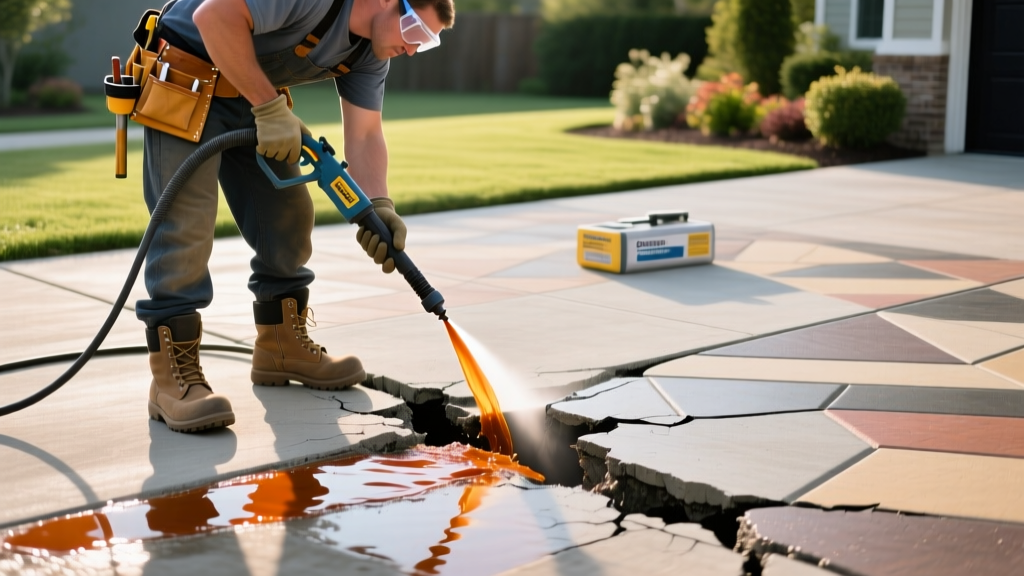
Concrete Repair Decision Matrix
| Concrete Type | Common Failure | Diagnostic Tool | Recommended Repair Material | Est. Cost |
|---|---|---|---|---|
| Standard (Normal) | Plastic Shrinkage | Crack Comparator Card | Self-Leveling Polyurethane | $2.50 - $4.50 / LF |
| High-Strength | Deep Spalling / Shear | Ultrasonic Pulse Velocity | High-Modulus Structural Epoxy | $12.00 - $22.00 / LF |
| Fiber-Reinforced | Surface Fuzzing | Raking Light Inspection | Polymer-Modified Micro-topping | $4.00 - $7.00 / SF |
| Stamped / Decorative | Sealer Blushing | Xylene Solvent Drop Test | Chemical Stripper + Polyaspartic | $3.50 - $6.00 / SF |
| Pervious | Pore Clogging / Raveling | ASTM C1701 Infiltrometer | Epoxy-Bound Open-Graded Agg. | $8.00 - $14.00 / SF |
Preventative Maintenance and Longevity
Troubleshooting is only half the battle; preventing secondary failures requires strict adherence to curing and maintenance protocols. For all five types of concrete, the application of a penetrating silane/siloxane water repellent (such as Ghostshield Siloxa-Tek 8500) every 3 to 5 years will drastically reduce chloride ingress and freeze-thaw damage. Furthermore, referencing the National Ready Mixed Concrete Association (NRMCA) guidelines for mix design verification ensures that the replacement or repair concrete matches the original performance criteria, preventing galvanic corrosion between old and new substrate interfaces.
Written by
James ThorntonJames Thornton is a construction industry veteran with 25 years of hands-on experience in wood framing, lumber grading, and residential building codes. He started as a framing carpenter in rural Oregon, earned his ICC Residential Building Inspector certification, and eventually became a senior plan reviewer for the City of Portland Bureau of Development Services. James holds a B.S. in Wood Science & Technology from Oregon State University and is a certified lumber grader through the West Coast Lumber Inspection Bureau (WCLIB). He has inspected over 3,000 residential construction sites and authored the city's internal guide on advanced framing techniques (2x6 at 24" O.C.). James lives in Bend, OR, where he builds custom timber-frame cabins and competes in lumberjack sports.
More from James Thornton
View all
Insulation
Best Home Insulation Materials: Complete 2026 Guide
Compare top home insulation materials for 2026. Find R-values, installed costs per square foot, and best uses for fiberglass, spray foam, and mineral wool.
Aug 4, 2026

Sustainable Building
Certify Your Green Building Material for LEED and WELL
Step-by-step guide to certifying a green building material for LEED v5 and WELL v2. Master EPDs, HPDs, and VOC limits for 2026 project specifications.
Aug 4, 2026

Stone & Masonry
Veneer Stacked Stone Panels: Interior Design & Style Showcase
Discover how veneer stacked stone panels transform interiors. Explore modern design profiles, material pairings, and technical installation specs.
Aug 4, 2026