Hydraulic Cement vs Concrete: Troubleshooting Foundation Leaks
Discover the critical differences in hydraulic cement vs concrete for foundation repairs. Learn which material stops active water leaks and structural cracks.

The Core Problem: Why Standard Concrete Fails at Leak Repair
When troubleshooting a weeping basement wall or an actively leaking foundation crack, the instinct is often to reach for standard Portland cement concrete. This is a fundamental material misapplication that guarantees repair failure. To understand why, you must look at the hydration chemistry and the physical forces at play.
Standard concrete relies on a precise water-to-cement (w/c) ratio—typically between 0.40 and 0.50 by weight—to form calcium silicate hydrate (C-S-H) gel, the glue that binds aggregates together. When you press standard concrete against an active leak, the incoming hydrostatic pressure (which exerts 0.433 psi per foot of water head) forcibly alters the w/c ratio. The flowing water washes away the cement paste before hydration can occur, leaving behind a porous, crumbling matrix of unbound sand and gravel. Furthermore, standard concrete undergoes volumetric shrinkage as it cures, pulling away from the existing foundation walls and creating a new pathway for water intrusion.
Material Breakdown: Hydraulic Cement vs Concrete
Hydraulic water-stop cement is fundamentally different from standard concrete. While standard concrete is a mix of Portland cement, sand, and coarse aggregate designed for bulk structural placement, hydraulic cement is a specialized, finely ground blend of Portland cement (often ASTM C150 Type III for high early strength), expansive agents like calcium sulfoaluminate, and specific accelerators. It contains no coarse aggregate, allowing it to be packed tightly into narrow fissures.
| Property | Hydraulic Water-Stop Cement | Standard Portland Concrete |
|---|---|---|
| Initial Set Time | 3 to 5 minutes | 24 to 48 hours (initial set 45-90 mins) |
| Volumetric Change | Expands 1% to 2% upon curing | Shrinks slightly during hydration |
| Active Water Tolerance | High; sets underwater and blocks flow | Zero; paste washes out in moving water |
| Compressive Strength | ~3,000 psi (at 28 days) | 3,000 to 5,000+ psi (at 28 days) |
| Primary Application | Active leak plugging, anchoring in wet conditions | Slabs, footings, structural bulk fills |
| Approx. Cost (2026) | $25 - $35 per 10 lb. tub | $4 - $6 per 80 lb. bag |
According to the Portland Cement Association, selecting the correct repair material requires matching the physical properties of the patch to the environmental conditions of the substrate. Hydraulic cement's expansive nature is its greatest asset in wet environments, as the 1-2% volumetric expansion creates a mechanical lock against the existing concrete substrate.
Troubleshooting Active Leaks: The Hydraulic Cement Protocol
Simply smearing hydraulic cement over a wet crack is a rookie mistake that will result in a blowout within weeks. Proper application requires specific geometric preparation and mixing discipline.
Step 1: Route an Inverted Dovetail Profile
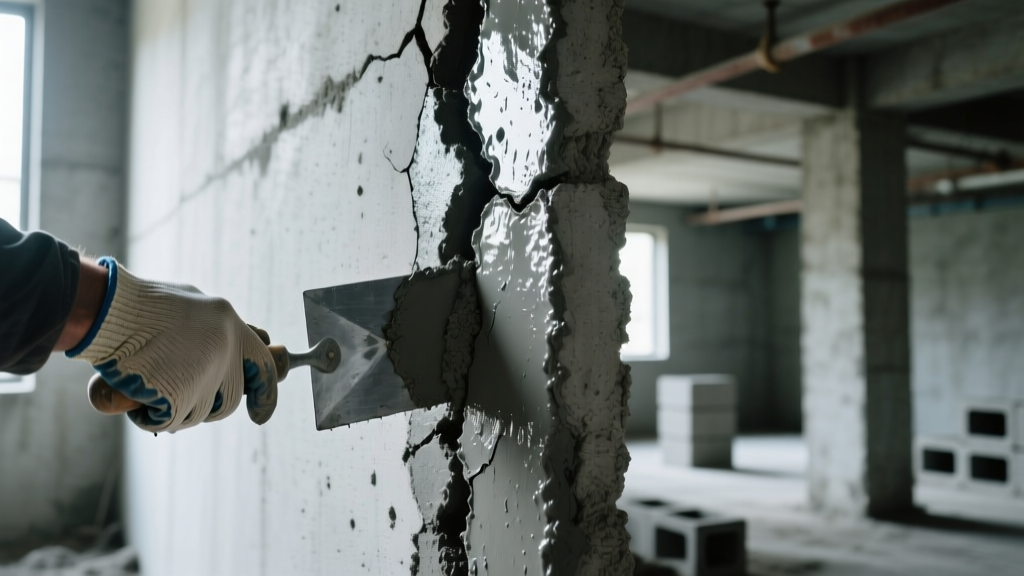
Use a cold chisel and a 3-pound masonry hammer to widen the crack to a minimum of 1/2 inch. Crucially, you must cut an inverted dovetail (undercut) profile. This means the back of the routed crack must be wider than the face. Because hydraulic cement expands as it sets, a standard V-notch (wider at the surface) will act as a wedge, pushing the cement plug completely out of the wall. The inverted dovetail ensures the expansion locks the material permanently into the substrate.
Step 2: Achieve Saturated Surface-Dry (SSD) Condition
Remove all loose debris, efflorescence, and dust using a wire brush and a shop vacuum. If the crack is not actively flowing, dampen the surrounding concrete with clean water. Hydraulic cement requires moisture from the substrate to complete its rapid hydration. However, standing water in the crack will dilute the mix; aim for an SSD condition where the concrete is dark and damp, but free of puddles.
Step 3: Micro-Batch Mixing
Do not mix hydraulic cement in a wheelbarrow or large bucket. The material generates a highly exothermic (heat-releasing) reaction and sets in under five minutes. Mix only what you can hold in your gloved hand—roughly the volume of a baseball. Use a margin trowel and a small hawk, adding cold water (warm water accelerates the set time dangerously fast) until the consistency resembles stiff modeling clay.
Step 4: The 5-Minute Hold
Form the mixed cement into a cone, press it firmly into the undercut crack, and hold it in place with continuous, firm pressure for 3 to 5 minutes. You will feel the material physically heat up and harden against your hand. Do not release pressure or attempt to trowel the surface smooth until the plug is completely rigid. Once hard, strike off the excess flush with the wall using a margin trowel.
Decision Framework: When to Use Which Material
Repair Triage Matrix
- Active, flowing water leak: Use Hydraulic Water-Stop Cement (e.g., Quikrete #124017 or Thoro Waterplug) to kill the flow, followed by a flexible polyurethane sealant or crystalline waterproofing coating once dry.
- Dormant structural crack (1/8 inch to 1/2 inch wide): Do NOT use hydraulic cement. Use a low-viscosity epoxy injection system to restore structural tensile strength.
- Spalled or scaling concrete surface: Use a polymer-modified concrete patching compound. Hydraulic cement is too brittle and lacks the polymer binders required for thin, feather-edge surface repairs.
- Setting fence posts in wet, muddy holes: Hydraulic cement is ideal here, as it will set and gain structural mass even when submerged in groundwater.
Common Application Mistakes & Failure Modes
Even with the correct material, troubleshooting foundation leaks requires addressing the root cause. The International Association of Certified Home Inspectors (InterNACHI) notes that interior crack repairs are merely symptom management if exterior hydrostatic pressure is not mitigated.
- Feather-Edging: Hydraulic cement cannot be applied in thin layers. If the repair area is less than 1/2 inch deep, the material will lack the mass required to generate its expansive locking force and will simply crumble. Deepen the substrate before patching.
- Ignoring the Water Table: Plugging one leak with hydraulic cement often increases the localized hydrostatic pressure, forcing water to find the next weakest point in the foundation (often the cove joint where the floor meets the wall). A permanent fix requires exterior grading, functional gutters, and potentially an interior French drain system.
- Over-troweling: Working the surface of hydraulic cement after the initial set breaks the crystalline bonds forming within the matrix, resulting in a weak, dusty finish that lacks waterproofing integrity.
Cost & Yield Analysis for Repair Projects
For a standard basement troubleshooting project involving a 20-foot vertical crack averaging 1/2 inch wide and 1 inch deep, the material yield dictates your budget. Standard concrete is sold in 80 lb. bags yielding roughly 0.6 cubic feet, costing about $5.00 per bag in 2026. However, its use here is counterproductive.
Hydraulic cement is sold in 10 lb. tubs or boxes, yielding approximately 0.1 cubic feet per 10 lbs. To fill a 20-foot crack (240 inches long x 0.5 inches wide x 1 inch deep = 120 cubic inches, or roughly 0.07 cubic feet), you will need approximately 7 to 10 lbs of dry material, accounting for waste and the undercut profile. Expect to spend roughly $30.00 on a single 10 lb. tub of premium hydraulic cement (such as Quikrete Hydraulic Water-Stop Cement). While the cost-per-pound is significantly higher than standard concrete, the labor savings, immediate leak cessation, and elimination of water damage make it the only economically viable choice for active water intrusion.
Written by
Marcus ChenMarcus Chen is a licensed structural engineer (PE) and building materials analyst with over 12 years of experience across residential, commercial, and industrial construction. He holds a Master of Science in Civil Engineering from UC Berkeley and spent six years at Thornton Tomasetti before transitioning to independent consulting and technical writing. Marcus specializes in material selection for seismic-prone regions, concrete reinforcement strategies, and lifecycle cost analysis. His work has been cited by the American Concrete Institute (ACI) and the Structural Engineers Association of California (SEAOC). When he is not on a job site or at his desk, you will find him hiking the Sierra Nevada or restoring a 1920s craftsman bungalow in Oakland, CA.
More from Marcus Chen
View all
Construction Cost
How Much Did the Eiffel Tower Cost to Build?
How much did the Eiffel Tower cost to build in 1889? We adjust for inflation and compare its budget to modern skyscraper construction.
Aug 4, 2026

Fire Resistance
What Is a Fire Resistant Material? Testing & Certification Guide
Discover what is a fire resistant material through ASTM and UL testing. Learn how fire ratings, certifications, and assemblies work in construction.
Aug 4, 2026

Construction Cost
How Much Did the Burj Khalifa Cost to Build?
How much did the Burj Khalifa cost to build? We break down the $1.5B project and extract 5 money-saving strategies for your next build.
Jul 30, 2026