Paver Stone vs Concrete Cost: Troubleshooting Long-Term Repair Expenses
Compare paver stone vs concrete cost by analyzing long-term troubleshooting, repair methods, and lifetime maintenance expenses for hardscapes.

The Hidden Variables in Paver Stone vs Concrete Cost
Most homeowners and contractors evaluate paver stone vs concrete cost strictly on day-one installation metrics. In 2026, poured concrete typically runs $9 to $14 per square foot for a standard broom-finish driveway, while interlocking concrete pavers range from $16 to $26 per square foot installed. However, from a troubleshooting and long-term repair perspective, this initial price gap is highly deceptive. Hardscape materials do not fail uniformly; their failure modes, diagnostic pathways, and remediation costs dictate the true 20-year lifecycle ROI.
When a poured concrete slab fails, the repair is often highly visible, structurally complex, and expensive. When a paver system fails, the issue is usually localized, modular, and cheaper to fix—provided the base was engineered correctly. This guide bypasses basic installation comparisons and dives deep into the troubleshooting realities, specific material costs, and structural repair methodologies for both systems.
Diagnostic Matrix: Common Failure Modes
Before calculating repair costs, you must accurately diagnose the failure. The root cause of 80% of hardscape failures—whether pavers or poured concrete—is subgrade preparation and hydrostatic pressure. Below is a diagnostic matrix to help identify what you are actually dealing with.
| Failure Mode | Paver Stone Manifestation | Poured Concrete Manifestation | Primary Culprit |
|---|---|---|---|
| Frost Heave | Localized ridging; individual units pushed upward by 1/4 to 1 inch. | Transverse cracking; entire slab sections lifting unevenly at control joints. | Moisture trapped in poorly drained subgrade freezing and expanding. |
| Structural Overload | Rotational settling; pavers tilt at the edges under heavy point loads (e.g., RV jacks). | Longitudinal cracking; deep structural fractures radiating from the load point. | Exceeding the PSI rating or base thickness limits of the hardscape. |
| Surface Degradation | Pitting or spalling on the paver face due to de-icing salts or efflorescence. | Scaling and pop-outs; the top 1/8 inch of cement paste flakes away. | Chemical attack from chlorides or improper air-entrainment in the mix. |
| Water Pooling | Joint sand washout leading to weed intrusion and minor settling. | Birdbaths (depressions >1/4 inch deep) leading to accelerated freeze-thaw damage. | Loss of the original 2% minimum slope grade due to base settlement. |
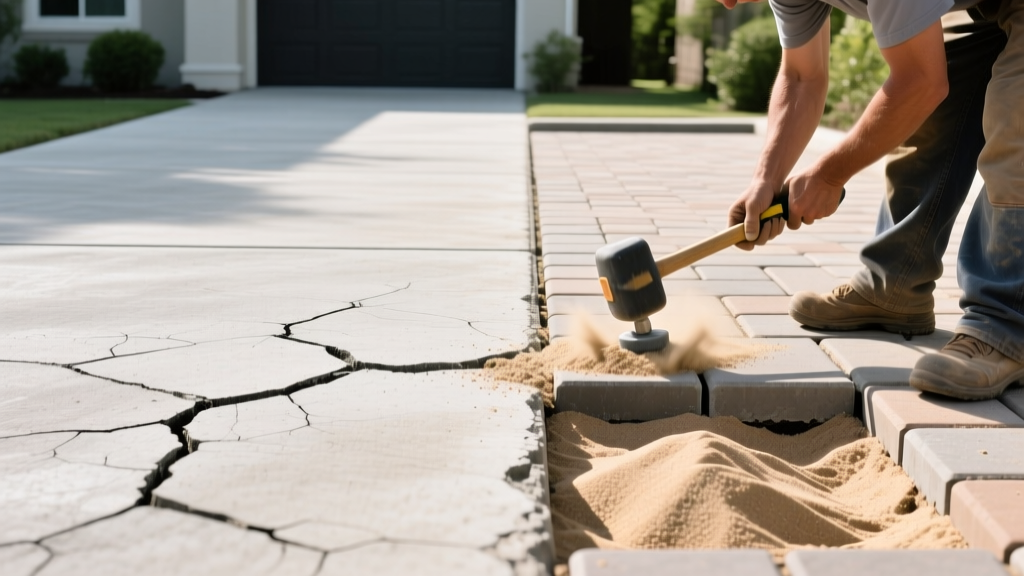
Troubleshooting Paver Stone Failures: Fixes and Costs
The primary advantage of interlocking pavers, as highlighted by the Interlocking Concrete Pavement Institute (ICPI), is their flexibility. Because they are unbound modular units, they can be unzipped, repaired, and reinstalled without leaving a visible scar.
1. Joint Sand Erosion and Weed Intrusion
When polymeric sand fails or washes out, the interlocking friction that gives the pavement its structural integrity is compromised. Standard masonry sand is no longer acceptable for modern repairs.
- The Fix: Use a high-performance polymeric sand like Techniseal HP2 or Alliance Gator Dust. For joints wider than 1/2 inch, Gator Dust is mandatory to prevent washout.
- Material Cost: $35 to $45 per 50-lb bag (covers approximately 150-200 sq ft for tight 1/8-inch joints).
- Labor & Process: Clear joints to a depth of 1 inch using a pressure washer or specialized joint scraper. Allow 48 hours of complete drying. Sweep in sand, compact with a vibratory plate compactor equipped with a urethane pad (to prevent scratching the paver faces), and mist with water according to manufacturer specs.
- Total Repair Cost (500 sq ft): $150 - $225 (DIY materials only).
2. Base Settling and Paver Heaving
If a section of the patio has sunk by more than 1/2 inch, surface sand topping will not fix the hydrostatic or load-bearing failure underneath.
- The Fix: Remove the affected pavers. Excavate the compromised bedding sand and base aggregate. Re-compact the subgrade, add 4 to 6 inches of 3/4-inch crushed angular aggregate (Class II road base), and compact in 2-inch lifts using a reversible plate compactor to achieve 95% Proctor density.
- Material Cost: $40 for aggregate, $15 for bedding sand.
- Total Repair Cost (per 50 sq ft area): $100 - $150 (including equipment rental for the compactor).
3. Efflorescence and Surface Staining
Efflorescence is a white, powdery deposit of water-soluble salts migrating to the paver surface. It is a cosmetic issue, not a structural one, but it heavily impacts curb appeal.
- The Fix: Apply a specialized efflorescence cleaner (e.g., Techniseal EF-Stop). Do not use muriatic acid, which can etch the paver surface and degrade the polymeric sand joints.
- Cost: $30 per gallon of cleaner. Total chemical cost for 1,000 sq ft is roughly $90.
Troubleshooting Poured Concrete Failures: Fixes and Costs
Poured concrete is a monolithic structure. When it fails, the repair requires chemical bonding, structural bridging, or complete demolition. The American Concrete Institute (ACI) provides strict guidelines for concrete repair, emphasizing that surface patches will fail if the underlying structural stress is not addressed.
1. Structural Cracking and Spalling
Hairline cracks (less than 1/16 inch) are often cosmetic, but cracks exceeding 1/4 inch indicate subgrade failure or thermal expansion stress.
- The Fix (Non-Structural): Route the crack with a diamond blade grinder and fill with a self-leveling polyurethane sealant like SikaFlex SL. This allows for future thermal expansion.
- The Fix (Structural): For cracks that have vertically displaced, use an epoxy injection system (e.g., Sikadur Crack Repair Kit) to weld the slab back together.
- Material Cost: SikaFlex SL is ~$14 per tube. Sikadur Epoxy kits are ~$85 to $120.
- Total Repair Cost (50 linear feet): $150 - $300 depending on crack width and depth.
2. Frost Heave and Slab Settlement
When a concrete driveway settles unevenly, creating a tripping hazard at the garage apron or sidewalk, you cannot simply patch the top. The slab must be lifted or replaced.
- The Fix: Polyurethane foam jacking (poly-jacking). Technicians drill 5/8-inch holes through the slab and inject high-density expanding polyurethane foam beneath the concrete to lift it back to grade.
- Cost: $6 to $12 per square foot. Lifting a settled 10x10 driveway section will cost between $600 and $1,200.
- Alternative: Mudjacking (cement slurry) is cheaper ($3 to $6 per sq ft) but requires larger drill holes (1.5 inches) and adds significant weight to an already failing subgrade.
3. Surface Scaling and Spalling
Spalling occurs when the top layer of concrete flakes off, exposing the aggregate beneath. This is usually caused by finishing the concrete while bleed water is still on the surface or applying de-icing salts during the first winter.
- The Fix: Pressure wash, etch with a mild acid solution, and apply a polymer-modified concrete resurfacer (e.g., Quikrete Concrete Resurfacer).
- Material Cost: $35 per 40-lb bag (covers ~90 sq ft at 1/8-inch thickness).
- Total Repair Cost (500 sq ft driveway): $250 in materials, plus 12-16 hours of intense labor. Professional resurfacing runs $4 to $7 per square foot.
Lifetime Repair Cost Projection (1,000 sq ft Driveway)
To truly understand the paver stone vs concrete cost debate, we must project the maintenance and repair expenses over a 20-year lifecycle. This table assumes standard residential use and proper initial subgrade preparation.
| Cost Category | Poured Concrete (4,000 PSI) | Interlocking Paver Stones |
|---|---|---|
| Initial Installation (1,000 sq ft) | $11,000 | $20,000 |
| Year 5: Joint/Crack Maintenance | $150 (Sealant) | $200 (Re-sanding joints) |
| Year 10: Surface Restoration | $1,500 (Resurfacing/Sealing) | $350 (Deep clean & re-sand) |
| Year 15: Structural Settlement Fix | $900 (Poly-jacking 150 sq ft) | $250 (Base repair 50 sq ft) |
| 20-Year Total Lifecycle Cost | $13,550 | $20,800 |
While pavers remain more expensive over 20 years, the critical difference lies in the aesthetic outcome of the repairs. A repaired concrete driveway will always feature visible patch lines, color mismatches, and sealant tracks. A repaired paver driveway is virtually indistinguishable from the original installation.
Decision Framework: When to Repair vs. Replace
Use this diagnostic framework to determine when a hardscape has crossed the threshold from routine troubleshooting to total replacement.
- Replace Pavers If: The underlying subgrade consists of expansive clay that was not properly amended, resulting in widespread, recurring heaving across more than 40% of the surface. Constant base repairs will exceed the cost of a full excavation and rebuild.
- Replace Concrete If: The slab exhibits D-cracking (a series of fine cracks parallel to the joints and edges caused by freeze-thaw destruction of the aggregate itself). D-cracking cannot be patched or resurfaced; the slab must be demolished.
- Repair Pavers If: Damage is localized to high-traffic zones or edges where retaining wall restraints have shifted. Re-install the edge restraints using heavy-duty spike-in aluminum or concrete curbing, and re-lay the border course.
- Repair Concrete If: Cracking is strictly confined to the control joints, or if the slab has settled uniformly but maintains its structural integrity. Slabjacking or routing and sealing will extend the life by another decade.
Ultimately, choosing between these materials requires looking past the initial quote. Consult resources from the National Ready Mixed Concrete Association (NRMCA) for proper mix designs if you choose concrete, or rely on ICPI certified installers if you opt for pavers. The cheapest hardscape is the one engineered correctly the first time, minimizing the troubleshooting required in year ten.
Written by
James ThorntonJames Thornton is a construction industry veteran with 25 years of hands-on experience in wood framing, lumber grading, and residential building codes. He started as a framing carpenter in rural Oregon, earned his ICC Residential Building Inspector certification, and eventually became a senior plan reviewer for the City of Portland Bureau of Development Services. James holds a B.S. in Wood Science & Technology from Oregon State University and is a certified lumber grader through the West Coast Lumber Inspection Bureau (WCLIB). He has inspected over 3,000 residential construction sites and authored the city's internal guide on advanced framing techniques (2x6 at 24" O.C.). James lives in Bend, OR, where he builds custom timber-frame cabins and competes in lumberjack sports.
More from James Thornton
View all
Insulation
Best Home Insulation Materials: Complete 2026 Guide
Compare top home insulation materials for 2026. Find R-values, installed costs per square foot, and best uses for fiberglass, spray foam, and mineral wool.
Aug 4, 2026

Sustainable Building
Certify Your Green Building Material for LEED and WELL
Step-by-step guide to certifying a green building material for LEED v5 and WELL v2. Master EPDs, HPDs, and VOC limits for 2026 project specifications.
Aug 4, 2026

Stone & Masonry
Veneer Stacked Stone Panels: Interior Design & Style Showcase
Discover how veneer stacked stone panels transform interiors. Explore modern design profiles, material pairings, and technical installation specs.
Aug 4, 2026