Broom vs Brush Finish Concrete: Traction & Texture Guide
Master the broom vs brush finish concrete debate. Learn tool selection, timing, and step-by-step application for optimal traction and aesthetics.

The Traction vs. Aesthetics Dilemma in Flatwork
When specifying exterior flatwork, the surface texture dictates both the safety and the visual character of the installation. The debate of broom vs brush finish concrete ultimately comes down to the required coefficient of friction, barefoot comfort, and architectural intent. While both techniques disrupt the surface paste to create slip resistance, they utilize entirely different tooling, timing windows, and finishing methodologies. Misunderstanding the distinction leads to hazardous walkways, premature surface flaking, or aesthetic failures in high-end architectural projects.
Tool Anatomy: Brooms vs. Brushes in Concrete Finishing
The terminology in concrete finishing is precise. A 'broom' refers to wide, bracket-mounted tools designed for broad, uniform striations across large slabs. A 'brush' refers to narrower, handheld, or specialized stipple/wash tools used for targeted texturing, exposed aggregate, or architectural precast panels.
Concrete Brooms (Heavy-Duty Traction)
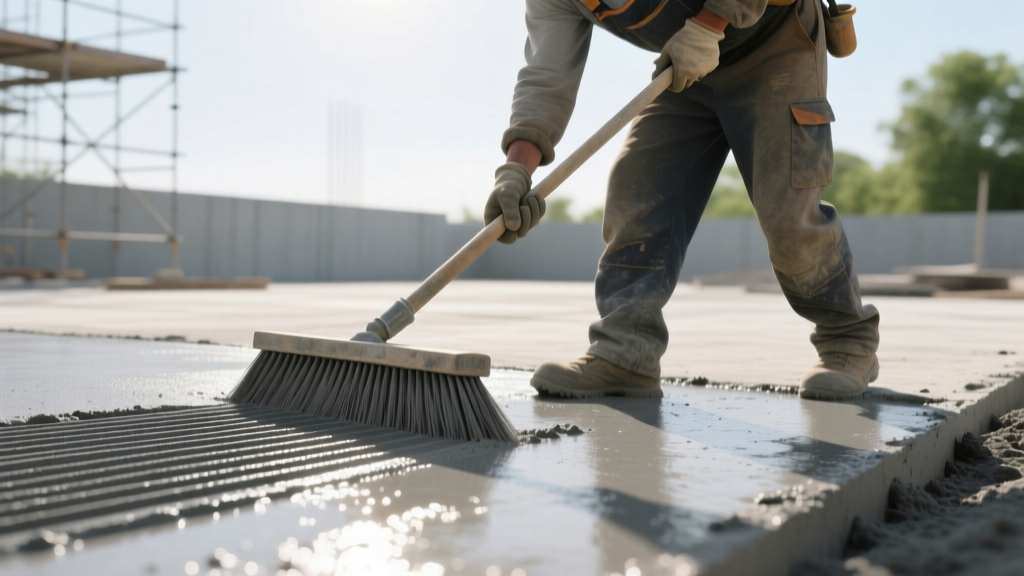
Standard concrete brooms feature bristles mounted to an aluminum or wooden bracket, attached to a threaded pole. The bristle material and diameter determine the aggressiveness of the finish:
- Stiff Polypropylene (0.040" - 0.050" diameter): Creates deep, wide grooves (up to 1/8" deep). Mandatory for commercial driveways, loading docks, and municipal ramps where maximum slip resistance is required. Extremely harsh on bare feet.
- Medium Polypropylene (0.030" diameter): The industry standard for residential sidewalks and patios. Provides excellent wet-weather traction with a groove depth of roughly 1/16" to 3/32".
- Soft Polypropylene or Horsehair: Used for pool decks and barefoot-heavy areas. Creates a fine, sandpaper-like texture that provides slip resistance without abrading skin.
Concrete Brushes (Architectural & Specialty Finishes)
Brushes are rarely used for standard driveway traction. Instead, they serve specialized architectural and surface-retarder applications:
- Stipple Brushes: Short, stiff synthetic bristles used in a 'pouncing' or stabbing motion on vertical formwork or tilt-up panels to create a uniform, sandblasted appearance without the dust or cost of actual sandblasting.
- Wash Brushes (Nylon/Poly): Medium-stiff handheld brushes used to gently scrub away surface mortar after a chemical retarder has been applied, exposing the underlying aggregate.
- Wire Brushes: Reserved for scoring green concrete or aggressively cleaning formwork; never used for standard slip-resistant flatwork finishing.
Comparison Matrix: Selecting the Right Texture
| Feature | Coarse Broom (Stiff Poly) | Standard Broom (Medium Poly) | Fine Broom (Horsehair) | Stipple / Wash Brush |
|---|---|---|---|---|
| Groove Depth | 1/8" (Deep) | 1/16" - 3/32" (Medium) | 1/32" (Shallow/Fine) | N/A (Textured/Exposed) |
| Primary Application | Driveways, Ramps, Docks | Walkways, Patios, Steps | Pool Decks, Barefoot Areas | Architectural Panels, Exposed Aggregate |
| Barefoot Comfort | Poor (Abrasive) | Fair | Excellent | Variable (Depends on aggregate size) |
| Labor Cost Adder (2026) | Base Rate | Base Rate | +$0.50 - $0.75 / sq ft | +$2.00 - $4.50 / sq ft |
| Timing Window | Wide (Plastic state) | Wide (Plastic state) | Narrow (Requires firm set) | Highly specific (Retarder dependent) |
Critical Timing: The Plastic State and the Thumbprint Test
The most common cause of finish failure in the broom vs brush finish concrete discussion is poor timing. Texturing must occur when the concrete is in a specific 'plastic' state—after bleed water has completely evaporated, but before the surface has begun its final set.
Environmental factors drastically alter this window. In 90°F (32°C) weather with low humidity, your finishing window may shrink to 15–20 minutes per pour section. In 50°F (10°C) damp conditions, that window can extend to over an hour. According to guidelines from the Portland Cement Association, finishing operations must never commence while bleed water is present, as trapping water beneath the surface guarantees future scaling and delamination.
Step-by-Step Installation: Executing a Standard Broom Finish
- Screed and Bull Float: Strike off the concrete and immediately follow with a bull float to embed aggregate and push down high spots. Do not overwork.
- Edge and Groove: Run an edger along all formwork to create a smooth, radiused edge that prevents chipping. Cut control joints with a groover if required by the structural plan.
- Float the Surface: Use a magnesium hand float or a power float to create a uniform, slightly open pore structure. Expert Note: Never use a steel trowel before brooming exterior concrete; steel troweling brings cement paste (fat) to the surface, creating a highly slippery film when wet, defeating the purpose of the broom.
- Wait for Bleed Water: Allow the sheen of bleed water to completely evaporate. Use a leaf blower on a low, cool setting to gently move standing water off the surface if necessary, but never drag water across the slab.
- Pull the Broom: Attach the broom to an extended pole. Pull it in a single, continuous, fluid motion from one edge to the other. Keep the handle angle low (roughly 30 to 45 degrees to the slab). Overlap each pass by 1 to 2 inches to ensure seamless coverage.
- Clean the Tool: Rinse the broom bristles immediately after each pass to prevent dried concrete paste from clumping the bristles, which will cause scratching on the next pass.
Step-by-Step Installation: Architectural Stipple Brush Finish
When architectural specifications call for a stipple brush finish (often used on precast panels, retaining walls, or high-end modern flatwork to mimic a sandblast texture), the technique shifts from dragging to pouncing.
- Form Preparation: Ensure forms are clean and treated with a non-reactive form release agent.
- Initial Set: Unlike flatwork brooming, stipple brushing on vertical surfaces often requires the concrete to be slightly stiffer to hold the texture without slumping.
- The Pounce Technique: Hold the stiff-bristled stipple brush perpendicular to the surface. Stab the brush into the concrete in a rapid, rhythmic motion. Do not drag or swipe.
Uniformity Check: Maintain consistent pressure and overlap your pounce marks by 50% to avoid creating distinct 'swirl' patterns or heavy/light bands.
Common Failure Modes and Edge Cases
Even experienced crews encounter issues when environmental variables shift unexpectedly. Recognizing these failure modes allows for immediate course correction.
- Surface Tearing (Dragging Too Early): If the concrete is too wet, the broom bristles will tear the surface mortar, leaving rough, open voids that expose the aggregate prematurely. Fix: Stop immediately, allow 15-20 minutes of additional set time, and lightly re-float the damaged area before pulling the broom again.
- Bristle Skipping (Dragging Too Late): If the surface has hardened too much, the broom will skip across the top, creating shallow, intermittent scratches rather than continuous grooves. Worse, stiff bristles may dislodge coarse aggregate. Fix: Switch to a softer horsehair broom or abandon the broom finish in favor of a liquid anti-slip additive applied during sealing.
- Flaking and Scaling: Caused by brooming while bleed water is still present, or by adding water to the surface to make brooming easier. This weakens the top 1/8" of the slab, leading to winter freeze-thaw spalling. The American Concrete Institute (ACI) strictly prohibits the addition of surface water during finishing operations.
Long-Term Maintenance and Sealer Compatibility
The depth of your broom or brush finish directly impacts how the concrete must be maintained. Deep, coarse broom finishes trap dirt, de-icing salts, and organic matter (like algae). When applying a penetrating silane/siloxane sealer, a coarse broom finish requires 30% to 40% more material due to the increased surface area. Conversely, fine horsehair or stipple brush finishes are easily cleaned with standard pressure washing and require less sealer volume, making them more cost-effective over a 20-year lifecycle despite the higher initial labor cost.
Written by
Elena RodriguezElena Rodriguez is a civil engineer and technical writer specializing in concrete technology, masonry systems, and ASTM/ACI compliance. She earned her B.S. in Civil Engineering from Texas A&M University and spent a decade at a materials testing laboratory, performing over 2,000 concrete compressive strength tests and masonry prism evaluations. Elena is an ACI-certified Field Testing Technician (Grade I) and a member of ASTM Committee C12 on Natural Building Stone. She currently consults on forensic engineering cases involving concrete failures and moisture intrusion. Based in San Antonio, TX, Elena is a proud member of the Society of Women Engineers (SWE) and coaches her daughter's FIRST Robotics team.
More from Elena Rodriguez
View all
Walls & Panels
Cost Analysis: Light Gauge Steel Framing Advantages and Disadvantages
Evaluate light gauge steel framing advantages and disadvantages through a strict cost analysis lens, comparing material, labor, and lifecycle expenses.
Aug 4, 2026

Walls & Panels
Gypsum Board Types: Exact Specifications, Thickness & Dimensions
Compare standard, Type X, and moisture-resistant gypsum board types. Get exact specifications, thicknesses, dimensions, and ASTM standards for your project.
Aug 4, 2026

Fire Resistance
Best Fire-Resistant Outdoor Decking Materials: 2026 Buyer Guide
Discover the best fire-resistant outdoor decking materials for 2026. Compare Class A PVC, aluminum, and hardwood options for WUI compliance and safety.
Aug 4, 2026