Troubleshooting Cement Siding Materials: Yarmouth Coastal Repair Guide
Expert troubleshooting for cement siding materials in Yarmouth. Learn to fix freeze-thaw spalling, salt efflorescence, and wind-driven moisture damage.

The Yarmouth Coastal Microclimate: Why Fiber Cement Fails
Installing and maintaining cement siding materials in Yarmouth requires a fundamental understanding of the local coastal microclimate. Whether dealing with the salt-heavy air of Yarmouth, Maine, or the intense freeze-thaw cycles of Yarmouth, Nova Scotia, fiber cement products (like James Hardie or Allura) face environmental stressors that inland installations simply do not encounter. While fiber cement is inherently rot-proof and non-combustible, its Portland cement binder and cellulose fiber matrix remain vulnerable to capillary moisture intrusion, salt aerosol degradation, and extreme wind-driven rain from Nor'easters.
Troubleshooting these failures requires moving beyond surface-level patching. In 2026, building envelope science dictates that repairing coastal cement siding demands addressing the underlying water management and structural attachment systems. Below is a comprehensive diagnostic and repair framework tailored specifically for the harsh coastal conditions of the Yarmouth region.
Diagnostic Matrix: Identifying Cement Siding Failures
Before purchasing replacement materials or sealants, accurately diagnose the failure mode. Use this matrix to correlate visual symptoms with their specific coastal triggers.
| Visual Symptom | Yarmouth Climate Trigger | Diagnostic Check | Primary Repair Protocol |
|---|---|---|---|
| Face peeling or 'spalling' near end-cuts | Freeze-thaw expansion (50+ cycles/year) | Check for missing end-cut sealant at butt joints | Cut back to stud; apply polyurethane sealant |
| White, chalky residue (efflorescence) | Salt air reacting with calcium hydroxide | Scrape residue; test with diluted vinegar | Acid-wash alternative; apply silane sealer |
| Nail heads backing out or popping | 110+ mph wind gusts causing sheer stress | Check for structural sheathing rot behind panel | Upgrade to ring-shank stainless steel fasteners |
| Paint blistering at the bottom edge | Capillary wicking from snow accumulation | Measure clearance from roofline/grade | Trim board; install PVC flashing drip edge |
Repair Protocol 1: Freeze-Thaw Spalling and Core Delamination
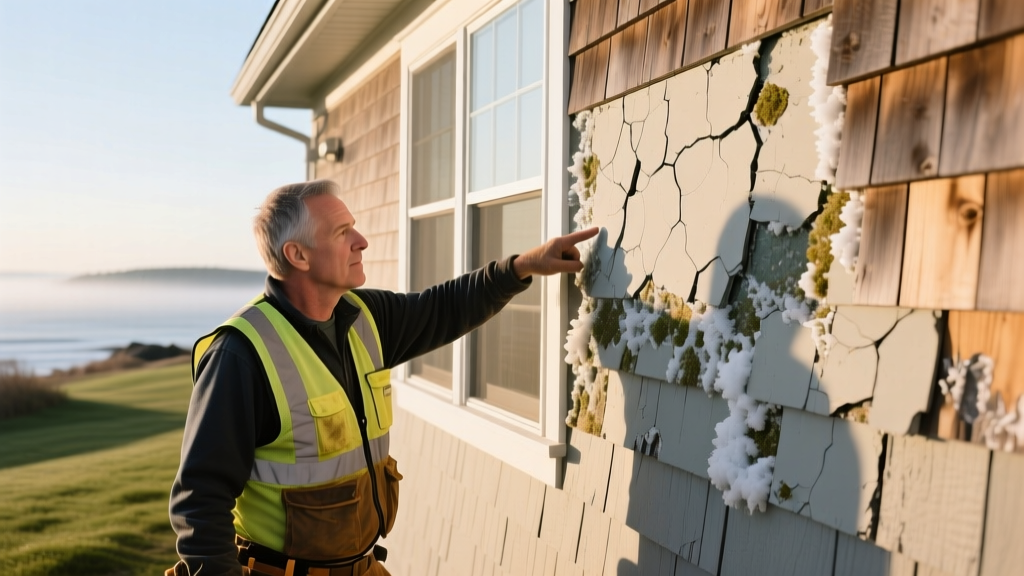
The most catastrophic failure of cement siding materials in Yarmouth is freeze-thaw spalling. Fiber cement absorbs moisture through unsealed edges. When temperatures drop below freezing, the trapped water expands by 9%, causing the laminated layers of the board to delaminate and the face to blow off.
Step-by-Step Spalling Repair
- Isolate the Damage: Do not attempt to patch delaminated fiber cement with wood filler or standard caulk. The structural integrity of the cellulose matrix is compromised. Measure 8 inches outward from the damaged area on both sides.
- Execute a Clean Cut: Use a diamond-tipped fiber cement shear or a circular saw with a polycrystalline diamond (PCD) blade to cut out the damaged section. Warning: Never use an abrasive masonry blade, as it creates respirable crystalline silica dust.
- Seal the End-Cuts: This is the most frequently skipped step. Coat all newly exposed factory edges with a high-quality, paintable polyurethane sealant like OSI QUAD Max or a dedicated fiber cement edge sealer. Allow 24 hours to cure.
- Install and Flash: Slide the replacement board (preferably a climate-specific product like James Hardie HZ10, engineered for high-moisture environments) into place. Maintain a strict 1/8-inch gap at the butt joint, and cover with a 4-inch wide, 0.019-inch thick aluminum flashing strip behind the joint.
Never use a pressure washer exceeding 1,500 PSI on fiber cement siding in coastal zones. High-pressure water forces moisture behind the weather-resistive barrier (WRB). If cleaning salt buildup, use a soft-bristle brush and a low-pressure garden hose.
Repair Protocol 2: Salt Aerosol Efflorescence and Paint Blistering
Coastal Yarmouth homes are constantly bombarded by salt aerosols. When salt penetrates the microscopic pores of the cement siding, it reacts with the calcium hydroxide in the Portland cement, creating calcium carbonate—a white, powdery substance known as efflorescence. This pushes the acrylic paint layer away from the substrate, causing blistering.
The Chemical Cleaning Solution
Standard power washing will not remove deep-seated efflorescence, and using muriatic acid (hydrochloric acid) is strictly prohibited, as it will aggressively eat away the cement binder and weaken the board.
- The Mix: Combine 1 part white distilled vinegar with 3 parts warm water. For severe coastal buildup, add 2 ounces of non-ionic surfactant per gallon.
- Application: Apply using a low-pressure pump sprayer. Allow the solution to dwell on the siding for 10 to 15 minutes. Do not let it dry on the surface.
- Agitation & Rinse: Scrub with a nylon-bristle brush, then rinse thoroughly from the top down.
- Repaint Specification: Once fully dry (minimum 48 hours of low humidity), prime with a masonry-specific, alkali-resistant primer such as Sherwin-Williams Loxon Concrete & Masonry Primer before applying a 100% acrylic exterior topcoat.
Repair Protocol 3: Nor'easter Wind-Load Fastener Back-Out
Yarmouth's exposure to North Atlantic Nor'easters means siding must withstand sustained winds of 70 mph and gusts exceeding 110 mph. Standard electro-galvanized smooth-shank nails frequently back out under this cyclic sheer stress, creating gaps where wind-driven rain infiltrates the wall cavity.
According to guidelines published by the FEMA Building Science division regarding coastal construction, fastener withdrawal resistance is paramount in high-wind zones. When troubleshooting backed-out fasteners, do not simply hammer them back in. The sheathing hole is already enlarged and compromised.
Remove the failed nail. Inject a drop of exterior-grade construction adhesive into the void. Drive a Simpson Strong-Tie #8 x 2-1/2-inch stainless steel ring-shank screw (or a hot-dipped galvanized equivalent) directly into the wall stud, not just the sheathing. The ring-shank design increases withdrawal resistance by up to 300% compared to smooth shanks.
2026 Material and Labor Cost Breakdown for Yarmouth Repairs
Budgeting for coastal repairs requires accounting for the premium on marine-grade materials and the specialized labor required for working in high-wind, high-moisture environments. Below are the current 2026 average costs for Yarmouth-area contractors.
| Repair Service | Material Cost (Per Linear/Sq Ft) | Labor Cost (Per Linear/Sq Ft) | Total Estimated Range |
|---|---|---|---|
| Single Board Replacement (HZ10 Grade) | $3.50 - $5.00 / lin. ft. | $8.00 - $12.00 / lin. ft. | $11.50 - $17.00 / lin. ft. |
| Efflorescence Chemical Treatment | $0.40 - $0.80 / sq. ft. | $2.50 - $4.00 / sq. ft. | $2.90 - $4.80 / sq. ft. |
| Fastener Upgrade (Stainless Steel) | $0.15 - $0.25 / fastener | $1.00 - $1.50 / fastener | $1.15 - $1.75 / fastener |
| Kick-Out Flashing Retrofit | $25.00 - $45.00 / unit | $150.00 - $250.00 / unit | $175.00 - $295.00 / unit |
Critical Flashing and Water Management Upgrades
Troubleshooting cement siding is incomplete without evaluating the water management system behind it. As noted by the Building Science Corporation, cladding is merely the first line of defense; the weather-resistive barrier (WRB) and flashing do the actual work of keeping a coastal home dry.
In Yarmouth, the most common hidden failure behind cement siding is the absence or failure of kick-out flashing where a roofline intersects a sidewall. Without a proper kick-out, thousands of gallons of roof runoff are directed directly behind the fiber cement planks, leading to catastrophic sheathing rot and mold, even if the siding itself looks intact from the exterior.
Retrofitting the Envelope
When replacing damaged siding near roof intersections, contractors must peel back the bottom three courses of cement siding to install a rigid, one-piece kick-out flashing (such as the DryFlekt system) that integrates with the house wrap and diverts water into the gutter. Furthermore, ensure a minimum 2-inch clearance is maintained between the bottom edge of the siding and any horizontal roof surface to prevent capillary wicking and snow-dam ice buildup.
Frequently Asked Troubleshooting Questions
Can I use standard wood caulk to seal gaps in my Yarmouth cement siding?
No. Standard acrylic latex caulks lack the elasticity required to handle the extreme thermal expansion and contraction of coastal New England and Nova Scotia. You must use a high-performance, polyurethane-based sealant (like OSI QUAD Max or Sikaflex) that remains flexible down to -40°F and can withstand UV degradation and salt spray without cracking.
Is it necessary to prime the back of fiber cement boards in coastal areas?
While factory-primed boards (like James Hardie's ColorPlus Technology) come with a sealed face and edges, back-priming is highly recommended for homes within 1,000 feet of the Yarmouth coastline. Applying an alkali-resistant masonry primer to the back of the board prevents alkaline burn from the cement reacting with moisture trapped behind the siding, extending the lifespan of the paint system by up to 40%.
How often should I inspect my cement siding for coastal damage?
Conduct a comprehensive visual inspection twice a year: once in late autumn (to prep for Nor'easter season) and once in early spring (to assess freeze-thaw damage). Pay special attention to the south and west-facing elevations, which endure the brunt of UV degradation and prevailing coastal winds. For more detailed envelope maintenance standards, refer to the Portland Cement Association's guidelines on fiber cement durability.
Written by
Sarah WhitfieldSarah Whitfield is a chartered quantity surveyor (MRICS) and construction cost analyst with 15 years of experience in material pricing, procurement strategy, and project budgeting. She earned her degree in Construction Management from the University of Reading (UK) and has worked on projects ranging from $2M custom homes to $180M mixed-use developments across North America and Europe. Sarah currently leads cost estimating for BuildMat Insight, maintaining a proprietary database of 4,000+ material price points updated quarterly. She is a frequent contributor to RSMeans cost data panels and has presented at the International Cost Engineering Council (ICEC) congress. Based in Denver, CO, Sarah is an avid trail runner and volunteer mentor for Women in Construction.
More from Sarah Whitfield
View all
Wood & Lumber
What Are the Different Types of Wood? A Builder's Guide
Compare structural softwoods, finish hardwoods, and engineered lumber. Analyze Janka ratings, MOE values, and 2026 pricing for construction.
Aug 4, 2026

Walls & Panels
Steel Framing vs Wood Framing: Corrosion and Moisture Defense
Compare steel framing vs wood framing for moisture resistance. Learn about galvanized coatings, condensation risks, and corrosion protection strategies.
Jul 21, 2026

Stone & Masonry
How to Cut Stone Veneer: Wet Saw vs Grinder Comparison
Compare the best tools for cutting stone veneer. We review wet saws, angle grinders, and chop saws to help you achieve clean, chip-free cuts.
Jul 21, 2026