Types of Concrete Mixes: Selection and Installation Guide
Learn how to select, prepare, and install various types of concrete mixes for foundations, slabs, and decorative projects with expert specs.

The Foundation of Success: Matching Mix to Application
Selecting the correct material is only the first step; proper installation dictates the ultimate structural integrity and lifespan of the pour. The National Ready Mixed Concrete Association (NRMCA) emphasizes that even a perfectly engineered mix design will fail if placement, consolidation, and curing protocols are ignored. Understanding the specific rheology, water-cement (w/c) ratio, and aggregate gradation of different types of concrete mixes allows installers to adapt their formwork, vibration techniques, and finishing schedules to prevent catastrophic failures like plastic shrinkage cracking, honeycombing, or delamination.
This guide provides a field-tested framework for preparing, placing, and finishing the most common structural and flatwork mixes used in modern construction.
Breakdown of Standard Types of Concrete Mixes
Before ordering from the batch plant, you must align the mix design with the structural requirements and environmental exposure of the project. The Portland Cement Association (PCA) outlines that mixture proportioning must balance workability with long-term durability. Below is a technical matrix of standard field mixes.
| Mix Classification | Target Compressive Strength | Max w/c Ratio | Target Slump | Air Entrainment | Primary Application |
|---|---|---|---|---|---|
| Standard Flatwork | 3,000 - 3,500 psi | 0.50 | 4.0 inches | 5.0% - 7.0% | Driveways, patios, sidewalks |
| Structural Footings | 3,000 - 4,000 psi | 0.45 | 5.0 - 6.0 inches | None (unless exposed) | Continuous footings, pad foundations |
| High-Strength Vertical | 5,000+ psi | 0.40 | 6.0 - 8.0 inches (with HRWR) | Varies | Columns, shear walls, elevated decks |
| Mass Concrete | 3,000 - 4,000 psi | 0.45 | 4.0 - 5.0 inches | Varies | Dams, thick mat foundations (thermal control) |
| Rapid-Setting Repair | 4,000 psi (at 3 hours) | 0.35 | Flowable | None | Highway patches, industrial floor repairs |
If your project is in a region experiencing freeze-thaw cycles, air-entraining admixtures are non-negotiable for exterior flatwork. The microscopic air bubbles (5-7% by volume) provide expansion chambers for freezing water, preventing surface scaling and spalling. Always verify the air content at the point of discharge using a pressure air meter.
Pre-Installation: Subgrade and Formwork Protocols
The most common cause of slab-on-grade failure is not the concrete itself, but the subgrade beneath it. A poorly compacted base leads to differential settlement and subsequent cracking.
Subgrade Preparation
- Compaction: The native soil or imported fill must be compacted to a minimum of 95% Standard Proctor density (ASTM D698).
- Base Material: Apply a 4 to 6-inch layer of compacted aggregate base course (ABC) or crushed stone. This provides a stable, well-draining working platform and prevents the subgrade from absorbing water from the fresh concrete mix.
- Vapor Retarders: For interior slabs or moisture-sensitive floor coverings, install a minimum 15-mil polyethylene vapor barrier (compliant with ASTM E1745) directly beneath the slab. Tape all seams with moisture-resistant tape.
Formwork and Reinforcement
Forms must be rigid enough to withstand the hydrostatic pressure of the wet mix without bowing. Use 2x6 or 2x8 dimensional lumber for standard 4-inch to 6-inch slabs. Secure stakes every 2 to 3 feet. For reinforcement, position Welded Wire Reinforcement (WWR) or rebar in the upper third of the slab thickness. Use concrete chairs or dobies to maintain precise cover; dragging WWR up during the pour is an unacceptable field practice that compromises structural capacity.
Step-by-Step Installation Techniques by Mix Type
1. Placing Structural and Footing Mixes
Structural mixes often feature lower slumps and larger coarse aggregates (up to 1.5 inches). When placing into deep forms or heavily reinforced columns, the mix is prone to segregation and honeycombing.
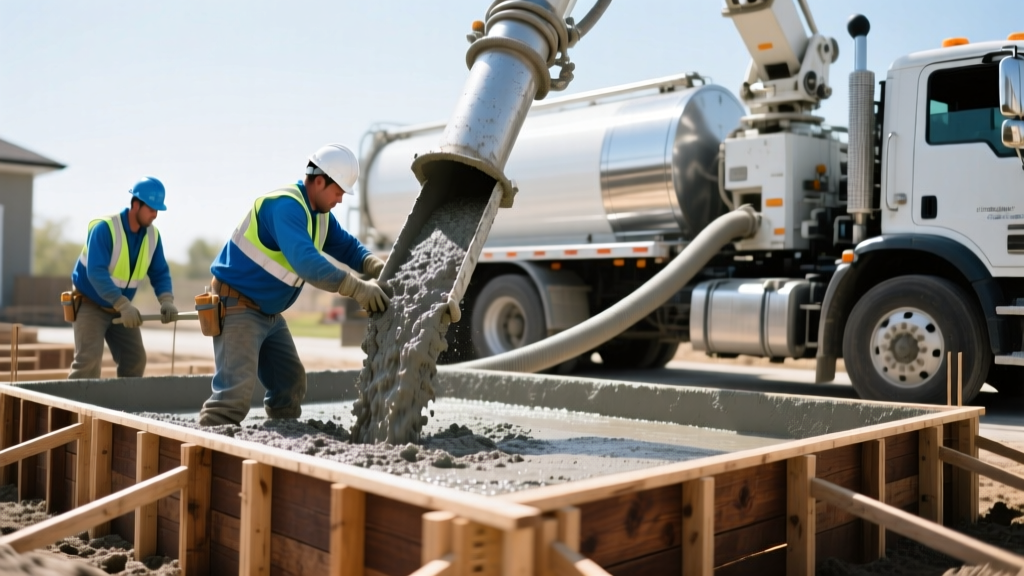
- Drop Height Limitation: Never drop concrete more than 4 to 5 feet vertically. Use elephant trunks, drop chutes, or conveyor belts to prevent aggregate segregation.
- Internal Vibration: Use a pencil vibrator (1 to 1.5 inches in diameter) to consolidate the mix. Insert the vibrator vertically every 12 to 18 inches. Penetrate the previous lift by 6 inches to eliminate cold joints. Warning: Over-vibration will cause heavy aggregates to sink and bleed water/cement paste to rise to the surface, severely weakening the top layer.
2. Placing and Finishing Standard Flatwork Mixes
Flatwork mixes (3,000 - 3,500 psi) require precise timing during the finishing sequence. The presence of bleed water dictates every subsequent step.
- Screeding: Use a straightedge or vibratory screed to strike off the concrete level with the top of the forms. Move the screed in a sawing motion while pulling it forward.
- Bullfloating: Immediately after screeding, use a bullfloat to push down large aggregate and embed it into the mortar matrix. This seals the surface and prepares it for finishing.
- Bleed Water Management: Wait for bleed water to evaporate completely before any further troweling. Working bleed water into the surface by troweling too early drastically increases the local w/c ratio, guaranteeing a weak, dusty surface that will scale and craze.
- Floating and Troweling: Use a hand float (magnesium or wood) to create a uniform, slightly textured surface. For a hard, dense finish, follow up with a steel trowel once the concrete can support a person's weight with only a 1/4-inch indentation.
Adding water to the truck chute to increase workability is a critical error. Every extra gallon of water per cubic yard reduces the compressive strength by approximately 200 psi and increases shrinkage cracking. If the mix is too stiff, request the batch plant to add a High-Range Water Reducer (HRWR / Superplasticizer) to increase slump without altering the w/c ratio.
Curing Protocols: The Most Neglected Installation Step
Curing is not simply "letting it dry." It is the active process of maintaining adequate moisture and temperature to allow the cement hydration reaction to continue. According to PCA Curing Guidelines, improperly cured concrete can lose up to 50% of its potential design strength and suffer from severe plastic shrinkage cracking.
- Wet Curing: The gold standard. Keep the surface continuously wet using burlap, cotton mats, or continuous sprinkling for a minimum of 7 days. This prevents moisture loss entirely.
- Membrane-Forming Compounds: Spray-applied liquid curing compounds (ASTM C309) form a microscopic film that traps moisture. Apply immediately after final finishing and the disappearance of bleed water. Ensure uniform coverage; missed spots will result in localized crazing.
- Temperature Control: If ambient temperatures are expected to drop below 40°F (4°C) within 24 hours of placement, insulate the concrete with thermal blankets to maintain an internal temperature above 50°F for at least 3 to 7 days, depending on the mix design.
Troubleshooting Common Installation Failures
Even experienced crews encounter anomalies. Use this diagnostic matrix to identify and mitigate field issues.
| Failure Symptom | Probable Cause | Corrective Action / Prevention |
|---|---|---|
| Plastic Shrinkage Cracking | Rapid surface evaporation due to high wind, low humidity, or hot sun before final set. | Apply evaporation retardants (monomolecular films) during finishing. Erect windbreaks. Begin curing immediately. |
| Honeycombing (Vertical Forms) | Insufficient vibration, overly stiff mix, or congested rebar blocking aggregate flow. | Use self-consolidating concrete (SCC) for dense rebar zones. Improve vibration technique. Patch with epoxy-bonded mortar. |
| Dusting / Scaling Surface | Troweling bleed water into the surface, or finishing before the concrete has bled out. | Strictly enforce bleed water evaporation wait times. Use dry-shake hardeners for industrial floors instead of over-troweling. |
| Cold Joints | Delay in truck arrival causing the previous lift to achieve initial set before the next lift is placed. | Coordinate dispatch timing. Use retarders in hot weather. If a joint forms, install a structural shear key or dowel system. |
Mastering the installation of various types of concrete mixes requires a synthesis of material science and disciplined field execution. By strictly adhering to subgrade prep, respecting the bleed water timeline, and enforcing rigorous curing protocols, contractors can ensure their structural and flatwork installations meet or exceed their engineered design life.
Written by
Priya KapoorPriya Kapoor is a real estate market analyst and construction economics researcher with expertise in housing affordability, development feasibility, and infrastructure investment. She holds a Master of Regional Planning from Cornell University and previously worked as a senior analyst at CBRE's Investment Properties group, where she modeled returns for $4B in mixed-use development pipelines. Priya now runs an independent research practice advising developers, municipalities, and REITs on construction cost forecasting and market timing. She publishes the quarterly "BuildMat Market Pulse" report tracking material price indices across 12 commodity categories. Based in Austin, TX, Priya serves on the board of Habitat for Humanity Austin and is a marathon runner.
More from Priya Kapoor
View all
Construction Cost
Cost to Build a 1600 Sq Ft Home in 2026: Full Breakdown
Accurate 2026 cost to build a 1600 sq ft home—material, labor, and regional pricing breakdowns included. Plan your budget with real-time estimates.
Aug 11, 2026

Wood & Lumber
Name the Types of Wood for Pressure Treatment and Preservation
Learn how to name the types of wood best suited for pressure treatment. Compare species treatability, chemical retention levels, and 2026 preservation costs.
Aug 4, 2026

Stone & Masonry
Stone Veneer Suppliers Lindenhurst: 2026 Cost Analysis
Analyze 2026 stone veneer costs in Lindenhurst, NY. Compare local supplier pricing, delivery fees, and Suffolk County installation labor rates.
Aug 4, 2026