Stamped Concrete Patio vs Pavers: The Ultimate Installation Guide
Compare the installation processes, site prep, and costs of a stamped concrete patio vs pavers. Expert guide to help you choose the right hardscape.
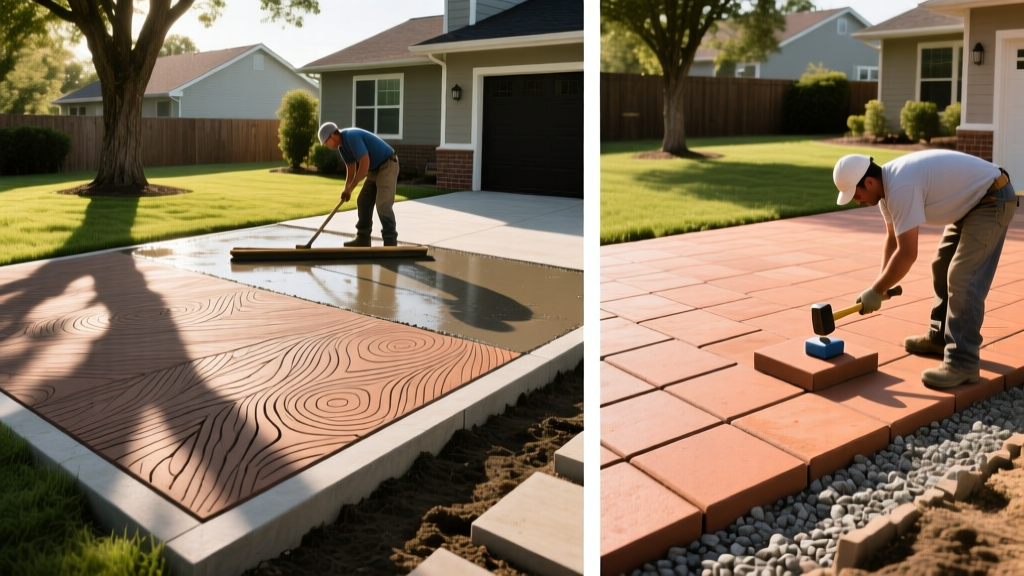
Subgrade and Base Preparation: The Shared Foundation
Whether you are pouring a stamped concrete patio or laying interlocking pavers, the installation's longevity is dictated entirely by the subgrade. Both systems require the removal of topsoil and the installation of a compacted aggregate base, but the tolerances and material specifications differ significantly.
Base Material and Compaction
For both systems, excavate to a depth of 9 to 11 inches to accommodate the base, bedding, and surface material. Use Class II road base (a mix of crushed rock and fines) rather than clean gravel. The fines are critical for locking the aggregate together during mechanical compaction.
- Stamped Concrete Base: Requires a 4 to 5-inch compacted base. Because the concrete slab acts as a monolithic structural element, the base primarily serves to prevent frost heave and provide a stable working platform. A 6-mil polyethylene vapor barrier is often laid over the base to prevent rapid moisture loss from the concrete into the soil during curing.
- Paver Base: Requires a minimum 6-inch compacted base (8 inches for driveways or poor-draining clay soils). According to the Interlocking Concrete Pavement Institute (ICPI) technical specifications, the base must be compacted in 2-inch lifts using a vibratory plate compactor with a minimum compaction force of 5,000 lbs. Geotextile fabric is mandatory beneath the base in clay soils to prevent the aggregate from migrating into the subgrade.
Stamped Concrete Installation Protocol
Stamped concrete is a time-sensitive, continuous-pour operation. Once the truck arrives, the installation window is dictated by ambient temperature, wind speed, and humidity.
Formwork and Reinforcement
Set forms to a precise 1/4-inch per foot slope for drainage. Reinforcement is non-negotiable to control structural cracking. Use #4 (1/2-inch) rebar tied on a 24-inch grid, elevated on 1.5-inch dobies (chairs) so it sits in the middle of the slab. Supplement with synthetic macro-fibers added at the batch plant to reduce plastic shrinkage cracking.
The Pour and Stamping Sequence
- Slump Management: Order a 4,000 PSI mix with a 4-inch to 4.5-inch slump. A slump higher than 5 inches will cause the stamping mats to sink, blurring the pattern and causing aggregate exposure.
- Color Application: Broadcast a dry-shake color hardener over the surface at a rate of 60 lbs per 100 square feet. Trowel it into the surface as it absorbs bleed water. This creates a dense, abrasion-resistant crust.
- Release Agent: Apply an antiquing release agent (powder or liquid) immediately before stamping. This prevents the polyurethane stamp mats from bonding to the concrete and adds secondary color variations.
- Stamping: Press the mats into the concrete when it can support a worker's weight with only a 1/4-inch indentation. Work in a staggered sequence, using a tamper to force the mats into the surface.
Detailing, Curing, and Sealing
After 24 hours, sawcut control joints to a depth of 1 inch (one-quarter of the slab thickness) to dictate where the concrete will crack. Wash off the excess release agent with a pressure washer after 3 to 5 days. The American Concrete Institute (ACI) mandates a 28-day moist cure before applying a solvent-based acrylic sealer, which enhances the color and provides UV protection.
Interlocking Paver Installation Protocol
Paver installation is a modular, dry-laid process. It is less dependent on weather windows and allows for phased installation, making it highly adaptable for complex site geometries.
Bedding and Laying
Do not use mason sand for the bedding layer; its fine particles retain water and lead to frost heave. Use 1 inch of coarse, washed concrete sand meeting ASTM C33 specifications. Screed the sand using 1-inch steel pipes and a straightedge to ensure a perfectly level bedding course. Never tamp the bedding sand before laying the pavers.
Cutting and Edge Restraint
Cut pavers using a 10-inch wet saw equipped with a continuous-rim diamond blade for clean, chip-free edges. Once the field is laid, install a rigid edge restraint (extruded aluminum or heavy-duty plastic). Secure the restraint with 10-inch steel spikes driven every 12 inches. Without this restraint, the pavers will laterally migrate and spread under load.
Jointing and Compaction
Sweep polymeric sand into the joints until they are completely filled. The Portland Cement Association and paver manufacturers emphasize that the paver surface must be 100% dry before applying polymeric sand to prevent haze. Activate the sand with a fine, misting spray of water. Finally, run a vibratory plate compactor over the entire surface with a urethane pad attached to lock the pavers into the bedding sand and settle the joint sand.
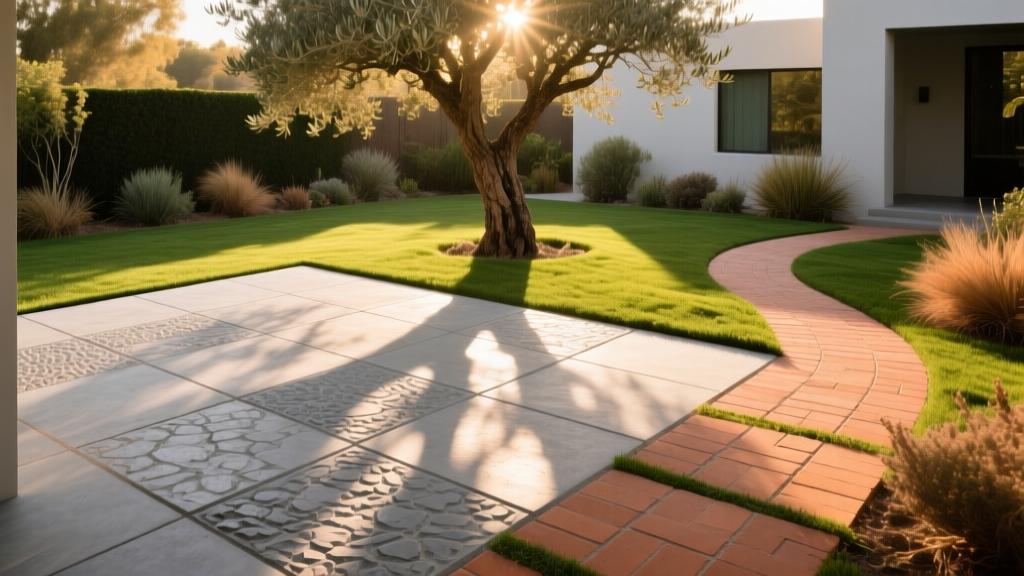
Installation Matrix: Time, Labor, and Variables
The following matrix contrasts the operational realities of both installations for a standard 400-square-foot patio.
| Variable | Stamped Concrete | Interlocking Pavers |
|---|---|---|
| Total Installation Time | 3 to 5 days (including cure time before sealing) | 4 to 7 days (continuous working days) |
| Crew Size Required | 4 to 6 professionals (pour day requires heavy manpower) | 2 to 3 professionals |
| Weather Sensitivity | Extreme (rain or high wind during pour ruins the slab) | Low (can cover base with tarps and resume next day) |
| DIY Feasibility | Near Zero (requires batch plant coordination and stamping expertise) | Moderate to High (physically demanding, but forgiving of minor errors) |
| Utility Access Post-Install | Destructive (must sawcut and patch slab to access underground lines) | Non-Destructive (unzip pavers, access line, replace sand and pavers) |
2026 Cost Breakdown & ROI
Material and labor costs have shifted significantly. The following table reflects average 2026 regional pricing for a professional installation of a 400-square-foot patio.
| Cost Category | Stamped Concrete (per sq. ft.) | Interlocking Pavers (per sq. ft.) |
|---|---|---|
| Materials (Base, Sand, Surface) | $4.50 - $6.00 | $8.00 - $14.00 |
| Labor & Equipment | $10.50 - $16.00 | $12.00 - $18.00 |
| Total Installed Cost | $15.00 - $22.00 | $20.00 - $32.00 |
While stamped concrete offers a lower upfront cost, pavers often yield a higher long-term ROI in regions with severe freeze-thaw cycles, as individual units can be replaced without the visual scarring of a concrete patch.
Critical Failure Modes & Mitigation
Understanding how these systems fail is the best way to ensure a successful installation.
Stamped Concrete Failures
- Delamination: Caused by overworking the surface or adding water during finishing, which traps a weak layer of cement paste beneath the color hardener. Mitigation: Strictly prohibit water addition during the finishing process.
- Efflorescence: White, powdery salt deposits on the surface. Caused by moisture migrating through the slab and evaporating. Mitigation: Install a high-quality vapor barrier beneath the slab and use a breathable acrylic sealer.
- Random Cracking: Occurs when control joints are cut too shallow or too late. Mitigation: Sawcut joints within 12 to 18 hours of the pour, exactly 1 inch deep.
Paver Failures
- Edge Creep and Spreading: Pavers separate over time, opening joints to weed growth. Caused by insufficient edge restraint spikes or using flexible plastic restraints on heavy-load perimeters. Mitigation: Use aluminum restraints on straight runs and drive spikes into the base, not just the bedding sand.
- Polymeric Sand Haze: A white, cloudy film that permanently ruins the paver surface. Caused by applying sand to damp pavers or over-watering during activation. Mitigation: Use a leaf blower to remove all surface dust before activation, and use a shower-nozzle for a gentle mist.
- Differential Settling: Caused by failing to compact the base in 2-inch lifts or using unwashed sand that retains water and washes out. Mitigation: Adhere strictly to ASTM C33 sand specs and 95% Proctor density for the base.
The Installer’s Decision Framework
Use this framework to finalize your hardscape selection based on site-specific variables:
- Your site has expansive, unbroken square footage (over 600 sq. ft.) where the monolithic look is desired.
- You are hiring a specialized decorative concrete crew and have a strict upfront budget.
- The patio design features sweeping, large-radius curves that would require excessive paver cutting and waste.
- The site is located in a climate with extreme freeze-thaw cycles and heavy clay soil.
- You anticipate needing future access to underground utilities (irrigation, gas lines, low-voltage lighting).
- You are managing a phased installation or want to integrate complex geometric borders and inlays without the cost of custom concrete stamping mats.
Both systems offer exceptional durability when installed to specification. The choice ultimately hinges on your tolerance for weather-dependent scheduling, your long-term maintenance preferences, and the specific load-bearing requirements of your site.
Written by
James ThorntonJames Thornton is a construction industry veteran with 25 years of hands-on experience in wood framing, lumber grading, and residential building codes. He started as a framing carpenter in rural Oregon, earned his ICC Residential Building Inspector certification, and eventually became a senior plan reviewer for the City of Portland Bureau of Development Services. James holds a B.S. in Wood Science & Technology from Oregon State University and is a certified lumber grader through the West Coast Lumber Inspection Bureau (WCLIB). He has inspected over 3,000 residential construction sites and authored the city's internal guide on advanced framing techniques (2x6 at 24" O.C.). James lives in Bend, OR, where he builds custom timber-frame cabins and competes in lumberjack sports.
More from James Thornton
View all
Insulation
Best Home Insulation Materials: Complete 2026 Guide
Compare top home insulation materials for 2026. Find R-values, installed costs per square foot, and best uses for fiberglass, spray foam, and mineral wool.
Aug 4, 2026

Sustainable Building
Certify Your Green Building Material for LEED and WELL
Step-by-step guide to certifying a green building material for LEED v5 and WELL v2. Master EPDs, HPDs, and VOC limits for 2026 project specifications.
Aug 4, 2026

Stone & Masonry
Veneer Stacked Stone Panels: Interior Design & Style Showcase
Discover how veneer stacked stone panels transform interiors. Explore modern design profiles, material pairings, and technical installation specs.
Aug 4, 2026