Concrete vs Brick Pavers: Troubleshooting and Repair Guide
Diagnose and fix patio damage with our concrete vs brick pavers troubleshooting guide. Compare repair costs, settling fixes, and joint sand solutions.

The Core Dilemma: Monolithic Slabs vs. Modular Units
When evaluating concrete vs brick pavers for exterior hardscaping, the decision is often driven by aesthetics or initial installation costs. However, from a maintenance perspective, the fundamental difference lies in their manufacturing standards and structural behavior. Concrete pavers are governed by ASTM C936, requiring a minimum compressive strength of 8,000 psi and water absorption of less than 5%. Clay brick pavers fall under ASTM C902, which mandates specific freeze-thaw durability ratings (Grade SX for severe weathering). Because both are modular, flexible systems laid over an aggregate base, they do not crack like poured concrete slabs. Instead, they fail through settling, joint degradation, and surface spalling. Understanding these distinct failure modes is critical for accurate troubleshooting and cost-effective repair.
Concrete Paver Troubleshooting: Surface and Structural Failures
Spalling and Surface Scaling
Concrete pavers are vibratory-pressed with a high cement-to-aggregate ratio. If the surface begins to flake, chip, or expose the underlying aggregate (spalling), the root cause is almost always freeze-thaw cycling combined with improper de-icing chemicals. Magnesium chloride and calcium chloride aggressively attack the calcium hydroxide in Portland cement, accelerating surface degradation.
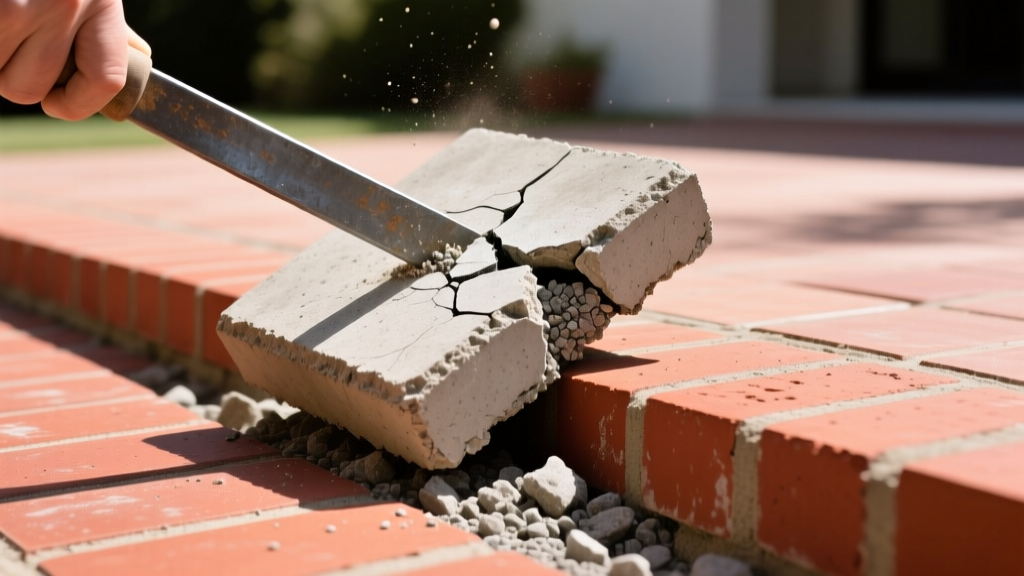
The Fix: You cannot patch a spalled concrete paver with surface-level epoxy or cementitious overlays; the patch will fail within one season due to flexible base movement. The only permanent repair is unit replacement. Use a specialized paver extractor tool (such as the PaveTech Scorpion) to grip the damaged unit and pull it vertically without disturbing the surrounding interlock. Replace it with a matching unit, ensuring the new paver meets the 8,000 psi ASTM C936 standard.
Polymeric Sand Hazing and Washout
Polymeric sand is the industry standard for locking concrete pavers, but improper activation leads to two major issues: hazing (a white polymer film stuck to the paver surface) and washout (sand failing to bind, allowing weed intrusion). Hazing occurs when the installer uses too much water during activation, floating the polymers to the surface.
The Fix: For hazing, apply a specialized polymer haze remover (e.g., Techniseal Haze Remover) and scrub with a stiff-bristle brush. For washout, you must vacuum out the failed joints to a depth of at least 1 inch, ensure the joints are bone-dry, re-apply the polymeric sand, and mist with a fine spray nozzle—never a heavy stream.
Never use rock salt (sodium chloride) or magnesium chloride on newly installed concrete pavers. The Interlocking Concrete Pavement Institute (ICPI) explicitly recommends avoiding chemical de-icers for the first winter. Use clean, sharp masonry sand for traction instead to protect the factory-applied sealers and the cementitious matrix.
Brick Paver Troubleshooting: Clay-Specific Defects
Grade MW Shattering in Freeze-Thaw Zones
A catastrophic failure unique to clay brick pavers is shattering or delamination during winter. This happens when contractors or homeowners mistakenly install Grade MW (Moderate Weathering) face bricks instead of Grade SX (Severe Weathering) paving bricks. Face bricks are designed for vertical, protected applications and possess higher porosity. When laid flat and saturated with water, they absorb moisture and shatter when it freezes.
The Fix: Inspect the broken bricks. If the unbroken bricks in the same batch show high porosity or lack the "SX" stamp, the entire patio is compromised. You must replace all Grade MW bricks with true ASTM C902 Grade SX clay pavers. There is no topical sealer that can adequately waterproof a substandard clay brick laid horizontally.
Efflorescence and Moisture Trapping
While concrete pavers experience temporary efflorescence (which usually washes away in 6-12 months), clay brick efflorescence can be persistent and structurally indicative. If white, powdery salt deposits continually reappear on clay bricks after cleaning, it indicates trapped moisture beneath the pavement system, often due to a failed base drainage layer or an impermeable jointing material trapping groundwater.
The Fix: First, saturate the brick surface with clean water. Then, apply a diluted solution of muriatic acid (1 part acid to 10 parts water) to dissolve the salts, scrubbing gently. Rinse thoroughly. To stop recurrence, ensure the patio base has a minimum 2% slope for positive drainage and consider switching to a permeable open-graded base system if water pooling is severe.
Head-to-Head Repair Matrix: Concrete vs Brick Pavers
| Failure Mode | Material Affected | Root Cause | Repair Method | Est. Cost (2026) |
|---|---|---|---|---|
| Surface Spalling | Concrete | Chemical de-icers / Freeze-thaw | Extract and replace unit | $4.50 - $8.00 / unit |
| Brick Shattering | Clay Brick | Incorrect Grade (MW vs SX) | Full section replacement | $2.50 - $5.00 / unit |
| Joint Washout | Both | Improper polymeric sand activation | Vacuum, re-sand, and mist | $45.00 / 40lb bag |
| Edge Creep / Spreading | Both | Plastic edge restraint failure | Install poured concrete curb | $12.00 - $18.00 / lin. ft. |
| Localized Settling | Both | Base washout or organic decay | Lift, re-screed base, reset | $85.00 - $120.00 / hr |
Step-by-Step Repair Protocols
Protocol A: Resetting a Sunken Paver Section (Both Materials)
Settling usually occurs near downspouts or heavy traffic zones where the crushed stone base (typically 4-6 inches of ASTM #57 stone) has washed out or compacted unevenly.
- Extract the Affected Units: Remove the sunken pavers and two additional courses of surrounding pavers to access the compromised base area.
- Excavate and Rebuild the Base: Remove the wet or failed bedding sand. If the underlying aggregate base is soft, excavate an additional 2 inches and refill with 3/4-inch crushed angular gravel. Compact using a 5,000 lbf plate compactor in 2-inch lifts.
- Screed the Bedding Layer: Apply a fresh 1-inch layer of coarse, washed concrete sand (ASTM C33). Use a screed board pulled across two PVC pipes to ensure a perfectly level surface. Do not tamp the bedding sand.
- Reset and Compact: Lay the pavers back in their original interlock pattern. Run a low-amplitude plate compactor over the surface with a urethane pad attached to prevent scratching the paver faces.
- Re-Joint: Sweep in new jointing sand and compact again to force the sand deep into the joints.
Protocol B: Fixing Edge Restraint Failure
Modular pavements rely entirely on edge restraints to maintain interlock. If you notice gaps widening between pavers (lateral creep), the edge restraint has failed. Cheap plastic spike-in restraints frequently pull out of the base over time.
- Remove the failing restraint: Pull out the plastic edging and the 10-inch landscaping spikes.
- Prep the trench: Dig a 6-inch wide by 6-inch deep trench along the perimeter.
- Pour a concrete collar: Mix 4,000 psi bagged concrete and pour it into the trench, troweling it flush with the bottom edge of the pavers. This creates a permanent, immovable barrier.
- Backfill: Once cured (48 hours), backfill the exterior side with topsoil or mulch to hide the concrete collar.
When to Replace Instead of Repair
Troubleshooting individual defects is cost-effective, but systemic failures require a full teardown. Apply this decision framework to determine if repair is viable:
- Base Contamination: If more than 20% of the patio is settling, the underlying geotextile fabric has likely failed, allowing clay subgrade to mix with the aggregate base. Spot repairs will result in a "whack-a-mole" scenario. Full excavation and base replacement are required.
- UV Degradation on Concrete: While concrete pavers are solid-color, cheaper pigmented units can fade unevenly. If replacing a single damaged paver results in a glaring color mismatch that cannot be blended with a color-enhancing sealer, consider replacing the entire field.
- Clay Brick Delamination: If Grade MW bricks are spalling, the structural integrity of the entire batch is compromised by frost. Replace the entire installation with Grade SX pavers immediately to prevent trip hazards.
Written by
Priya KapoorPriya Kapoor is a real estate market analyst and construction economics researcher with expertise in housing affordability, development feasibility, and infrastructure investment. She holds a Master of Regional Planning from Cornell University and previously worked as a senior analyst at CBRE's Investment Properties group, where she modeled returns for $4B in mixed-use development pipelines. Priya now runs an independent research practice advising developers, municipalities, and REITs on construction cost forecasting and market timing. She publishes the quarterly "BuildMat Market Pulse" report tracking material price indices across 12 commodity categories. Based in Austin, TX, Priya serves on the board of Habitat for Humanity Austin and is a marathon runner.
More from Priya Kapoor
View all
Construction Cost
Cost to Build a 1600 Sq Ft Home in 2026: Full Breakdown
Accurate 2026 cost to build a 1600 sq ft home—material, labor, and regional pricing breakdowns included. Plan your budget with real-time estimates.
Aug 11, 2026

Wood & Lumber
Name the Types of Wood for Pressure Treatment and Preservation
Learn how to name the types of wood best suited for pressure treatment. Compare species treatability, chemical retention levels, and 2026 preservation costs.
Aug 4, 2026

Stone & Masonry
Stone Veneer Suppliers Lindenhurst: 2026 Cost Analysis
Analyze 2026 stone veneer costs in Lindenhurst, NY. Compare local supplier pricing, delivery fees, and Suffolk County installation labor rates.
Aug 4, 2026