Thinset Mortar Application Guide: Mixing, Troweling, and Curing
Master thinset mortar application with exact mixing ratios, trowel size charts, and back-buttering techniques for large-format tile and stone.
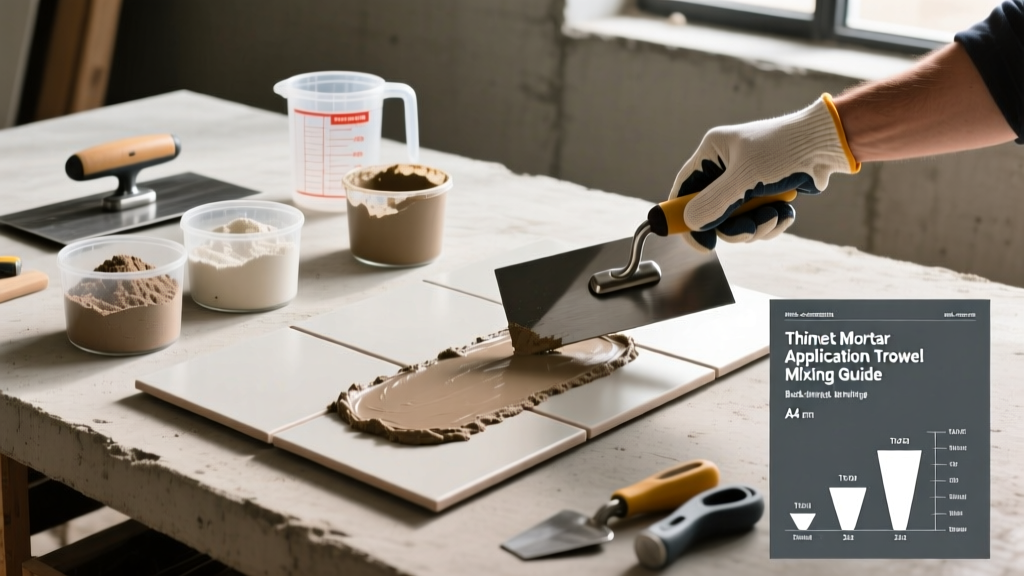
Selecting the Correct Thinset Mortar Formulation
Thinset mortar is a cementitious bond coat composed of Portland cement, fine sand, and water-retention agents, designed to adhere tile and stone to concrete or cementitious substrates. Selecting the correct formulation is the first critical step in preventing bond failure. The American National Standards Institute (ANSI) classifies thinset into distinct categories based on polymer modification and bond strength.
ANSI A118.1 (Unmodified)
Unmodified thinset relies solely on the hydration of Portland cement for its bond. It is typically reserved for interior, residential applications over concrete slabs where moisture vapor transmission is high, or when installing over certain uncoupling membranes that specifically require unmodified blends to allow for proper cement curing without trapping moisture.
ANSI A118.4 (Modified)
Modified thinset incorporates liquid or dry latex/acrylic polymers. These polymers enhance flexural strength, improve adhesion to dense substrates like porcelain, and increase freeze-thaw stability. For 90% of modern tile installations—especially porcelain, glass, and large-format tiles over concrete—an A118.4 modified thinset is the minimum requirement.
ANSI A118.15 (Improved Modified)
This is the premium tier of modified thinset, offering extended open times, higher shear strength, and superior non-sag properties. When installing heavy natural stone or large-format porcelain panels (LFT/LFTP) on vertical surfaces or overhead, A118.15 products like Mapei Ultraflex LFT or Laticrete 254 Platinum are mandatory to prevent tile slippage and ensure full coverage.
Substrate Preparation and Moisture Limits
Applying thinset mortar directly to an unprepared concrete slab is a primary cause of delamination. The concrete substrate must be structurally sound, free of laitance, curing compounds, sealers, and dust.
- Surface Profiling: The Tile Council of North America (TCNA) recommends a Concrete Surface Profile (CSP) of 2 to 3. Mechanical profiling via shotblasting or scarifying is required. Acid etching is widely deprecated by mortar manufacturers as it leaves residual salts that compromise the polymer bond.
- Moisture Vapor Emission Rate (MVER): Conduct a Calcium Chloride test (ASTM F1869). The MVER must not exceed 3 lbs per 1,000 square feet per 24 hours. Alternatively, an in-situ Relative Humidity (RH) test (ASTM F2170) must read below 75%.
- Crack Isolation: If the concrete slab exhibits active cracking, a liquid-applied or sheet crack isolation membrane must be applied before the thinset mortar to prevent reflective cracking through the tile assembly.
Precision Mixing Protocol
The chemical hydration of thinset mortar requires strict adherence to water ratios and mixing speeds. Improper mixing introduces air voids, weakening the shear strength of the cured bed.
- Water First: Always pour clean, potable water into a clean 5-gallon bucket before adding the dry powder. This prevents dry clumps from forming at the bottom of the bucket.
- Ratio: Follow the manufacturer's exact ratio, typically 5 to 6 quarts of water per 50 lb (22.7 kg) bag. Never add extra water to make the mix 'creamier'; excess water increases shrinkage and weakens the final bond.
- Low-Speed Mixing: Use a heavy-duty drill equipped with a mixing paddle, set to a low speed of 150 to 300 RPM. High speeds whip air into the mixture, creating microscopic voids that compromise structural integrity.
- The Slake Period: After the initial 3-minute mix, let the mortar rest (slake) for 5 to 10 minutes. This resting period allows the polymers and cement particles to fully hydrate. After slaking, remix for 1 to 2 minutes without adding any additional water.
Trowel Selection and Coverage Matrix
Achieving proper mortar coverage is non-negotiable. According to the National Tile Contractors Association (NTCA) and ANSI A108.5 standards, you must achieve a minimum of 80% coverage in dry areas and 95% coverage in wet areas or for natural stone installations. The trowel notch size dictates the thickness of the bond coat after the tile is embedded.
| Tile Dimensions | Recommended Trowel Notch | Back-Buttering Required? |
|---|---|---|
| Up to 8' x 8' | 1/4' x 1/4' x 1/4' Square Notch | No |
| 12' x 12' to 16' x 16' | 1/4' x 3/8' x 1/4' Square Notch | Recommended |
| 18' x 18' to 24' x 24' | 1/2' x 1/2' x 1/2' Square Notch | Yes (Mandatory) |
| 24' x 48' and Larger (LFT) | 3/4' x 3/4' x 3/4' Square or 1/2' U-Notch | Yes (Mandatory) |
Application Mechanics: Keying In and Directional Troweling
The physical technique used to spread thinset mortar directly impacts the transfer of the bond coat to the tile backing. Random swirl patterns trap air pockets, leading to hollow-sounding tiles and eventual cracking under point loads.
Step 1: Keying In
Using the flat side of the trowel, press a thin layer of thinset mortar directly into the substrate. This 'keying in' process forces the mortar into the microscopic pores and profile of the concrete, creating a mechanical lock. Apply only as much as you can cover with tile within the mortar's open time (typically 15 to 20 minutes at 70°F).
Step 2: Directional Combing
Immediately after keying in, use the notched side of the trowel to comb the mortar into straight, parallel ridges. Hold the trowel at a consistent 45-degree angle. Straight ridges allow air to escape easily when the tile is pressed into the bed, whereas circular patterns trap air in the valleys of the ridges.
Step 3: Back-Buttering Large-Format Tile
For any tile exceeding 18 inches on any side, or any natural stone, back-buttering is mandatory. Use the flat side of the trowel to scrape a thin, 1/16-inch layer of thinset onto the back of the tile. This fills the microscopic voids in the tile backing and ensures 95%+ coverage when the tile is embedded into the substrate ridges.
Step 4: Embedding and Collapsing the Ridges
Place the tile into the combed mortar and move it back and forth across the ridges (perpendicular to the trowel lines) by about 1/4 inch. This motion collapses the ridges, eliminates air voids, and ensures maximum physical contact between the mortar and the tile.
Curing Times and Environmental Controls
Thinset mortar cures through a chemical hydration process that is highly sensitive to ambient temperature and humidity. The ideal application temperature is 70°F (21°C).
- Cold Weather Limits: Never apply thinset when the ambient or substrate temperature is below 50°F (10°C). Cold temperatures drastically slow hydration, extending cure times from 24 hours to several days and risking freeze-thaw damage if the water in the mix freezes before curing.
- Hot/Dry Conditions: In temperatures above 90°F (32°C) or in environments with high airflow, the open time of the mortar is severely reduced. The surface of the combed ridges will 'skin over' in minutes, preventing a proper bond. Use an A118.15 extended-open-time formulation in these conditions.
- Foot Traffic: Standard modified thinsets require a minimum of 24 hours before light foot traffic is permitted. Heavy loads, rolling traffic, or exposure to standing water require a full 7 to 14 days of cure time, depending on the specific product data sheet.
By strictly adhering to substrate profiling limits, precise mixing protocols, and directional troweling techniques, installers can eliminate the most common causes of tile failure and ensure a permanent, high-strength bond over concrete substrates.